Hi Marijn,
I'm catching up again. Super work you're doing on all that rigging! Hat in hand...
HMS Victory and Le Redoutable at Trafalgar (1/300)
Moderators: BB62vet, MartinJQuinn, JIM BAUMANN, Jon, Dan K
-
Maarten Sch�nfeld

- Posts: 1835
- Joined: Fri Dec 12, 2008 12:44 pm
- Location: Herk-de-Stad, Belgium
Re: HMS Victory and Le Redoutable at Trafalgar (1/300)
"I've heard there's a wicked war a-blazing, and the taste of war I know so very well
Even now I see the foreign flag a-raising, their guns on fire as we sail into hell"
Roger Whittaker +9/13/2023
Even now I see the foreign flag a-raising, their guns on fire as we sail into hell"
Roger Whittaker +9/13/2023
-
Neptune

- Posts: 2453
- Joined: Sun Mar 13, 2005 11:51 am
- Location: Belgium
Re: HMS Victory and Le Redoutable at Trafalgar (1/300)
I believe it should be displayed in a museum (in Belgium of course!), centered in its own room, surrounded by magnified pictures of some details, accompanied by some historical background about those details.
I'm fairly sure people would come to see it after a little publicity.
But then I do think I'm biassed.
I'm fairly sure people would come to see it after a little publicity.
But then I do think I'm biassed.
The merchant shipyard
-
Maarten Sch�nfeld
- Posts: 1835
- Joined: Fri Dec 12, 2008 12:44 pm
- Location: Herk-de-Stad, Belgium
Re: HMS Victory and Le Redoutable at Trafalgar (1/300)
Sounds like a very good idea! Maybe a good museum to consider would be the Museum at Waterloo. https://www.waterloo1815.be/Neptune wrote: Wed Dec 24, 2025 8:07 am I believe it should be displayed in a museum (in Belgium of course!), centered in its own room, surrounded by magnified pictures of some details, accompanied by some historical background about those details.
I'm fairly sure people would come to see it after a little publicity.
But then I do think I'm biassed.
I think it will get a good exposure there: many international visitors. Of course it is centred around the end of Napoleon's reign, but there was also a beginning to that!
So it opens a door to tell the story of the beginning of the (slow) decline of Napoleon, which undoubtedly started at Trafalgar. (but some sharp observers could already sense the direction at the Battle of the Nile at Aboukir... that was 1798! Napoleon was a marvellous general, bust maritime warfare was clearly not his 'thing'.)
"I've heard there's a wicked war a-blazing, and the taste of war I know so very well
Even now I see the foreign flag a-raising, their guns on fire as we sail into hell"
Roger Whittaker +9/13/2023
Even now I see the foreign flag a-raising, their guns on fire as we sail into hell"
Roger Whittaker +9/13/2023
-
Maarten Sch�nfeld
- Posts: 1835
- Joined: Fri Dec 12, 2008 12:44 pm
- Location: Herk-de-Stad, Belgium
Re: HMS Victory and Le Redoutable at Trafalgar (1/300)
EJ,
The best part of your message is that you apparently are recovering from your surgery! Welcome back!
"I've heard there's a wicked war a-blazing, and the taste of war I know so very well
Even now I see the foreign flag a-raising, their guns on fire as we sail into hell"
Roger Whittaker +9/13/2023
Even now I see the foreign flag a-raising, their guns on fire as we sail into hell"
Roger Whittaker +9/13/2023
-
zs180

- Posts: 658
- Joined: Sun Oct 12, 2008 3:55 am
- Location: Budapest, Hungary
Re: HMS Victory and Le Redoutable at Trafalgar (1/300)
Please, please, bring this masterpece to the Mosonshow in April!
I would die to see it in flesh!
I would die to see it in flesh!
-
marijn van gils
- Posts: 2686
- Joined: Tue Feb 06, 2007 10:24 am
- Location: Belgium
Re: HMS Victory and Le Redoutable at Trafalgar (1/300)
Welcome back EJ! Great to have you back! 

I hope to see you in the flesh some time soon too.
Neptune and Maarten, thank you for the very flattering idea!
But first I think should finish the diorama...
The (relatively new) Waterloo museum is really nice indeed. I visited it last year and was really surprised by it!
George, I would love to return to Moson, if only to see you again; I have been away for too long!
I will see if I can convince some friend(s) to make the trip this year.
-
marijn van gils
- Posts: 2686
- Joined: Tue Feb 06, 2007 10:24 am
- Location: Belgium
Re: HMS Victory and Le Redoutable at Trafalgar (1/300)
Hello everyone,
There was still one ‘loose end’ to the shrouds: the chains connecting them from the channels to the hull.
For a long time, I thought the only way to construct this in a manageable way, was with PE. So, I decided I would have to draw my own custom PE and have it etched. That would be a great skill to acquire too, as I have never done this.
But the closer this step came, the less I felt like getting behind the computer for it.
So, I figured out a way to scratchbuild the chains with traditional materials. And it turned out to be much easier than I had imagined! And faster too!
But it still took quite some time, as there are 76 of them (56 for shrouds, and 20 for backstays). And I also needed to build the 30 supports for the channels too…
The order of operations:
The starboard main channel, without supports or chains:

First, the supports were added.
I couldn’t find enough PE strip of the correct width in my stash (I guess it’s smaller than Jims’! ), so I cut thin strips from sheet brass. The bolt heads are punched from plastic sheet with a grainer tool. They are about 0,15 mm diameter.
I had forgotten the main backstay stool earlier, so this was added too (white plastic sheet).

Next, I constructed the chains from 0,1 mm nikkel-silver wire (stiffer than copper wire, but more bendable than Shelf Oddity rigging wire):

A: Three ‘links’ were shaped. But only the middle link is actually fully formed; the two others being merely wire with a single bend.
B: These were superglued together to form one rigid assembly. The upper ‘link’ is kept long to serve as a handle. This side view shows that I glued the upper ‘link’ at an angle, but not the others.
C: The excess wire was cut away. (this is the front view)
The channel supports were base-coated, and the backstay chains glued in place. Where they connect to the hull, I added a 0,3 mm punched plastic disc (that simulates the lower loop of the lower link), with a 0,15 mm plastic ‘bolt’ on top.
I started with the backstay chains because they are shorter and thus set further back.

Those, and the channel supports, were now fully painted, and the (longer) shroud chains glued in place:

Finally, the lowest link of the main and fore shroud chains was simulated with two pieces of copper wire, in between two 0,3 + 0.15 mm plastic discs.
The chains were superglued in place, but those lower ‘links’ and plastic discs were glued with matt varnish.

And these were painted and weathered too:

Starboard fore channels and chains:

And the starboard mizzen channels and chains:

And of course, it looks nicer at an angle (port main channels and chains):

And even better when not zoomed in so horribly close (but still very enlarged!):


To make this kind of work easier, I expanded the protective side-panels again. I added two new panels that I can screw on or off, separate from the lower panels.


This allows me to lay the model down safely on its side. For working on the mast (like the futtock shrouds), I can add only the lower panel to the side I’m working on, so I can rest my hand on it while the hull is protected.

It’s not as professional as Joelle’s workbase, but it does the job!
There was still one ‘loose end’ to the shrouds: the chains connecting them from the channels to the hull.
For a long time, I thought the only way to construct this in a manageable way, was with PE. So, I decided I would have to draw my own custom PE and have it etched. That would be a great skill to acquire too, as I have never done this.
But the closer this step came, the less I felt like getting behind the computer for it.
So, I figured out a way to scratchbuild the chains with traditional materials. And it turned out to be much easier than I had imagined! And faster too!
But it still took quite some time, as there are 76 of them (56 for shrouds, and 20 for backstays). And I also needed to build the 30 supports for the channels too…
The order of operations:
The starboard main channel, without supports or chains:
First, the supports were added.
I couldn’t find enough PE strip of the correct width in my stash (I guess it’s smaller than Jims’! ), so I cut thin strips from sheet brass. The bolt heads are punched from plastic sheet with a grainer tool. They are about 0,15 mm diameter.
I had forgotten the main backstay stool earlier, so this was added too (white plastic sheet).
Next, I constructed the chains from 0,1 mm nikkel-silver wire (stiffer than copper wire, but more bendable than Shelf Oddity rigging wire):
A: Three ‘links’ were shaped. But only the middle link is actually fully formed; the two others being merely wire with a single bend.
B: These were superglued together to form one rigid assembly. The upper ‘link’ is kept long to serve as a handle. This side view shows that I glued the upper ‘link’ at an angle, but not the others.
C: The excess wire was cut away. (this is the front view)
The channel supports were base-coated, and the backstay chains glued in place. Where they connect to the hull, I added a 0,3 mm punched plastic disc (that simulates the lower loop of the lower link), with a 0,15 mm plastic ‘bolt’ on top.
I started with the backstay chains because they are shorter and thus set further back.
Those, and the channel supports, were now fully painted, and the (longer) shroud chains glued in place:
Finally, the lowest link of the main and fore shroud chains was simulated with two pieces of copper wire, in between two 0,3 + 0.15 mm plastic discs.
The chains were superglued in place, but those lower ‘links’ and plastic discs were glued with matt varnish.
And these were painted and weathered too:
Starboard fore channels and chains:
And the starboard mizzen channels and chains:
And of course, it looks nicer at an angle (port main channels and chains):
And even better when not zoomed in so horribly close (but still very enlarged!):
To make this kind of work easier, I expanded the protective side-panels again. I added two new panels that I can screw on or off, separate from the lower panels.
This allows me to lay the model down safely on its side. For working on the mast (like the futtock shrouds), I can add only the lower panel to the side I’m working on, so I can rest my hand on it while the hull is protected.
It’s not as professional as Joelle’s workbase, but it does the job!

-
Joelle

- Posts: 195
- Joined: Fri Aug 12, 2022 8:50 am
- Location: Herdecke
- Contact:
Re: HMS Victory and Le Redoutable at Trafalgar (1/300)
As always, it's impressive what you build at this scale. It looks so great and lifelike. 
Your assembly aid is also quite something. A real help, isn't it!?
Your assembly aid is also quite something. A real help, isn't it!?
Greetings from Germany, Joelle.
Follow me on Instagram:

Follow me on Instagram:
-
wefalck

- Posts: 2079
- Joined: Wed Sep 28, 2011 12:04 pm
- Location: Paris
- Contact:
Re: HMS Victory and Le Redoutable at Trafalgar (1/300)
I am quite running out of superlatives for compliments
I gather there is no pull on the deadeyes, right? Otherwise, how did you anchor them on the shelves?
Making the chains from wire is a better option than PE, as the original would have not been flat, but forged iron bars.
I gather there is no pull on the deadeyes, right? Otherwise, how did you anchor them on the shelves?
Making the chains from wire is a better option than PE, as the original would have not been flat, but forged iron bars.
Eberhard
Former chairman Arbeitskreis historischer Schiffbau e.V. (German Association for Shipbuilding History)
--------------------------------------------------------------------------------------------------------------------------------------------------------------------------------------------


Former chairman Arbeitskreis historischer Schiffbau e.V. (German Association for Shipbuilding History)
--------------------------------------------------------------------------------------------------------------------------------------------------------------------------------------------
-
MartinJQuinn

- Posts: 8512
- Joined: Tue Jan 11, 2005 1:40 pm
- Location: New Jersey
Re: HMS Victory and Le Redoutable at Trafalgar (1/300)
Agreed. This build continues to amaze me.
Martin
"Tomorrow is the most important thing in life. Comes into us at midnight very clean. It's perfect when it arrives and it puts itself in our hands. It hopes we've learned something from yesterday." John Wayne
Ship Model Gallery
"Tomorrow is the most important thing in life. Comes into us at midnight very clean. It's perfect when it arrives and it puts itself in our hands. It hopes we've learned something from yesterday." John Wayne
Ship Model Gallery
-
Dan K
- Posts: 9037
- Joined: Tue Jan 11, 2005 10:56 am
- Location: New York City
Re: HMS Victory and Le Redoutable at Trafalgar (1/300)
What they said. 
-
SG1
- Posts: 400
- Joined: Mon Apr 17, 2017 2:43 am
- Contact:
Re: HMS Victory and Le Redoutable at Trafalgar (1/300)
What they said plus: 0.15 mm plastic bolts?? by grainer tool action? This is very inspirational  Love the damaged chains too
-
marijn van gils
- Posts: 2686
- Joined: Tue Feb 06, 2007 10:24 am
- Location: Belgium
Re: HMS Victory and Le Redoutable at Trafalgar (1/300)
Thank you very much everyone!
The nice thing is that you can expand on it while you go. A mast is added and needs protection? Just glue another piece to the work base! Does that piece need to be removable for later access? Then use screws instead of glue...
Also, it may have been hard to get them etched properly at 0,1mm thickness.
And in the end, I think it was way faster to construct them this way than it would have been for a newbie like me to make digital drawings for them and send them out to be etched. And certainly much cheaper too! And most importantly: more fun (at least for me)...
There is indeed no tension on the deadeyes, or not much at least.
The wires protruding from the bottom of the deadeyes were inserted in holes in the channels (that I drilled a long time ago when constructing the channels).
On Redoutable, but I did it exactly the same on Victory:

Just in case there would be some stresses involved, I strengthened the channels with a layer of brass sheet on the bottom:

BTW, these holes were used to determine the position of the deadeyes/shrouds on the paper template for the shroud/ratline jig, like here on the lower top:

After poking the wires through these holes and gluing them firmly in place, I clipped the excess lengths at the bottom of the channels off. Small stubs were left, against which I glued the chains.
The bitts have a round hollow tip, each with a different diameter. You insert the bitt of your choice in the handle (in the centre, between the bitts), and press the bitt through a thin piece of plastic sheet to get the 'bolts', while the plastic sheet is held on a piece of firm rubber.
I used the second smallest diameter for the (about?) 0,15 mm bolts.
It certainly is! I learned it from the books of Philip Reed.Joelle wrote: Fri Jan 02, 2026 7:11 amYour assembly aid is also quite something. A real help, isn't it!?
The nice thing is that you can expand on it while you go. A mast is added and needs protection? Just glue another piece to the work base! Does that piece need to be removable for later access? Then use screws instead of glue...
That is certainly true! With the naked eye, it would be hard to see the difference at a thickness of only 0,1 mm, but it would show in enlarged photos like the above.wefalck wrote: Fri Jan 02, 2026 7:36 amMaking the chains from wire is a better option than PE, as the original would have not been flat, but forged iron bars.
Also, it may have been hard to get them etched properly at 0,1mm thickness.
And in the end, I think it was way faster to construct them this way than it would have been for a newbie like me to make digital drawings for them and send them out to be etched. And certainly much cheaper too! And most importantly: more fun (at least for me)...
Good question!wefalck wrote: Fri Jan 02, 2026 7:36 amI gather there is no pull on the deadeyes, right? Otherwise, how did you anchor them on the shelves?
There is indeed no tension on the deadeyes, or not much at least.
The wires protruding from the bottom of the deadeyes were inserted in holes in the channels (that I drilled a long time ago when constructing the channels).
On Redoutable, but I did it exactly the same on Victory:
Just in case there would be some stresses involved, I strengthened the channels with a layer of brass sheet on the bottom:
BTW, these holes were used to determine the position of the deadeyes/shrouds on the paper template for the shroud/ratline jig, like here on the lower top:
After poking the wires through these holes and gluing them firmly in place, I clipped the excess lengths at the bottom of the channels off. Small stubs were left, against which I glued the chains.
Thank you! These were really fun to do. I let the battle damage that I already added to the hull guide me: if I had put a hole on the spot were the chains would be attached, that chain had to be damaged...
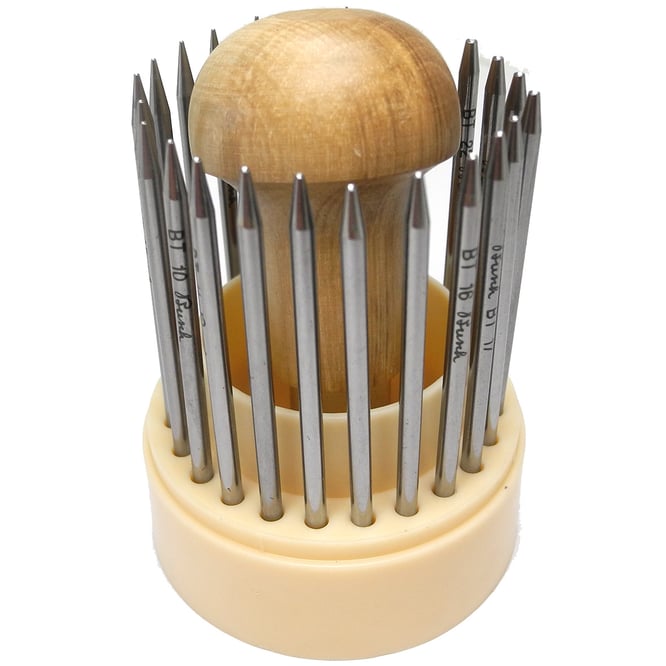
Probably you already know this, but this is a grainer tool:SG1 wrote: Sat Jan 03, 2026 3:35 am0.15 mm plastic bolts?? by grainer tool action? This is very inspirational :cool_2
The bitts have a round hollow tip, each with a different diameter. You insert the bitt of your choice in the handle (in the centre, between the bitts), and press the bitt through a thin piece of plastic sheet to get the 'bolts', while the plastic sheet is held on a piece of firm rubber.
I used the second smallest diameter for the (about?) 0,15 mm bolts.
-
wefalck
- Posts: 2079
- Joined: Wed Sep 28, 2011 12:04 pm
- Location: Paris
- Contact:
Re: HMS Victory and Le Redoutable at Trafalgar (1/300)
Actually, I have never thought of using a graining tool as punch
Eberhard
Former chairman Arbeitskreis historischer Schiffbau e.V. (German Association for Shipbuilding History)
--------------------------------------------------------------------------------------------------------------------------------------------------------------------------------------------
Former chairman Arbeitskreis historischer Schiffbau e.V. (German Association for Shipbuilding History)
--------------------------------------------------------------------------------------------------------------------------------------------------------------------------------------------
-
marijn van gils
- Posts: 2686
- Joined: Tue Feb 06, 2007 10:24 am
- Location: Belgium
Re: HMS Victory and Le Redoutable at Trafalgar (1/300)
I learned it from this AFV-modelling book by Tony Greenland:wefalck wrote: Sat Jan 03, 2026 5:31 amActually, I have never thought of using a graining tool as punch :thumbs_up_1
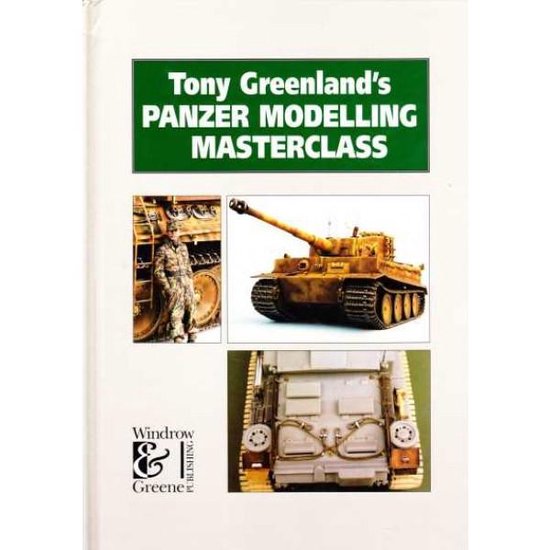
It was one of the best known books on the subject in the mid 90-ies. He used it on pewter sheet to make 1/35 scale rivets, but it works great on (thin!) plastic sheet too.
It pays to have a wide modelling-interest!
-
wefalck
- Posts: 2079
- Joined: Wed Sep 28, 2011 12:04 pm
- Location: Paris
- Contact:
Re: HMS Victory and Le Redoutable at Trafalgar (1/300)
"It pays to have a wide modelling-interest! " - indeed, I am still drawing on my early experience in armour-modelling and figure-painting in the early to later 1970s.
Eberhard
Former chairman Arbeitskreis historischer Schiffbau e.V. (German Association for Shipbuilding History)
--------------------------------------------------------------------------------------------------------------------------------------------------------------------------------------------
Former chairman Arbeitskreis historischer Schiffbau e.V. (German Association for Shipbuilding History)
--------------------------------------------------------------------------------------------------------------------------------------------------------------------------------------------
-
ModelMonkey
- Model Monkey

- Posts: 4096
- Joined: Sat Aug 20, 2005 9:27 pm
- Location: USA
- Contact:
Re: HMS Victory and Le Redoutable at Trafalgar (1/300)
Not only is the modeling amazing, the photography is spectacular.
Have fun, Monkey around. TM
-Steve L.
Complete catalog: - https://www.model-monkey.com/
Follow Model Monkey™ on Facebook: - https://www.facebook.com/modelmonkeybookandhobby
-Steve L.
Complete catalog: - https://www.model-monkey.com/
Follow Model Monkey™ on Facebook: - https://www.facebook.com/modelmonkeybookandhobby
-
marijn van gils
- Posts: 2686
- Joined: Tue Feb 06, 2007 10:24 am
- Location: Belgium
Re: HMS Victory and Le Redoutable at Trafalgar (1/300)
And besides for adding crew figures to your models, I'm sure it still helps in many other ways too!wefalck wrote: Sat Jan 03, 2026 2:07 pm"It pays to have a wide modelling-interest!
Thank you very much!ModelMonkey wrote: Sun Jan 04, 2026 8:09 amNot only is the modeling amazing, the photography is spectacular.
For ship models, I found focus stacking helps really a lot. I use Helicon Focus (which I found very user-friendly!), and I learned it from this article by the amazing John Leyland, who sadly passed away last year: http://www.modelwarships.com/features/h ... /tips.html
Of course, this does require a DSLR-camera and tripod setup, and a couple of half-decent lights. But the learning curve for that is luckily not too steep.
-
EJFoeth
- Posts: 2907
- Joined: Wed Jan 21, 2009 1:51 pm
Re: HMS Victory and Le Redoutable at Trafalgar (1/300)
Oh wait, I actually bought one a year ago but didn't spend enough time with it... I was looking for a punch & die set smaller than 0.5mm that I used to have but rusted away completely. And indeed that greenland book is greatmarijn van gils wrote: Sat Jan 03, 2026 4:53 am Probably you already know this, but this is a grainer tool:
-
wefalck
- Posts: 2079
- Joined: Wed Sep 28, 2011 12:04 pm
- Location: Paris
- Contact:
Re: HMS Victory and Le Redoutable at Trafalgar (1/300)
Got a good offer for a beading/graining set and it should arrive here by the end of the month. I soon will have to make various bolt-heads of different sizes ...
Eberhard
Former chairman Arbeitskreis historischer Schiffbau e.V. (German Association for Shipbuilding History)
--------------------------------------------------------------------------------------------------------------------------------------------------------------------------------------------
Former chairman Arbeitskreis historischer Schiffbau e.V. (German Association for Shipbuilding History)
--------------------------------------------------------------------------------------------------------------------------------------------------------------------------------------------