My U-69

Moderators: BB62vet, MartinJQuinn, JIM BAUMANN, Jon, Dan K

User avatar
TRM
Posts: 63
Joined: Tue Nov 10, 2009 12:33 pm

Re: My U-69

Post by TRM »

HAPPY DAYS!!!!!! I got back to my desk this afternoon at work, and voila...a package from Modelworks. I have to say that shipping it between two pieces of 3/16" Luan Plywood is ingenious.

Basic review so far:

Good points:

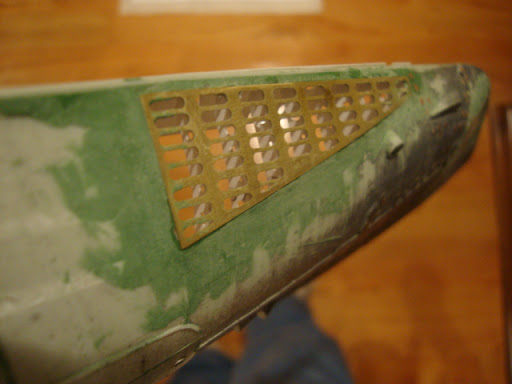
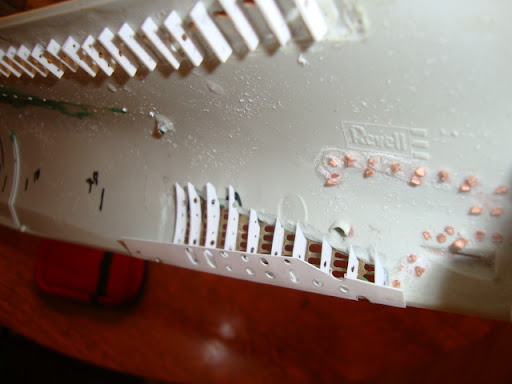
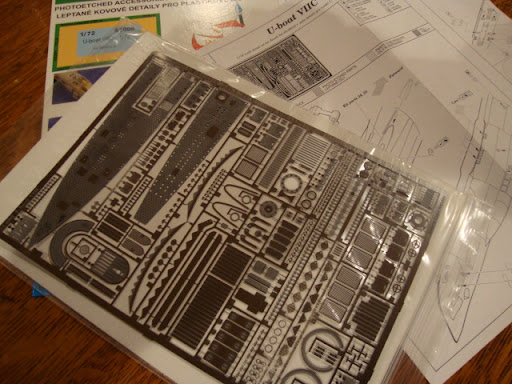
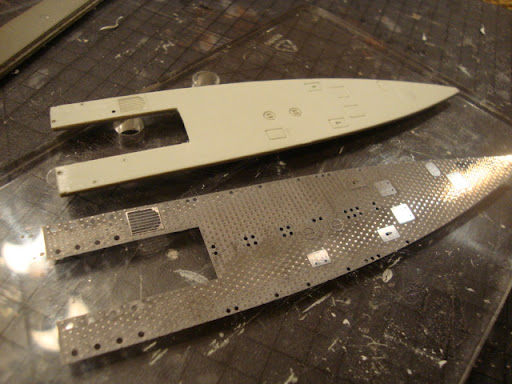
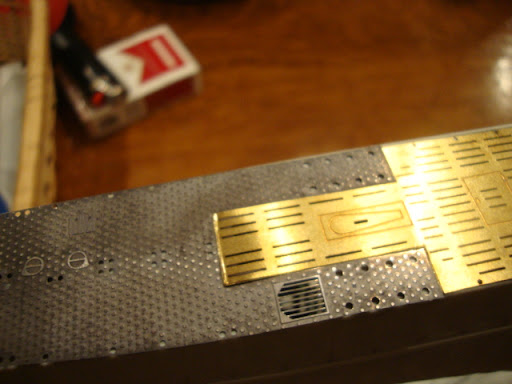
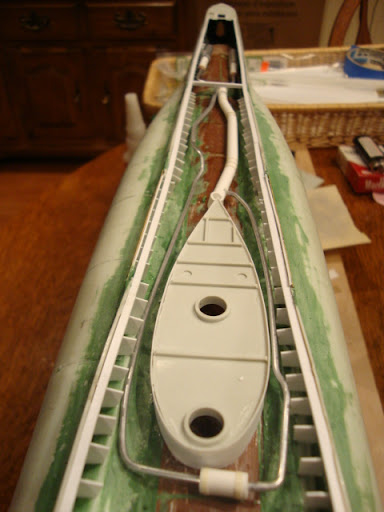
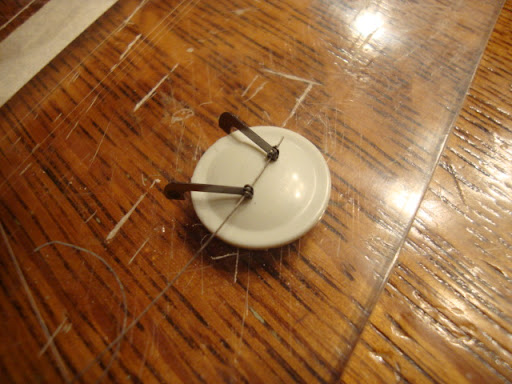
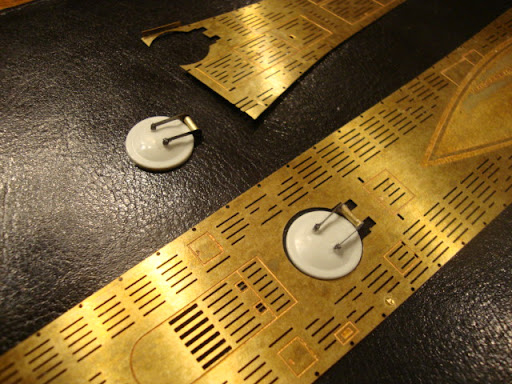
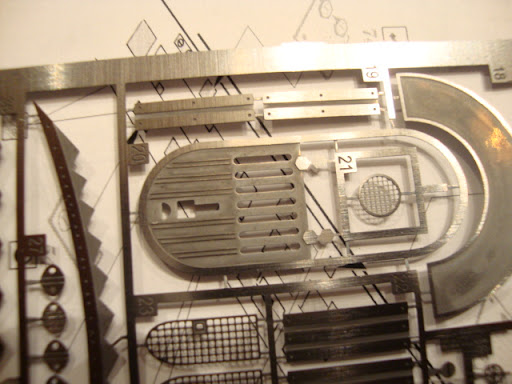
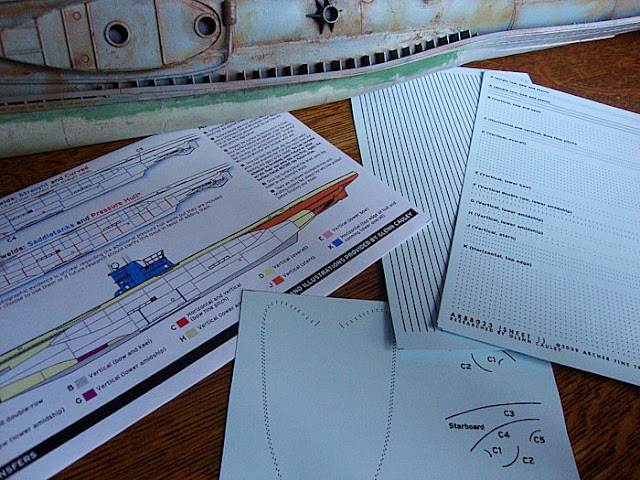
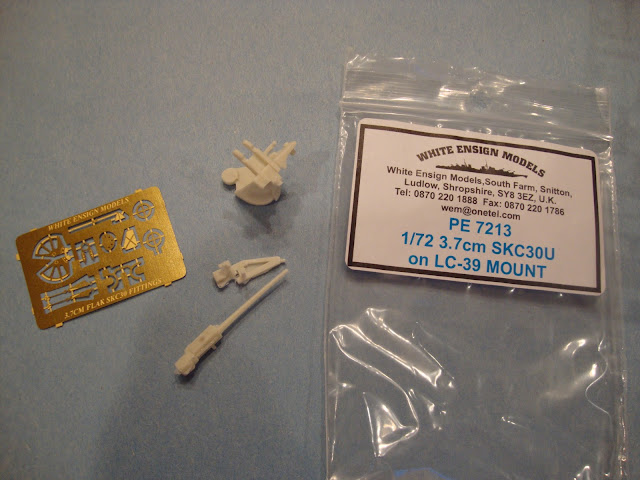
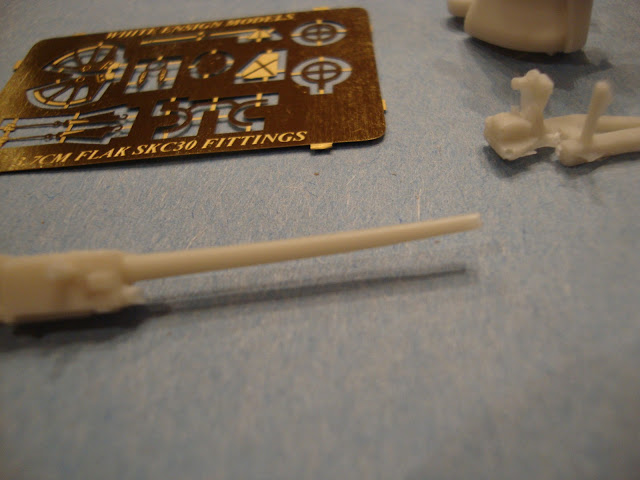
1 - It has pieces I need to authenticate the Revell model.
2 - Shipped in a nice package
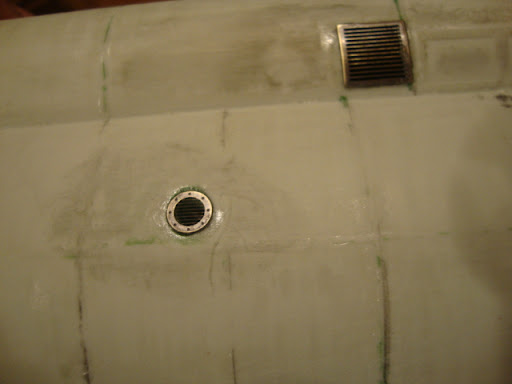
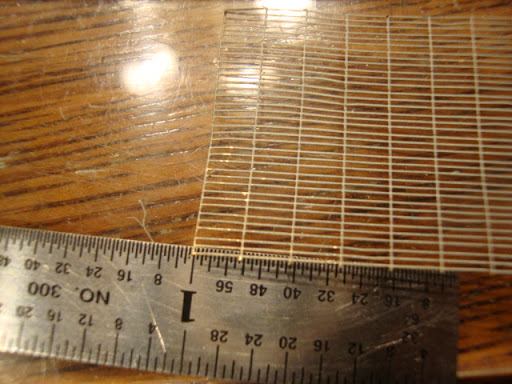
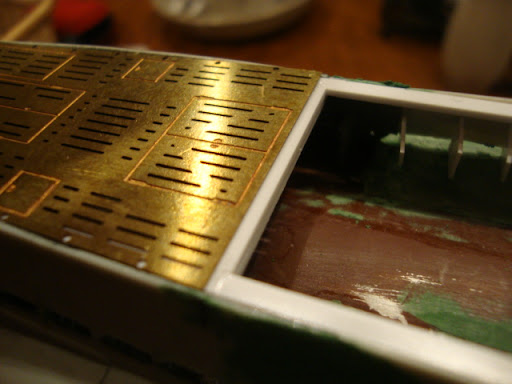
3 - Price, was not that bad
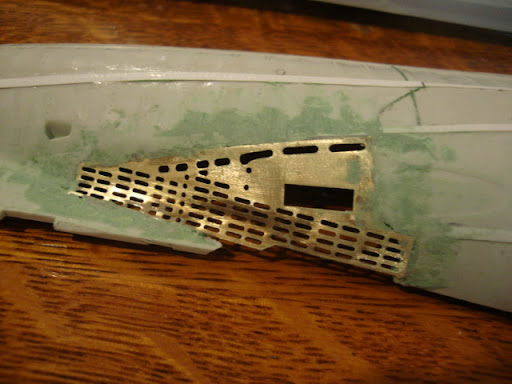
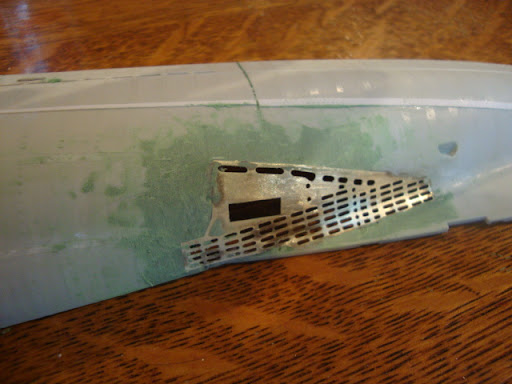
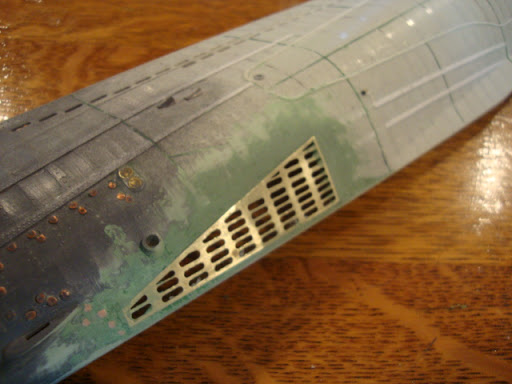
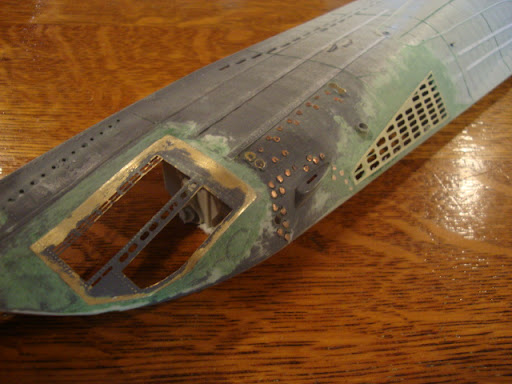
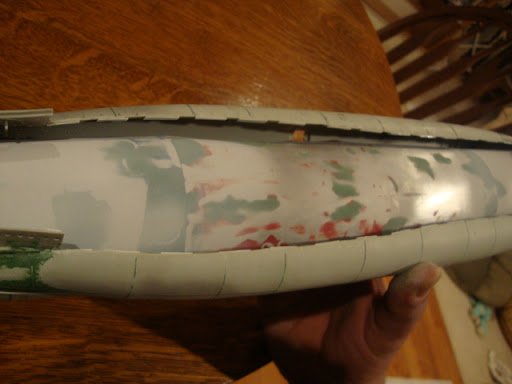
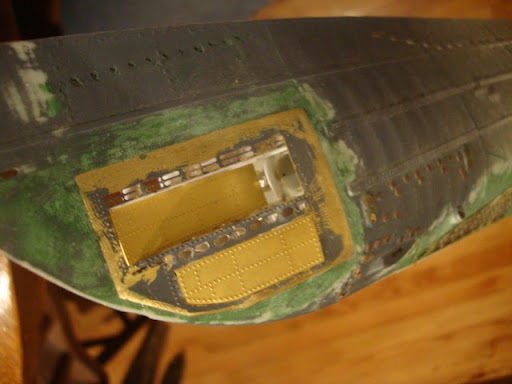
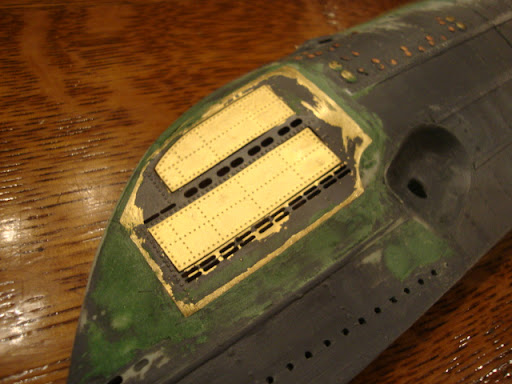
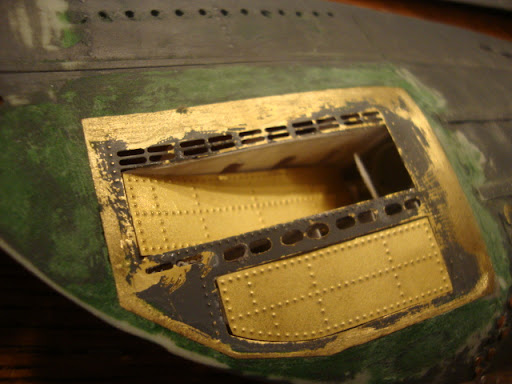
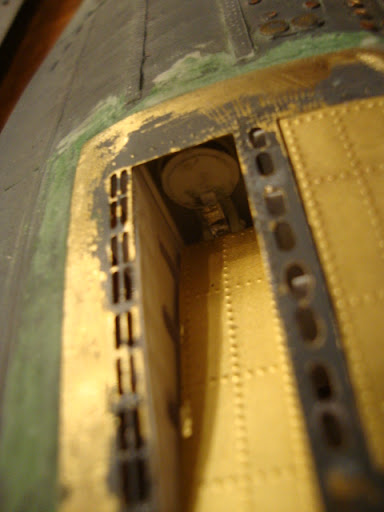
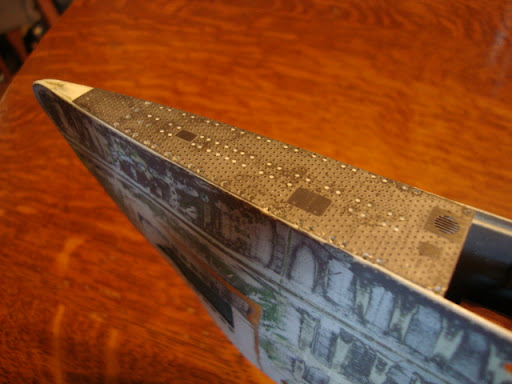
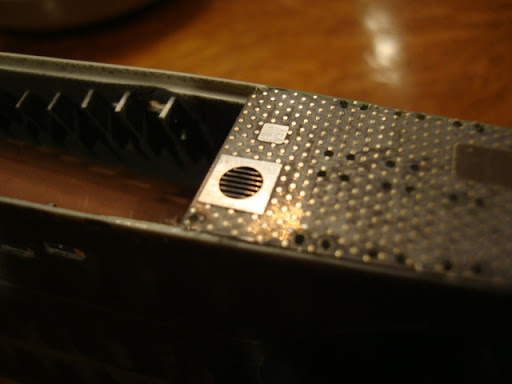
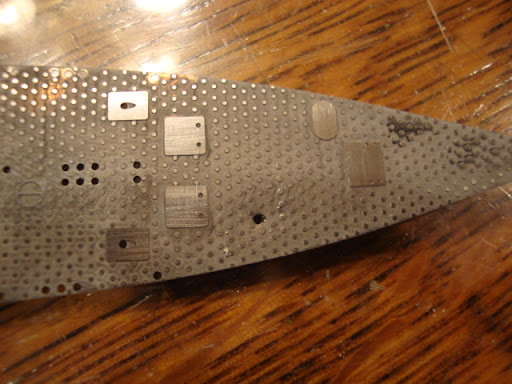
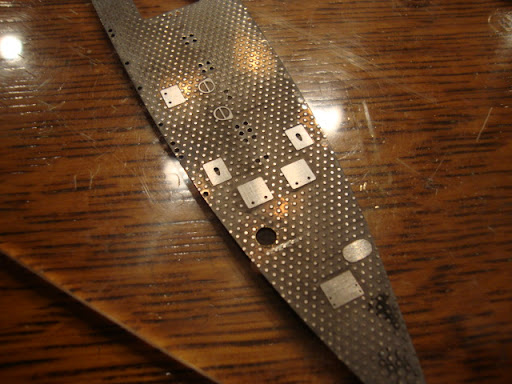
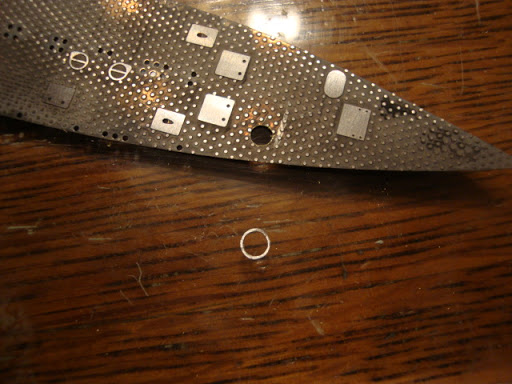
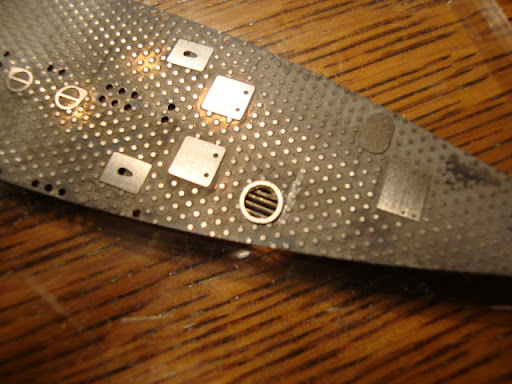
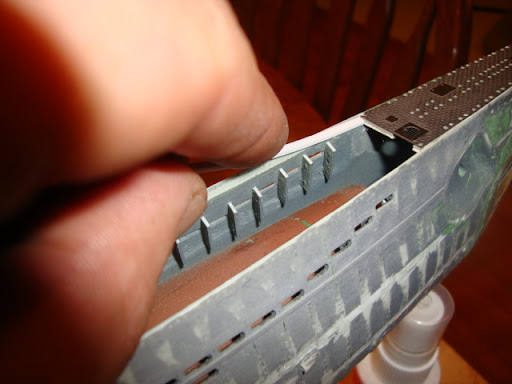
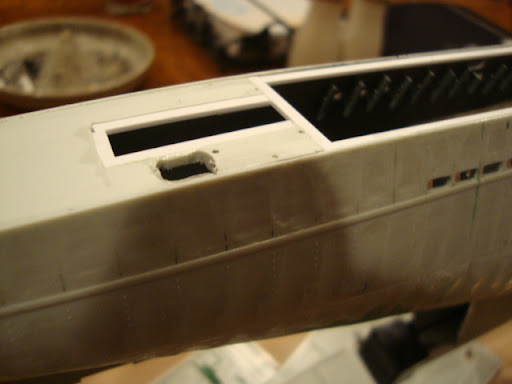
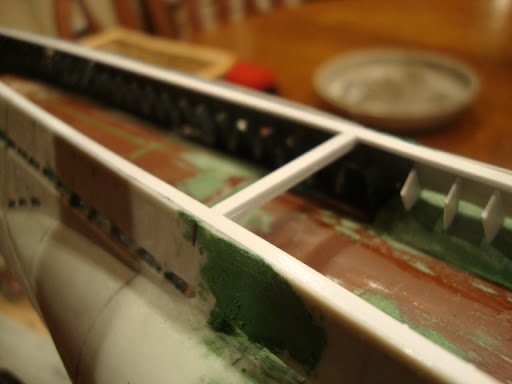
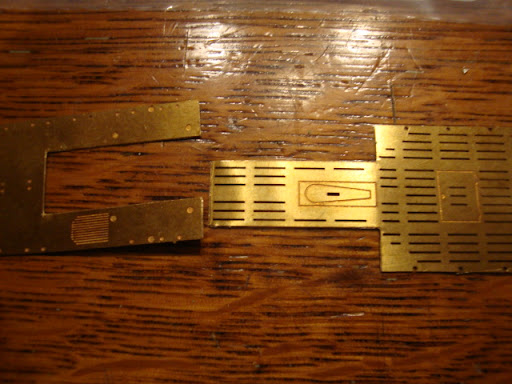
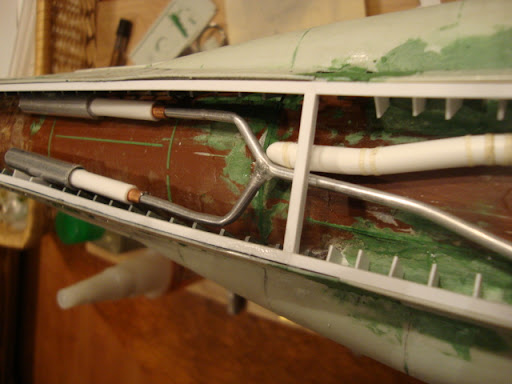
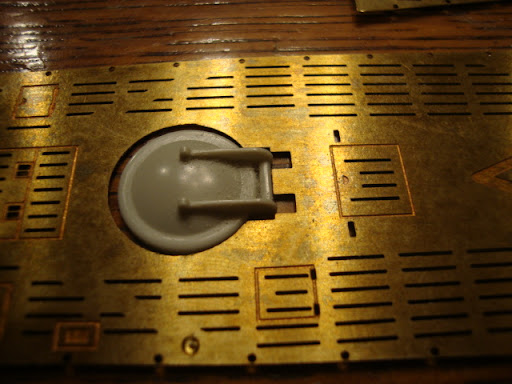
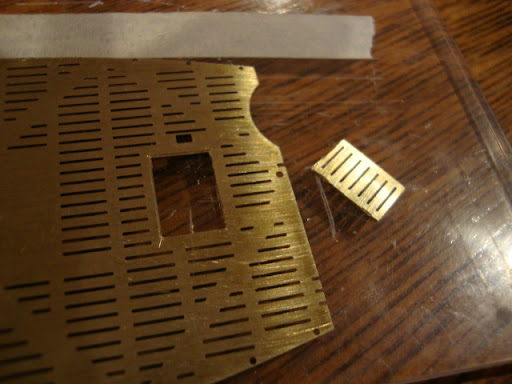
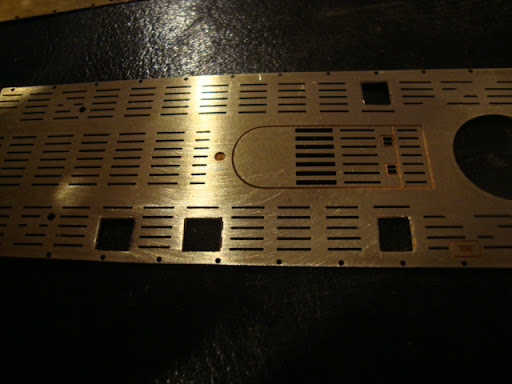
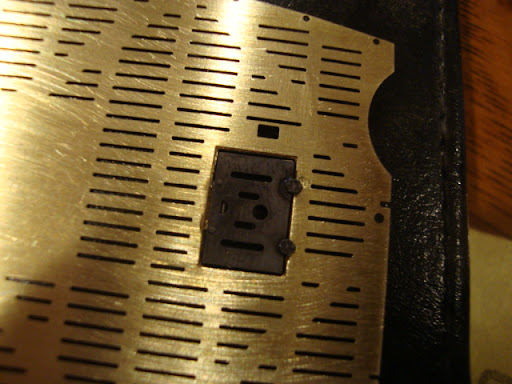
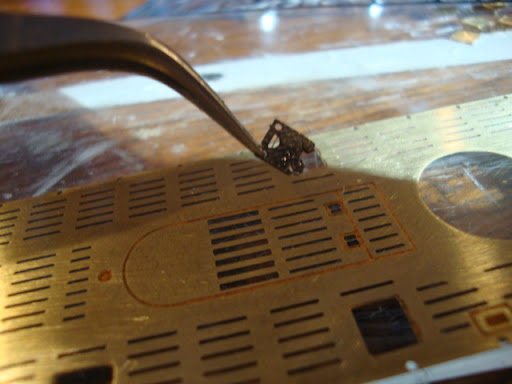
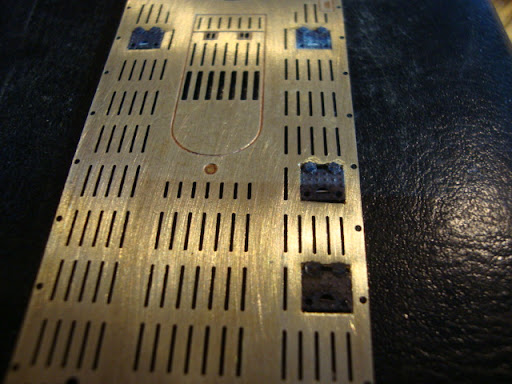
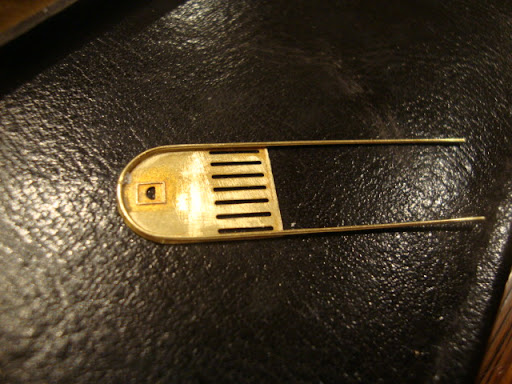
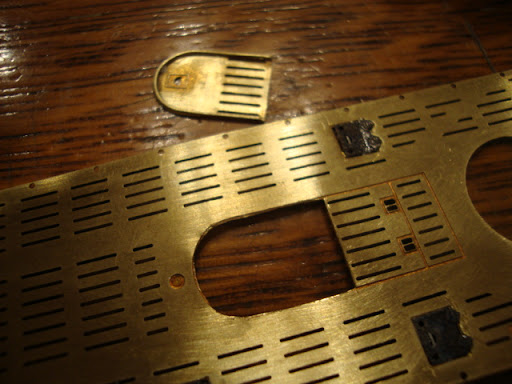
4 - Product itself, appears to be of decent quality ( Not the thickness of the AMP PE, but still nice)
5 - Workability.....I will get back to this in the near future.

Cons:

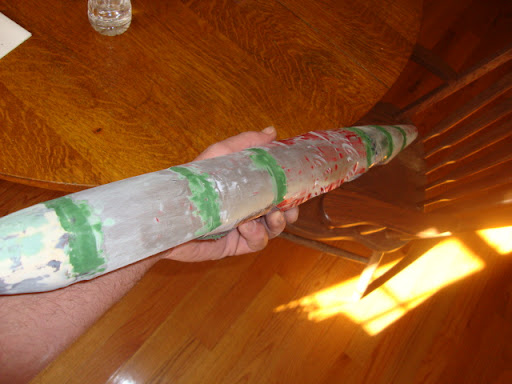
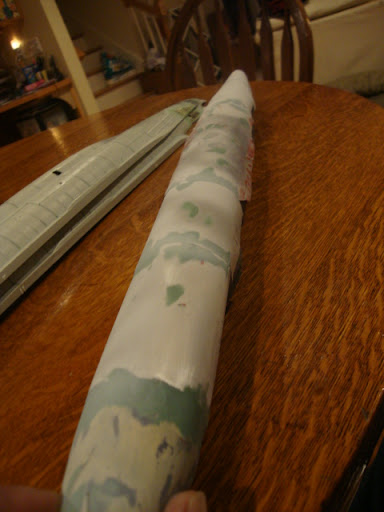
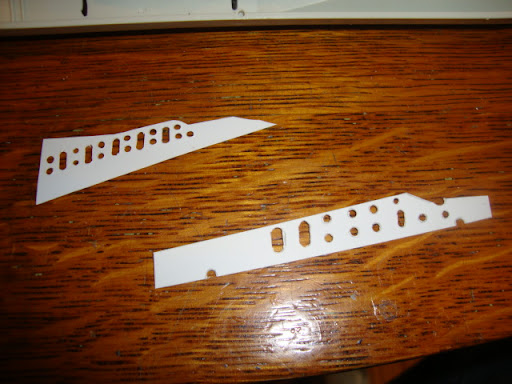
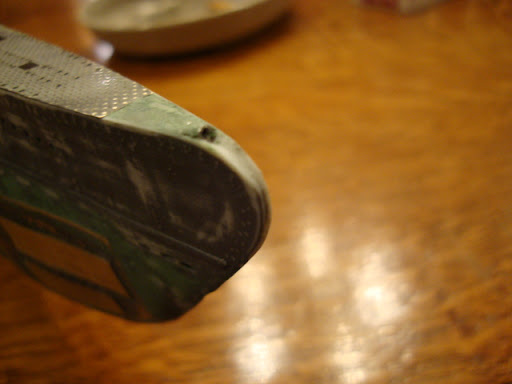
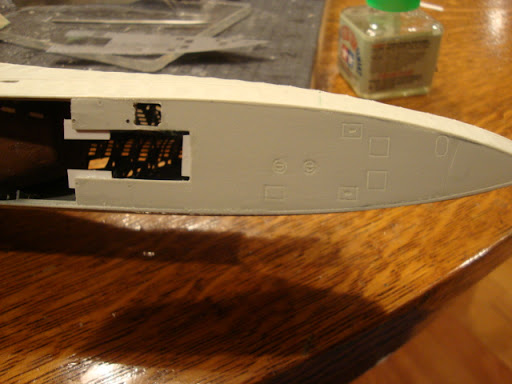
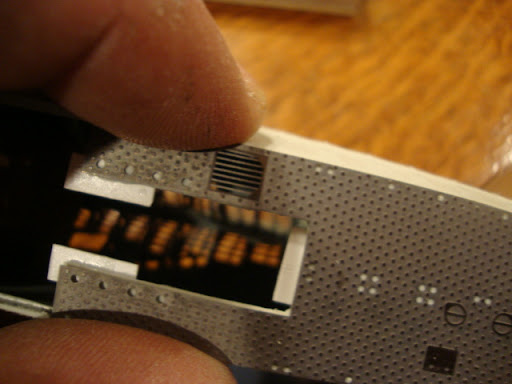
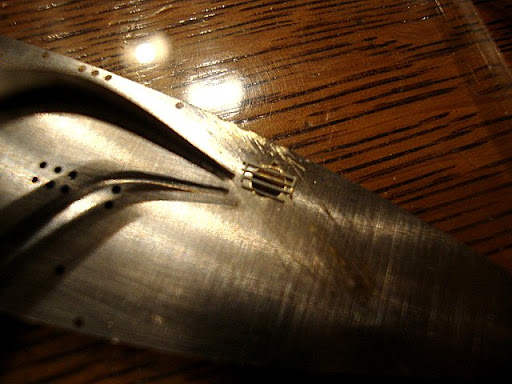
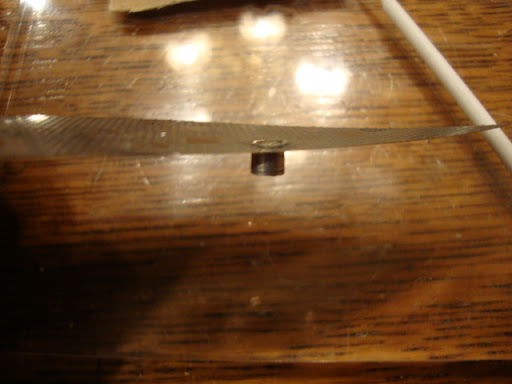
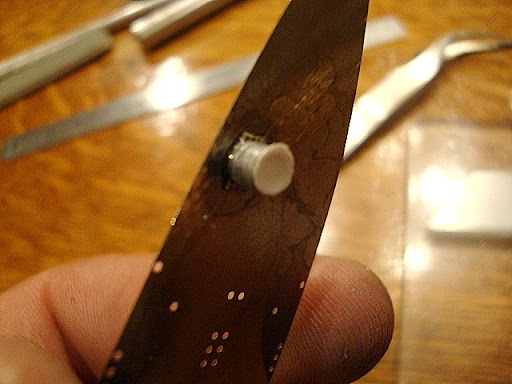
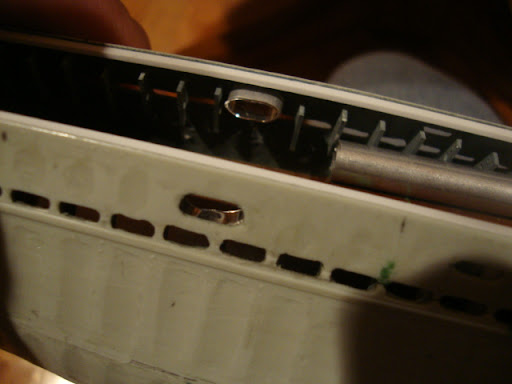
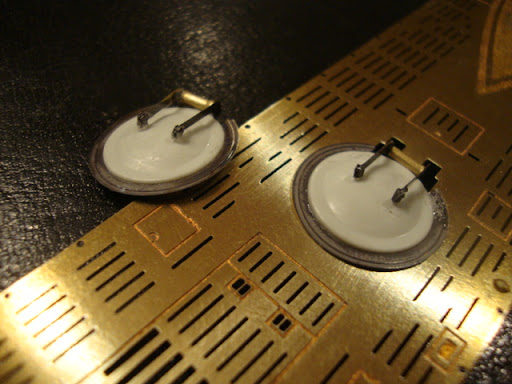
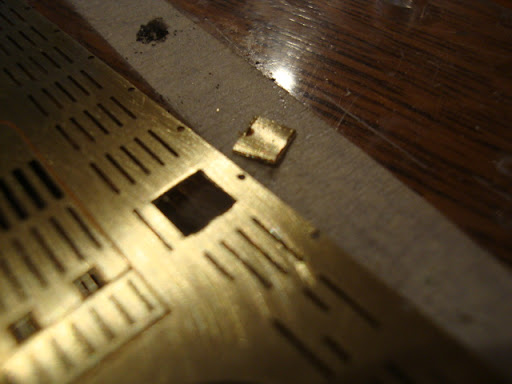
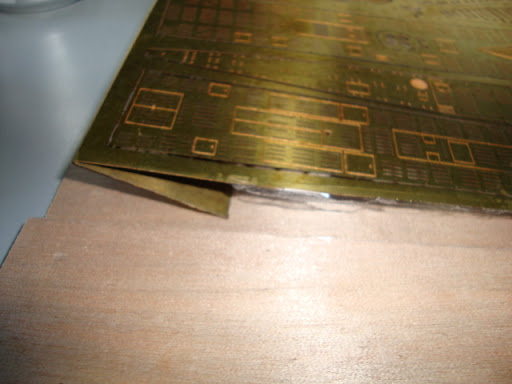
1 - The package it was sent in was a hair too short. So they bent the piece along an etch line.
Image

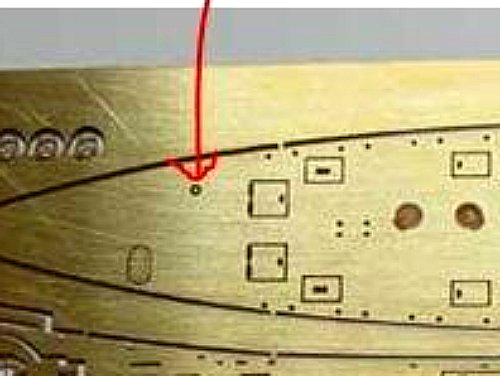
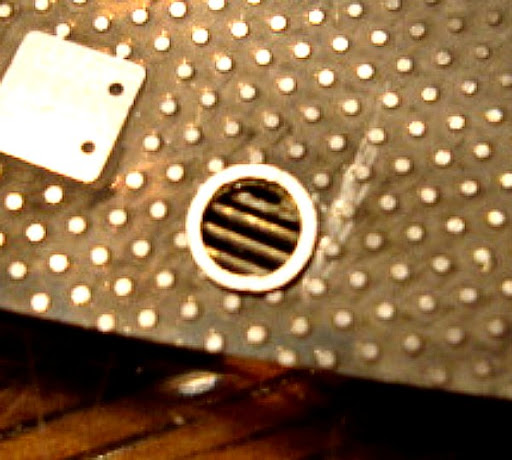
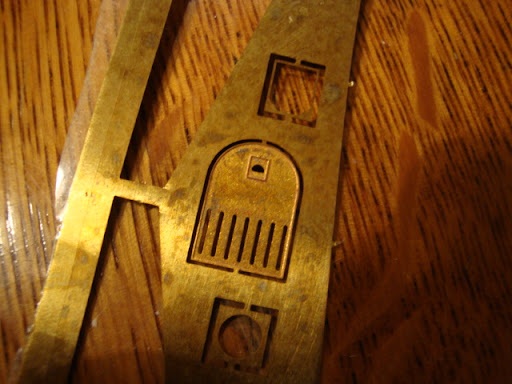
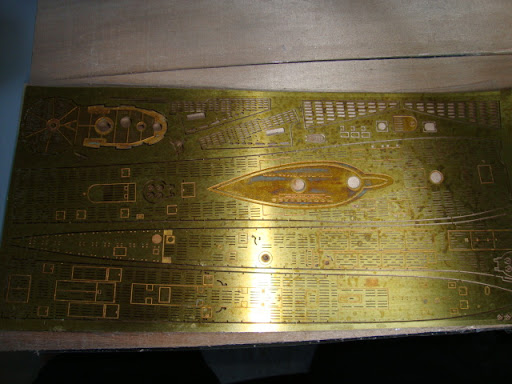
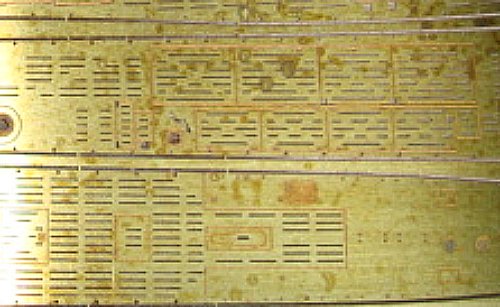
2 - There appears to still be some of the pitting from the etch process still on the sheet. I have experimented with my own etch tank and FeCl3 (Ferric Chloride) and when done with the etching, neutralization needs to be done and the final wash. They may have rushed this.
Image
Image
3 - The shipping time and lack of knowledge of where the package was. The site mentions about a two week lead time. BILL, you mentioned 4 weeks....you were pretty much right on.

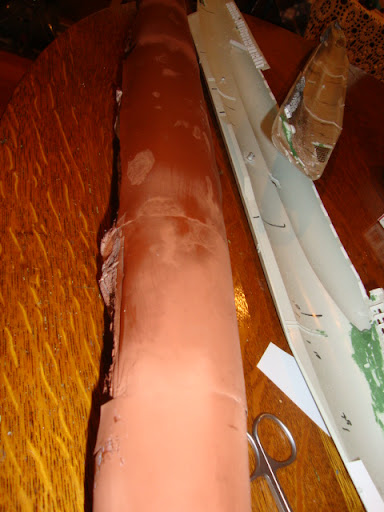
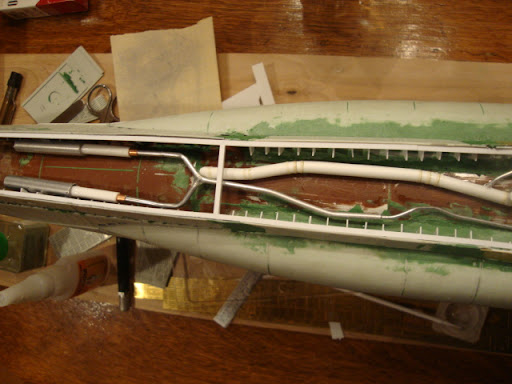
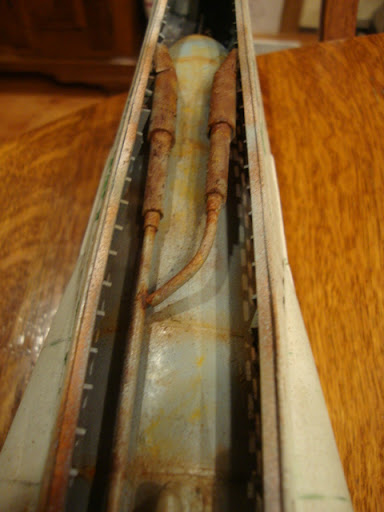
With this out of my system now, I can focus on getting back to work. As I mentioned the product itself appears to be in acceptable condition and I can move forward. A little sanding and cleaning with Acetone...should be good as new.

Cheers
Regards,
T


"The humblest craft that floats makes its appeal to a seaman by the faithfulness of her life."

Joseph Conrad


USS Arizona
USS Laffey
U-69
User avatar
TRM
Posts: 63
Joined: Tue Nov 10, 2009 12:33 pm

Re: My U-69

Post by TRM »

Somewhat update to what has been going on at the docks....


Been working on the pressure hull for starters. I decided to used some toilet paper rolls as a base. Three girls in the house and a lack of sheet stock....made sense.
Image
Image

I have been slowly working on the Modelbrass vents. Not as easy as it seems getting them to fit just right. Still some filling and such, but coming along...
Image

Ended up removing parts of the doublers here and there, which will easily be replaced...
Image
Image
Image

I have just recently added some filler to the pressure hull. Been sanding and filling. Once I get it placed I will add a few details only, the scuttle for the conning tower, some piping, not too much. It is fairly dark in there and would like to begin pressing on. I figure a few more weeks and I might get a chance to fit the deck! ::)

Cheers!
Regards,
T


"The humblest craft that floats makes its appeal to a seaman by the faithfulness of her life."

Joseph Conrad


USS Arizona
USS Laffey
U-69
User avatar
Finland's Jonne
Posts: 295
Joined: Mon Dec 08, 2008 5:06 am
Location: Southwest Finland, Uusikaupunki

Re: My U-69

Post by Finland's Jonne »

:faint:

You have very patient, TRM!

Excellent job!

I will following your work! :heh:

Regards,

Joe
Planning for next:

1:200 RMS Titanic in project
1:72 Type XXI, U-2540 in project
1:350 HMS Ark Royal take a break
1:350 HMS Legion take a break
User avatar
TRM
Posts: 63
Joined: Tue Nov 10, 2009 12:33 pm

Re: My U-69

Post by TRM »

Thank you for the kind words Joe. Patience? Not too sure about that, just have learned to know when to what away from the frustration. :big_grin:

Cheers!
Regards,
T


"The humblest craft that floats makes its appeal to a seaman by the faithfulness of her life."

Joseph Conrad


USS Arizona
USS Laffey
U-69
User avatar
TRM
Posts: 63
Joined: Tue Nov 10, 2009 12:33 pm

Re: My U-69

Post by TRM »

A continuation on the pressure hull....still a little sanding left.
Image
Image
Image
Regards,
T


"The humblest craft that floats makes its appeal to a seaman by the faithfulness of her life."

Joseph Conrad


USS Arizona
USS Laffey
U-69
User avatar
mabmanu
Posts: 347
Joined: Sun Dec 27, 2009 4:39 am
Location: loctudy finist�re France

Re: My U-69

Post by mabmanu »

Hello .

Herculean task

Travail de Titan
a+
patrice
Image
User avatar
Bigdaddy Mark
Posts: 1038
Joined: Thu Aug 20, 2009 6:52 pm
Location: Y-town Ohio
Contact:

Re: My U-69

Post by Bigdaddy Mark »

This is amazing! I am excited to see more!
God grant me the courage not to give up what I think is right even though I think it is hopeless.
~ Chester W. Nimitz ~
My Builds ~ http://ussnorthcaroilna.shutterfly.com/
User avatar
TRM
Posts: 63
Joined: Tue Nov 10, 2009 12:33 pm

Re: My U-69

Post by TRM »

Merci beaucoup, Madmanu!

Thank you, Mark!

On to some internal framing before the hull is set in gold. :cool_2:

Cheers!
Regards,
T


"The humblest craft that floats makes its appeal to a seaman by the faithfulness of her life."

Joseph Conrad


USS Arizona
USS Laffey
U-69
User avatar
TRM
Posts: 63
Joined: Tue Nov 10, 2009 12:33 pm

Re: My U-69

Post by TRM »

Quick update:

Been real busy, side jobs and dances for my girls, birthday parties and we have been puppy sitting for a friend....been trying to steal time away!

Managed a little:
Some internal framing (Thanks Ernest for your hard work on the plans!)
Image

Quick prime job on the P-hull. Most of the fitting will go on after the install:
Image

First application of interior lower vent framing:
Image

Inside shot:
Image

The little house guest! (Demon seed!) The guest is the one on the right. Cote! Mine is the one on the left, Shiloh. Both are Mini-Australian Shepard. Shiloh is a tri-color and the ....let's say, tenacious one, is a Blue Merl. Sure, he looks cute....eats everything and poops!!!!!!! Get my house back tomorrow! :o
Image

Cheers!
Regards,
T


"The humblest craft that floats makes its appeal to a seaman by the faithfulness of her life."

Joseph Conrad


USS Arizona
USS Laffey
U-69
User avatar
TRM
Posts: 63
Joined: Tue Nov 10, 2009 12:33 pm

Re: My U-69

Post by TRM »

Finally....somewhat progress. Been working side projects while the money is there and the weather is fine! Doesn't leave too much time for hobbies :'(.

Anyway....

I finished work on the torpedo doors. I need some help with something though.....I am unsure about the functions of the inner torpedo tube covers. Did they open BEFORE the exterior doors and sit behind them, or, did the open after (as I have done, and could easily rectified)? I made the inner cover movable....not sure if it should appear open or closed. I will stuff a torpedo in it if it remains open....opinions are always welcome. ;D
Image
Image
Image
Image

I was also able to actually connect the two halves....I had to fight with the pressure hull (about a hundred dry fittings, then it doesn't fit! >:( Finally it came together, after removing some of the interior framing. I also began the saddle tank extensions, fill, fill, fill, sand, sand, sand :P
Image
Image
You can see I made some early reference marks to below deck placement. Any suggestions at this point would be helpful....

Not shown, I have begun to sand the entire hull, AGAIN! I am removing my rivets that were added after oil canning, in preparation to purchasing the Archer set. Once I saw what is accomplished with this set, :o ,I think the time spent putting them back will enhance the project a lot better.

Ohhhhh, This finally came yesterday:
Image
All the missing vents and then some!
After sanding I will begin to add all the hull fittings from the Modelbrass and Eduard PE set to the hull and saddle tanks and work on some "light" scratch on the pressure hull.

Cheers!
Regards,
T


"The humblest craft that floats makes its appeal to a seaman by the faithfulness of her life."

Joseph Conrad


USS Arizona
USS Laffey
U-69
Bilge Rat
Posts: 20
Joined: Fri Nov 12, 2010 7:47 am
Location: Cambridge Ontario,Canada

Re: My U-69

Post by Bilge Rat »

Hi TRM! Very nice build so far. I like the way you make the strips of rivets, I will steal your idea and use it to make rivets for the superstructure on a destroyer I am building. :wave_1:
"Try not. Do or do not. There is no try." Yoda
User avatar
TRM
Posts: 63
Joined: Tue Nov 10, 2009 12:33 pm

Re: My U-69

Post by TRM »

Thanks Bilge Rat! The riveting too is one of the best purchases I have made, so far. Oddly enough, I am actually removing what I have installed. I will be remaking and re-applying the doublers, since I have decided to sand off my attempt at the rivets in favor of the Archer set as explained. Realized after-the-fact how clean they look. Still a bit out on this, but getting ready!

Cheers!
Regards,
T


"The humblest craft that floats makes its appeal to a seaman by the faithfulness of her life."

Joseph Conrad


USS Arizona
USS Laffey
U-69
User avatar
TRM
Posts: 63
Joined: Tue Nov 10, 2009 12:33 pm

Re: My U-69

Post by TRM »

Bow section:
Image
Image

Image
Image

Image
Image
Image

Stern opening ???
Image

Cheers!
Regards,
T


"The humblest craft that floats makes its appeal to a seaman by the faithfulness of her life."

Joseph Conrad


USS Arizona
USS Laffey
U-69
User avatar
TRM
Posts: 63
Joined: Tue Nov 10, 2009 12:33 pm

Re: My U-69

Post by TRM »

I was informed a "missing vent" in the stern section. Overseen by the modeling companies as well as PE manufacturers, well, Modelbrass appears to have attempted it, but not completed it:
Missing vent, between the sailors' feet:
Image
Image
Modelbrass attempt:
Image


Went to work to rectify the "missing vent". I will be cutting out the section of the Modelbrass deck and using the Eduard PE stern section.
I plotted the vent and drill a small pilot hole:
Image

Then using a larger bit and finishing off with a round file:
Image

I cut a small ring using aluminum rod and sanded it as fine as I could. This will be the escutcheon plate that (from what I can see) caps the vent on the deck"
Image

Using some left over 1/700 railing stock, I cut the grates for the deck vent:
ImageImage

With the escutcheon ring in place, I wanted to add a section of tubing below deck. Probably not seen, but in the right light???
Image

A small cap from sheet stock for good measure:
Image

I am thinking it came out, not half bad.
ImageImage

I notice a little CA residue on the edge of the vent....then thought it will work out nicely with the "gunk" that can get caught up in the vents, algae and stuff.
Regards,
T


"The humblest craft that floats makes its appeal to a seaman by the faithfulness of her life."

Joseph Conrad


USS Arizona
USS Laffey
U-69
User avatar
TRM
Posts: 63
Joined: Tue Nov 10, 2009 12:33 pm

Re: My U-69

Post by TRM »

Now an update...

Interior framing set
Image
Image

Put down some 1mm thick strips to pad up for the deck.
Image
Image

Placed a support where the decking pieces come together
Image
Image

Modifying parts
Image
Image

Warning!!!! This is my feeble attempt to fill some of the "void" under the deck. I did not want to go overboard, soooooooo, I made some piping, loosely based......very loosely based one one of Simon's drawingstill need to connect the exhaust ends to the mufflers....be kind, most , if not all is barley seen. Just trying to add some definition. ::)
Image
Image
Image
Image
Image

Removed hatches from original kit and doug-in
Image
Image
Image
Image

Going with the Modelbrass hatch with this one. The eduard doesn't match, at lest in the one picture I have of the U-69 deck in this spot.
Image

Need to add something to the edge on one side, seems to be a larger "bulging" rounded edge than the PE

Modelbrass part
Image

Eduard Part
Image

More to come....

Cheers!
Regards,
T


"The humblest craft that floats makes its appeal to a seaman by the faithfulness of her life."

Joseph Conrad


USS Arizona
USS Laffey
U-69
User avatar
TRM
Posts: 63
Joined: Tue Nov 10, 2009 12:33 pm

Re: My U-69

Post by TRM »

Couple of more...

Started cutting hatches to add the Eduard PE
Image
Image
Image

Started putting them back too. Added a wire handle..
Image
Image
Image

Finally, started the rounded hatch(really need to look up what hatch this is....so I can stop calling it "the rounded hatch") Removed the hatch that is standard on the Modelbrass deck. Adding the supplied replacement seemed to make it too layered. Trying to correct the rounded lip as well.
Image
Image

If I can figure out how to attach the mufflers to the tailpipe ??? ??? ??? I would love to prime the innards (PH) tomorrow maybe! ::)

Cheers!
Regards,
T


"The humblest craft that floats makes its appeal to a seaman by the faithfulness of her life."

Joseph Conrad


USS Arizona
USS Laffey
U-69
User avatar
les
Posts: 819
Joined: Mon Jan 10, 2005 3:01 pm
Location: Port Townsend, WA

Re: My U-69

Post by les »

Topedo loading hatch?
Any ship larger than a Destroyer is a waste of metal.
User avatar
TRM
Posts: 63
Joined: Tue Nov 10, 2009 12:33 pm

Re: My U-69

Post by TRM »

Thanks Les! Works for me. :thumbs_up_1:
Regards,
T


"The humblest craft that floats makes its appeal to a seaman by the faithfulness of her life."

Joseph Conrad


USS Arizona
USS Laffey
U-69
User avatar
TRM
Posts: 63
Joined: Tue Nov 10, 2009 12:33 pm

Re: My U-69

Post by TRM »

Moving along....
Image
Image
Image

Certainly some missing stuff, but it should get rid of that "empty" feeling :D

Cheers!
Regards,
T


"The humblest craft that floats makes its appeal to a seaman by the faithfulness of her life."

Joseph Conrad


USS Arizona
USS Laffey
U-69
User avatar
TRM
Posts: 63
Joined: Tue Nov 10, 2009 12:33 pm

Re: My U-69

Post by TRM »

Not much of an update....Been sanding and awful lot lately. Just about completely removed all the rivets I had added onto the hull. I received the Archer rivet transfer sheet and am looking forward to priming the hull so I can add them. Still need to add a few more things to the hull and get the deck secured (this will be a while). Thought I would post a couple of the upgrade kits....

Image
The Archer rivets for VIIC by Glenn Cauley
Image
WEM's 37mm upgrade kit....will most likely order a brass barrel replacement
Image

TBC...
Regards,
T


"The humblest craft that floats makes its appeal to a seaman by the faithfulness of her life."

Joseph Conrad


USS Arizona
USS Laffey
U-69
Post Reply

Return to “Works in Progress”