1/100 Chaconia LPG carrier

In progress online builds of Scratchbuilt ships of all scales. Remote Control and Static Display.

Moderators: MartinJQuinn, JIM BAUMANN, HMAS, Tiny69, Dave Wooley

User avatar
ARH
Posts: 2557
Joined: Mon Jan 10, 2005 10:52 am
Location: Land of the Cheshire cat

Re: 1/100 Chaconia LPG carrier

Post by ARH »

Hi Roal, Its taking shape and looking good, never give up, in scratchbuilding it can always be altered, patients is the key. :thumbs_up_1: :wave_1:
Simple but effective.
User avatar
Neptune
Posts: 2466
Joined: Sun Mar 13, 2005 11:51 am
Location: Belgium

Re: 1/100 Chaconia LPG carrier

Post by Neptune »

Thanks for the comments and support people.
I've indeed decided to make an upstanding edge around my windows, I deem it important enough to spend all the time on that. We'll see whether it was worth the effort. I've finished 5 windows up till now. Pictures will follow.

Jim, the method I use is one of the vast array of methods shown by ARH/Ron, I've looked and followed on the board when he was building his ships and for me this method looked like the most crude, a method that allows for a couple of mistakes, certainly made by beginners like me. The filler allows to still correct some of these mistakes in the end. A fibreglass hull with a plug would have been a problem regarding the shape with the bulb and strange aft section and probably too many new things at once.

Indeed Dave, that is the Udaloy standing next to the Chaconia, and something you'll like to hear now... I'm actually making progress on the Udaloy. I'm not putting in the ballast first, yet I just glued the main deck in place. I'm preparing to put the tracks on the main deck now. I'll have trouble afterwards since the hull isn't watertight yet (noticed after gluing the deck that I didn't close all portholes....) Anyway, progress is progress right? :heh:
The merchant shipyard
User avatar
Neptune
Posts: 2466
Joined: Sun Mar 13, 2005 11:51 am
Location: Belgium

Re: 1/100 Chaconia LPG carrier

Post by Neptune »

Finally a picture, the board has slowed down I see!

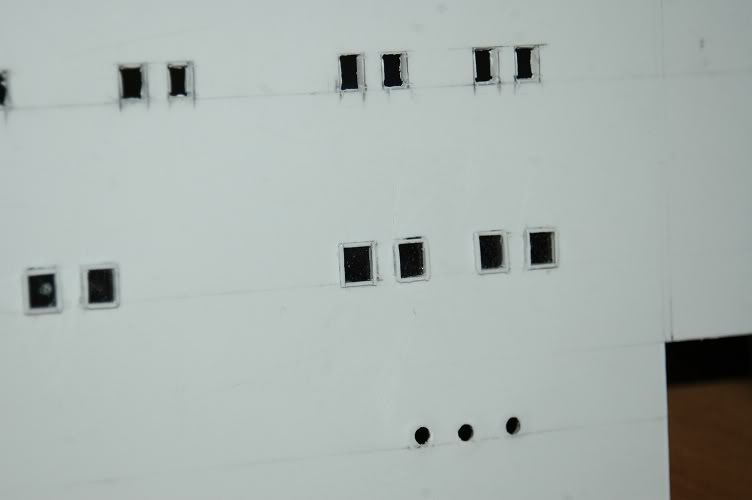
Anyway, here it is. I've finished the first row of raised windows now.
Image

Practically I make a 1mm high frame and stick the transparent "window" to it. This way the facing doesn't look as thick as it is (2mm). The windows are in reality slightly inward, but not 20cm as a 2mm edge would indicate.
I also started using a jig now, I cut a small piece of wood (as the styrene glue doesn't really stick to that) to fit in each window to have the same and right size. First I glued that small block to my cutting board and shaped the frame around it. I had a lot of difficulty to cut and move it off the jig again, so now I cut off the block and I just create my frame. When the glue is still soft I fit the small wooden block in it and push or pull the frame sides where necessary. The transparent window is helping to keep the shape as the frame sides are made of 0.5mm thick styrene.
The merchant shipyard
User avatar
Dave Wooley
Posts: 4131
Joined: Sat Jan 22, 2005 10:18 am
Location: Liverpool

Re: 1/100 Chaconia LPG carrier

Post by Dave Wooley »

Hi Roel A difficut job done well .
Dave Wooley :thumbs_up_1:
User avatar
Neptune
Posts: 2466
Joined: Sun Mar 13, 2005 11:51 am
Location: Belgium

Re: 1/100 Chaconia LPG carrier

Post by Neptune »

So here is another, small update.

The windows are slowly advancing, but I've continued a bit without the facing.
I've used a different method for glazing and edging of the other windows as there the side wall is made of 1mm styrene rather than 2mm for the facing.
This method is a little less perfect, but easier and faster in progress. In reality the windows are rounded in the corners though. I guess that can only be done by using PE or something similar.
Most of it is still dry fit though. I made two 2mm supports in the centre to hold the back wall and strengthen the whole thing.
Image

Image

Image

Next are the back walls on the sides, only doors there. On the facing after the windows are a lot of steps, hand rails and the spray system to be added.
The merchant shipyard
User avatar
Neptune
Posts: 2466
Joined: Sun Mar 13, 2005 11:51 am
Location: Belgium

Re: 1/100 Chaconia LPG carrier

Post by Neptune »

Christmas update,

Merry Christmas to all readers and forum members!

Recently I had a bit of a building dip, pretty much caused by me being over full of ideas and my confused way of building, without a real plan or schedule on how to tackle something. In short, I didn't see the progress nor end of the project anymore.
After reading a while on the board I noticed a good tip of Jim that building something short, in which you practically saw the end before you started it, could help.
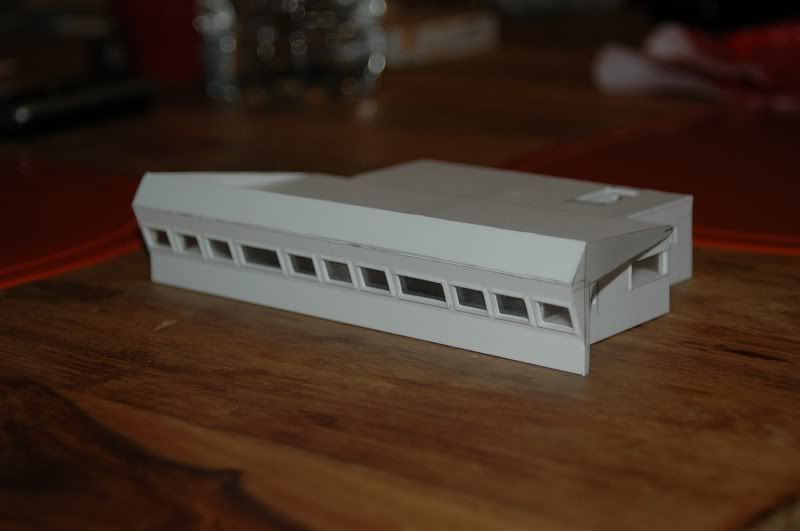
So I tackled the bridge as a seperate project. I thought it would only take me one evening, but in the end I worked a little over three days on it. As most things it appeared to be more complicated than originally thought.
The bridge on these ships is well located, giving a view over the ventmasts and crane on deck. The bridge however is impractical as in those days there was no talk about computers, let alone integrated bridge systems or even GMDSS. Later on they were upgraded with GMDSS and some other equipment, but the radars and other equipment were still scattered around the bridge (the size of a ball room compared to most other ships of that size). The view isn't really great either as they have relatively small windows with big pieces of steel in between them.
In the mean time I 've also made some considerable steps in proceeding with the superstructure. The biggest step was going to the model shop over 60km away, to buy some styrene and tubing.
I've also decided to throw away my 2mm thick facing as the windows were not of the same size and due to extensive cutting and realigning the windows were not aligned well anymore. Since all other parts are measured for 2mm facing, I'll build 2 facings of 1mm thickness behind each other. One will be used as a structural member to build the accomodation, and in front of that one will be the final facing with windows.
Image
The merchant shipyard
User avatar
Dave Wooley
Posts: 4131
Joined: Sat Jan 22, 2005 10:18 am
Location: Liverpool

Re: 1/100 Chaconia LPG carrier

Post by Dave Wooley »

Hi Roel I know the problems . There is only one answer if you are not satisfied with the job in hand correct it or start again . Harsh I know but the alternative will not make you happy with the finished model. Keep at it and as JB has pointed out A series of small steps forward but plenty of them this saves going backwards to often and loosing a bit of heart in the project ! :thinking: :thumbs_up_1: :wave_1:
Dave Wooley
User avatar
Cadman
Site Admin
Site Admin
Posts: 3632
Joined: Sat Jan 08, 2005 4:31 pm
Location: Plattsburg, Missouri

Re: 1/100 Chaconia LPG carrier

Post by Cadman »

Looking good! Something that may help you is to mass produce the standard size window frames. Fine tune the dims needed and start chopping. Hopefully you have a chopper that you can set up with a backstop. Once you get over that first big hump and have something to show for it, the next leg of the project will look less intimidating.
Timothy Dike
Owner & Administrator
ModelWarships.com
User avatar
Neptune
Posts: 2466
Joined: Sun Mar 13, 2005 11:51 am
Location: Belgium

Re: 1/100 Chaconia LPG carrier

Post by Neptune »

Happy New Year Boss,

I don't have a chopper, I use a ruler and a cutter... Probably the reason for all the not-really-straight pieces.

One thing I've noticed over the past project(s): If you go for bigger scales, you all of a sudden need a whole lot more equipment to do it right. Skill (although limited in my case) just doesn't do it anymore...
Anyway, as need arises, I've been purchasing some equipment, from even the basic leather punch to a full punch set to go to bigger diameters (with the mooring winches in mind).

Here is a small progress picture, I've been working on the portside aft area of the superstructure as that is again the blocking point. I first had to finish that swimming pool area, where they used undulated plating (represented by sticking 1mm styrene tubing which was cut and sanded to half its size to the walls). This is to avoid the vertical force of a filled swimming pool. Undulated plating has the tendency to de-undulate, so they welded two lines of inserts to give it more horizontal strength. All in all I had to reproduce this effect too.
Furthermore you see the big tube, which is the support for the stores crane. If the ship receives food and spares this is mostly taken by this crane as it's closest to the engine room and accomodation entry. You can also see an angled piece which is a shield to collect garbage (incinerator room is below that part and there is a hatch towards that incinerator). Being careful for security reasons I won't be giving too much explanations as to which door leads where nor will I detail the bridge or any insides of the ship for that reason. And of course for the reason that it's hard to see and that it would consume a lot of time.
Since I was on that job, I've also added the doors to the aft and the main deck level of the accomodation. A few different sizes and types of doors. All doors have small holes drilled in to put the handles. Next up is the painting of the swimming pool area as the portside side plate is extending slightly aft of the bulkhead and so it will be difficult to reach that part afterwards.

I've been having some trouble with my photobucket so I'll have to try and upload it here...
Attachments
chacpool3.jpg
The merchant shipyard
User avatar
Dave Wooley
Posts: 4131
Joined: Sat Jan 22, 2005 10:18 am
Location: Liverpool

Re: 1/100 Chaconia LPG carrier

Post by Dave Wooley »

Hi Roel Don't be hard on you, Can I just say that your skill level had come along leaps and bounds over the last few years. Just looking at the work so far and how you are developing the superstructures you are really gaining a good understanding of all the techniques required to work in styrene at larger scales and you have developed a clear appreciation of the term "scratch building� in the context of these scales, I have always said that scratch building requires the added mental skill of thinking in 3D . The trouble with larger scales is the finer detail becomes more prominent and difficult to ignore or dismiss as to difficult a job to undertake . Also you are identifying the need for specialist tools for the jobs in hand and getting acquainted with their use. Yes your Chaconia will test your developing skills but as the saying goes if it's worth doing then it's worth doing well .You are right on course on both counts.
Dave Wooley
:thumbs_up_1: :thumbs_up_1: :thumbs_up_1: :cool_1:
User avatar
Cadman
Site Admin
Site Admin
Posts: 3632
Joined: Sat Jan 08, 2005 4:31 pm
Location: Plattsburg, Missouri

Re: 1/100 Chaconia LPG carrier

Post by Cadman »

I'm with Dave, your getting better all the time. I would consider investing in a chopper as on a project like this, it will save you a lot of time when you are cutting umpteen window frames that all need to be square and the same length.
Timothy Dike
Owner & Administrator
ModelWarships.com
User avatar
Neptune
Posts: 2466
Joined: Sun Mar 13, 2005 11:51 am
Location: Belgium

Re: 1/100 Chaconia LPG carrier

Post by Neptune »

Thanks for the comments guys. I guess a chopper would be handy too, with a lot of stairs to make too.

The portside is now "finished" as far as I remember the details and whatever I can find on plans and pictures. Nowadays it's not allowed to put the F of Fire hose on the fire hose boxes anymore, instead you need IMO stickers, but anyway I put the old style F on it. Painted with a piece of wire. I've also added the small hydrant next to it with a tiny wheel.
Now I've already proceeded with the deck level on top of that so that I could finally put these long-awaited side panels on it. Starboard side panel is fixed and I'm working on the level below that.
Unfortunately my crappy internet connection is blocking me from uploading too many pictures nowadays (I can upload as you see, but it takes 10 minutes for a 90kb picture!).
Attachments
Chacpoolport.jpg
The merchant shipyard
User avatar
Ticonderoga
Posts: 652
Joined: Mon Feb 22, 2010 7:54 pm
Location: Mudgeeraba, Qld Australia

Re: 1/100 Chaconia LPG carrier

Post by Ticonderoga »

Hi Roel,

You are doing really well, so as the others have said, don't be so hard on yourself. I have just about got my Slava hull to the point where I can begin working the superstructure. Once you start seeing pictures of my novice styrene work, then you will really see how good you are :thumbs_up_1: :thumbs_up_1:

Keep up the good work and enjoy the journey.....

Andrew :wave_1: :wave_1:
Ex RAN. Anzac, Duchess, Vampire, Yarra, Betano, Bombard, Brisbane, Swan, Melbourne (Carrier), HMS Leander
User avatar
Neptune
Posts: 2466
Joined: Sun Mar 13, 2005 11:51 am
Location: Belgium

Re: 1/100 Chaconia LPG carrier

Post by Neptune »

So, here we are now. Some parts are dryfitted, the funnel is only the skeleton with the front and back plate attached, but it gives you a shape.

Bridge and bridge deck are only dryfitted too.
And I put a Revell acrylic can next to it, so you can see the size of this thing!
Attachments
chacsup.jpg
The merchant shipyard
User avatar
Dave Wooley
Posts: 4131
Joined: Sat Jan 22, 2005 10:18 am
Location: Liverpool

Re: 1/100 Chaconia LPG carrier

Post by Dave Wooley »

Roel this is looking really good . Question can you glaze without to much of a problem ?
Dave Wooley :thumbs_up_1: :thumbs_up_1: :thumbs_up_1: :wave_1:
User avatar
Neptune
Posts: 2466
Joined: Sun Mar 13, 2005 11:51 am
Location: Belgium

Re: 1/100 Chaconia LPG carrier

Post by Neptune »

Glazing isn't too much of a problem. I'm using the transparent side of some type of A4 file. It has a coloured back, but a sturdy (yet flexible) transparent, slightly brownish front. I'm using that. I'm using UHU glue to glue/melt it to the inside of the walls, in reality our windows are also slightly "inside". One remark here on inaccuracy though, we have windows that come "out" of the wall too, they can be opened, the other type cannot be opened, only broken. (the ones you see on the front). The ones that can open are in the back. I have only modelled one type of window though. After careful examination of Jimmy Wood's work as well as yours I've seen a couple of inaccuracies or things that were left out too, so I chose to follow the masters and not bother too much with tiny elements.

Enough talking now. I've advanced upwards and "finished" the funnel along with the portside as well as the level just below the bridge. The bridge deck as well as the bridge are dry fit in this picture, the rest is mostly glued, although I'm waiting to glue the funnel to the structure until I've finished all the detailing (finishing the pool, put a hatch for the engine room etc.). I'll also first spray the funnel before actually mounting it. It's easy to align as I intend to put a smoke generator inside, so I've already made the holes to put a pipe all the way through the superstructure into the hull.
Attachments
chacportsidesup.jpg
The merchant shipyard
User avatar
Capit�o Norbert
Posts: 1993
Joined: Tue Apr 17, 2007 9:18 am
Location: Brasil

Re: 1/100 Chaconia LPG carrier

Post by Capit�o Norbert »

Hi Roel
the bridge looks so very well done made
fantastic work i like this :thumbs_up_1: :wave_1:
User avatar
Neptune
Posts: 2466
Joined: Sun Mar 13, 2005 11:51 am
Location: Belgium

Re: 1/100 Chaconia LPG carrier

Post by Neptune »

Thanks Norberto, nowhere near your styrene skills, but it will do for now. I've learned a lot from it already!

Not to forget what I was building, I've put the structure in place. Luckily it's a real nice fit in beam. I had to rescale the front (and accomodation) to fit the beam of the ship. One good reason why you should start with the hull on a merchant ship, the superstructure often has the same beam, it's easier to adjust your accomodation than the hull. The hull is slightly 0.5cm too large.

I've been detailing a little on the aft of the superstructure, the funnel also received some white paint. Details included fire boxes, some doors (more of them still, and yet another type of doors) as well as some ventilation fans and ducts. The good thing about a large project like this is that there is always something else to do if your stuck on some of these fittings. I've also roughly redrilled (easy since I had them cut out of the wood first) the holes in the forward part of the hull, I just have to manually file them to shape afterwards. There is still some work left (for spring/summer when the temperatures are good to work outside) on the hull.
Attachments
Chacoverviewjan.jpg
chacoutline.jpg
The merchant shipyard
User avatar
Cadman
Site Admin
Site Admin
Posts: 3632
Joined: Sat Jan 08, 2005 4:31 pm
Location: Plattsburg, Missouri

Re: 1/100 Chaconia LPG carrier

Post by Cadman »

It looks like it is really coming together. Very cool!
Timothy Dike
Owner & Administrator
ModelWarships.com
User avatar
Dave Wooley
Posts: 4131
Joined: Sat Jan 22, 2005 10:18 am
Location: Liverpool

Re: 1/100 Chaconia LPG carrier

Post by Dave Wooley »

Hi Roel Excellent You are getting there . As for painting I agree wait until the late spring . Question what type of ships boats are fitted? :thumbs_up_1: :thumbs_up_1: :thumbs_up_1:
Dave Wooley
Post Reply

Return to “Online Scratchbuild Projects”