Are there substanstial visual differences are between the 1941 and the Leyete Gulf version?
How about the Mutsu?
Thanks
First Ship model- 1/350 Nagato with extras!
Moderators: BB62vet, MartinJQuinn, JIM BAUMANN, Jon, Dan K
-
Firecaptain
- Posts: 57
- Joined: Mon Apr 16, 2007 11:49 am
- Location: Virginia
-
oldpaperone
- Posts: 25
- Joined: Sun Sep 27, 2009 7:04 am
- Location: Tathra,NSW,Australia
Re: First Ship model- 1/350 Nagato with extras!
Yes, there are substantial differences - see my earlier post with the Hasegawa web addresses showing the models in 1941 and 1944 configurations
Last edited by oldpaperone on Wed Dec 16, 2009 3:15 am, edited 1 time in total.
Chris
Paper,Paper and now Plastic
Paper,Paper and now Plastic
-
oldpaperone
- Posts: 25
- Joined: Sun Sep 27, 2009 7:04 am
- Location: Tathra,NSW,Australia
Re: First Ship model- 1/350 Nagato with extras!
drizzt73
I would like to get a display case first - keep the dust off during the construction.
I would like to get a display case first - keep the dust off during the construction.
Last edited by oldpaperone on Thu Dec 17, 2009 4:39 pm, edited 1 time in total.
Chris
Paper,Paper and now Plastic
Paper,Paper and now Plastic
-
oldpaperone
- Posts: 25
- Joined: Sun Sep 27, 2009 7:04 am
- Location: Tathra,NSW,Australia
Re: First Ship model- 1/350 Nagato with extras!
Nagato
Last edited by oldpaperone on Thu Dec 17, 2009 4:36 pm, edited 1 time in total.
Chris
Paper,Paper and now Plastic
Paper,Paper and now Plastic
-
J. Soca

- Posts: 2161
- Joined: Sun Dec 03, 2006 5:36 pm
- Location: About 50 miles away from the Gulf of Mexico ( traveling W is you do so :)
Re: First Ship model- 1/350 Nagato with extras!
Cool !!  i've seen the one Admiral Yamamoto is walking at the stern of the ship before but not the others, the movie shot was real well done the Nagato really looks to be on water. it's a shame the took the whole thing down on the other hand i don't think it would've lasted long. BTW did i mention it was this the very same model that hooked me up with the japanese navy
  . thanks for those shots.
Jose
i've seen the one Admiral Yamamoto is walking at the stern of the ship before but not the others, the movie shot was real well done the Nagato really looks to be on water. it's a shame the took the whole thing down on the other hand i don't think it would've lasted long. BTW did i mention it was this the very same model that hooked me up with the japanese navy . thanks for those shots.Jose
-
oldpaperone
- Posts: 25
- Joined: Sun Sep 27, 2009 7:04 am
- Location: Tathra,NSW,Australia
Re: First Ship model- 1/350 Nagato with extras!
As promised here is a pic of one of the crew with my fingernail in view 
- Attachments
-
Chris
Paper,Paper and now Plastic
Paper,Paper and now Plastic
-
drizzt73
- Posts: 61
- Joined: Wed Jan 14, 2009 3:06 am
Re: First Ship model- 1/350 Nagato with extras!
Happy New Year! 
After a 2 year hiatus I have gotten back into this build (man time flies)
My new years resolution was to finish the Nagato this year -hopefully by May when my Model club has their yearly show.
I pulled it out and dusted it off yesterday and glued the deck down to the hull

The deck detail is great

I also added the rudders and propeller shafts

I managed to prime the hull last night so will begin painting her today.
As this is my first ship model I am unsure how to progress with the painting and am thinking of doing the hull/deck in full and then gloss coating it to help protect it and then build everything else and paint it at the end?
Cheers and thanks for looking
After a 2 year hiatus I have gotten back into this build (man time flies)
My new years resolution was to finish the Nagato this year -hopefully by May when my Model club has their yearly show.
I pulled it out and dusted it off yesterday and glued the deck down to the hull
The deck detail is great
I also added the rudders and propeller shafts
I managed to prime the hull last night so will begin painting her today.
As this is my first ship model I am unsure how to progress with the painting and am thinking of doing the hull/deck in full and then gloss coating it to help protect it and then build everything else and paint it at the end?
Cheers and thanks for looking
-
drizzt73
- Posts: 61
- Joined: Wed Jan 14, 2009 3:06 am
Re: First Ship model- 1/350 Nagato with extras!
Hi all,
I have made some progress with painting the hull and deck. I used Tamiya Hull red with a teenie bit of flat red on the lower hull and the Tamiya Kure Grey with a drop of German Grey, I then randomly sprayed plain kure grey and then later kure grey/light grey mix to add some shading. The deck is Tamiya wood deck tan followed by a gloss coat and some pro-modeller wash. I removed most of the wash leaving the grooves in the deck and later followed this with a sepia wash to add some warm tones. Finally I misted some deck tan on to lighten it back up. I am reasonably happy with the results being my first go at painting a ship!
Any tips/comments appreciated


I am using the kit display stand and felt from the super detail set to sit the hull on during these stages
Now I am going to start tapping the wood deck so I can spray the main grey bits on the deck (I may hand paint some of the finer details on the deck)
Cheers
Anthony
I have made some progress with painting the hull and deck. I used Tamiya Hull red with a teenie bit of flat red on the lower hull and the Tamiya Kure Grey with a drop of German Grey, I then randomly sprayed plain kure grey and then later kure grey/light grey mix to add some shading. The deck is Tamiya wood deck tan followed by a gloss coat and some pro-modeller wash. I removed most of the wash leaving the grooves in the deck and later followed this with a sepia wash to add some warm tones. Finally I misted some deck tan on to lighten it back up. I am reasonably happy with the results being my first go at painting a ship!
Any tips/comments appreciated
I am using the kit display stand and felt from the super detail set to sit the hull on during these stages
Now I am going to start tapping the wood deck so I can spray the main grey bits on the deck (I may hand paint some of the finer details on the deck)
Cheers
Anthony
-
drizzt73
- Posts: 61
- Joined: Wed Jan 14, 2009 3:06 am
Re: First Ship model- 1/350 Nagato with extras!
Hi all, well after about 2 hrs of masking  , the Nagato now has a new camo scheme


Next step is to spray all the grey bits on the deck.
Cheers
, the Nagato now has a new camo scheme Next step is to spray all the grey bits on the deck.
Cheers
-
drizzt73
- Posts: 61
- Joined: Wed Jan 14, 2009 3:06 am
Re: First Ship model- 1/350 Nagato with extras!
Hi all, I've been pushing on with the build. I sprayed all of the grey bits and after removing the tape was quite happy with the results- but forgot to take pics at that stage sorry.
I then realised that I probably should have attached the bridge deck before painting the hull and deck but oh well- first ship and all and not planning ahead. I then started on the first of the PE (a bit daunted by all of the PE as superglue and me do not get along at all . On that subject whenever I try supergluing something, no matter how careful I am the glue sticks to me, tweezers and anything else but the 2 pieces I am trying to glue together- whats with that?
Anyway here are some pics of this stage


I then attached some PE to the seaplane deck area

This morning I airbrushed the wood deck and then masked up the bridge deck and then sprayed the grey bits


Tonight I just started with some more PE removing the kit plastic 9m cutter stands (not sure what their correct name is) with a 2 piece PE one


Thanks for looking- any comments welcome
Cheers
I then realised that I probably should have attached the bridge deck before painting the hull and deck but oh well- first ship and all and not planning ahead. I then started on the first of the PE (a bit daunted by all of the PE as superglue and me do not get along at all
. On that subject whenever I try supergluing something, no matter how careful I am the glue sticks to me, tweezers and anything else but the 2 pieces I am trying to glue together- whats with that?Anyway here are some pics of this stage
I then attached some PE to the seaplane deck area
This morning I airbrushed the wood deck and then masked up the bridge deck and then sprayed the grey bits
Tonight I just started with some more PE removing the kit plastic 9m cutter stands (not sure what their correct name is) with a 2 piece PE one
Thanks for looking- any comments welcome
Cheers
-
drizzt73
- Posts: 61
- Joined: Wed Jan 14, 2009 3:06 am
Re: First Ship model- 1/350 Nagato with extras!
A quick update, I ordered some IJN extra ladders (to replace the aztec stairs in the kit) and some portholes. Obviously I won't be replacing the ones on the hull but will be using them on the bridge etc.

I started on some White Ensign PE cable reels over the weekend and also the funnel structure and will post some pics this arvo

Cheers
I started on some White Ensign PE cable reels over the weekend and also the funnel structure and will post some pics this arvo
Cheers
-
Guest
Re: First Ship model- 1/350 Nagato with extras!
I've been steadily working on the PE and thought it was time for some more pics.
I spent a few hours putting together some cable reels and winding some cotton around them to represent the cables, whilst on that subject does anyone know if all the cable reels had cables on them or just some of them? (P.S I need to fill those holes - any suggestions what to use?)


Mounted on the hull with the now painted bridge deck


I have had this week off work and over the past 2 days I have put the main guns together and am pleased with the results
No 1 turret

No 2 turret

Mounted on the hull


no 3 and 4 turrets

What she looks like to date - starting to look like a battleship now I think!

Thanks for looking
I spent a few hours putting together some cable reels and winding some cotton around them to represent the cables, whilst on that subject does anyone know if all the cable reels had cables on them or just some of them? (P.S I need to fill those holes - any suggestions what to use?)
Mounted on the hull with the now painted bridge deck
I have had this week off work and over the past 2 days I have put the main guns together and am pleased with the results
No 1 turret
No 2 turret
Mounted on the hull
no 3 and 4 turrets
What she looks like to date - starting to look like a battleship now I think!
Thanks for looking
-
Guest
Re: First Ship model- 1/350 Nagato with extras!
I've been steadily working on the PE and thought it was time for some more pics.
I spent a few hours putting together some cable reels and winding some cotton around them to represent the cables, whilst on that subject does anyone know if all the cable reels had cables on them or just some of them? (P.S I need to fill those holes - any suggestions what to use?)

I then started work on the funnel assembly and the appropriate PE- I have to say that the PE is very nice to work with but I still have trouble with super glue her her

Mounted on the hull with the now painted bridge deck
I have had this week off work and over the past 2 days I have put the main guns together and am pleased with the results
No 1 turret
No 2 turret
Mounted on the hull
no 3 and 4 turrets
What she looks like to date - starting to look like a battleship now I think!
Thanks for looking
I spent a few hours putting together some cable reels and winding some cotton around them to represent the cables, whilst on that subject does anyone know if all the cable reels had cables on them or just some of them? (P.S I need to fill those holes - any suggestions what to use?)
I then started work on the funnel assembly and the appropriate PE- I have to say that the PE is very nice to work with but I still have trouble with super glue her her
Mounted on the hull with the now painted bridge deck
I have had this week off work and over the past 2 days I have put the main guns together and am pleased with the results
No 1 turret
No 2 turret
Mounted on the hull
no 3 and 4 turrets
What she looks like to date - starting to look like a battleship now I think!
Thanks for looking
-
drizzt73
- Posts: 61
- Joined: Wed Jan 14, 2009 3:06 am
Re: First Ship model- 1/350 Nagato with extras!
I've been steadily working on the PE and thought it was time for some more pics.
I spent a few hours putting together some cable reels and winding some cotton around them to represent the cables, whilst on that subject does anyone know if all the cable reels had cables on them or just some of them? (P.S I need to fill those holes - any suggestions what to use?)
I then started work on the funnel assembly and the appropriate PE- I have to say that the PE is very nice to work with but I still have trouble with super glue hee hee
Mounted on the hull with the now painted bridge deck
I have had this week off work and over the past 2 days I have put the main guns together and am pleased with the results
No 1 turret
No 2 turret
Mounted on the hull
no 3 and 4 turrets
What she looks like to date - starting to look like a battleship now I think!
Thanks for looking
I spent a few hours putting together some cable reels and winding some cotton around them to represent the cables, whilst on that subject does anyone know if all the cable reels had cables on them or just some of them? (P.S I need to fill those holes - any suggestions what to use?)
I then started work on the funnel assembly and the appropriate PE- I have to say that the PE is very nice to work with but I still have trouble with super glue hee hee
Mounted on the hull with the now painted bridge deck
I have had this week off work and over the past 2 days I have put the main guns together and am pleased with the results
No 1 turret
No 2 turret
Mounted on the hull
no 3 and 4 turrets
What she looks like to date - starting to look like a battleship now I think!
Thanks for looking
-
ComfortablyNumb

- Posts: 313
- Joined: Sun Mar 13, 2011 12:19 am
- Location: Fredericton NB, Canada
Re: First Ship model- 1/350 Nagato with extras!
She's looking beautiful~!! Very nice work on the turrets and I love your workspace!
Tony, I see that you masked off the seaplane deck piece but how did you get the seaplane track railings grey like this? (very nice btw)
I am starting that part of Nagato soon and I was wondering if there was a trick to it or did you hand paint them or did you mask off the deck (ALL those little areas separately!) and then spray the grey? Thanks for your insight and keep up the good work! -Tim
Tony, I see that you masked off the seaplane deck piece but how did you get the seaplane track railings grey like this? (very nice btw)
I am starting that part of Nagato soon and I was wondering if there was a trick to it or did you hand paint them or did you mask off the deck (ALL those little areas separately!) and then spray the grey? Thanks for your insight and keep up the good work! -Tim
-
JIM BAUMANN

- Posts: 5687
- Joined: Mon Jan 10, 2005 5:30 pm
- Location: Nr Southampton England
Re: First Ship model- 1/350 Nagato with extras!
drizzt73 wrote
..............(P.S I need to fill those holes - any suggestions what to use?)...........
The harder way is to use some styremne rod of the correct or near correct size, glue in , pare flat and paint.
problem is doing this you willprobably damage all your surrounding paintwork-at best on the deck--at worst the bulkheads...
best done before construction begins...!!!!
--------------------------------------------------------------------------------------------------------------
The easier way--what I would do if faced with that situation
is to plug the hole with a drop of white glue- this will span the gap.
when it dries it will dish slightly-- no problem.
the second coat of slightly thinned glue will self-level.( occasionally needs a third go.)
use a fast drying glue such as Evostick rapide or whatever you can fin where you are
paint to match

JIM B
..............(P.S I need to fill those holes - any suggestions what to use?)...........
The harder way is to use some styremne rod of the correct or near correct size, glue in , pare flat and paint.
problem is doing this you willprobably damage all your surrounding paintwork-at best on the deck--at worst the bulkheads...
best done before construction begins...!!!!
--------------------------------------------------------------------------------------------------------------
The easier way--what I would do if faced with that situation
is to plug the hole with a drop of white glue- this will span the gap.
when it dries it will dish slightly-- no problem.
the second coat of slightly thinned glue will self-level.( occasionally needs a third go.)
use a fast drying glue such as Evostick rapide or whatever you can fin where you are
paint to match
JIM B
....I buy them at three times the speed I build 'em.... will I live long enough to empty my stash...?
http://www.modelshipgallery.com/gallery ... index.html
IPMS UK SIG (special interest group) www.finewaterline.com
http://www.modelshipgallery.com/gallery ... index.html
IPMS UK SIG (special interest group) www.finewaterline.com
-
drizzt73
- Posts: 61
- Joined: Wed Jan 14, 2009 3:06 am
Re: First Ship model- 1/350 Nagato with extras!
Thanks for the advice Jim- I'll give it a go.
Cheers
Anthony
Cheers
Anthony
-
drizzt73
- Posts: 61
- Joined: Wed Jan 14, 2009 3:06 am
Re: First Ship model- 1/350 Nagato with extras!
Hi Tim,HalseysBeard wrote:She's looking beautiful~!! Very nice work on the turrets and I love your workspace!
Tony, I see that you masked off the seaplane deck piece but how did you get the seaplane track railings grey like this? (very nice btw)
I am starting that part of Nagato soon and I was wondering if there was a trick to it or did you hand paint them or did you mask off the deck (ALL those little areas separately!) and then spray the grey? Thanks for your insight and keep up the good work! -Tim
Thanks for your kind words- I appreciate the support.
I sprayed the Tamiya Linoleum and then hand painted the grey (Vallejo Basalt Grey is very close to the Kure Grey mix that I am using) and then had to go back and hand touch up some of the brown again. If I did it again I would mask around the grey bits as it would have been a neater finish. Using Tamiya tape It wasn't that bad when I did the rest of the deck so it is possible. I guess I didn't because I didn't think it through and I am still learning the finer points of ship modelling. I am really enjoying this build and may be converted to "the salty side of modelling" I am planning on a IJN Heavy Cruiser as my next build and leaning towards the Tamiya Tone but am choing between that and the Tamiya Mogami or the Hasegawa Agano?
Cheers
Anthony
P.S I am following your build closely and am loving your PE work in particular.
-
drizzt73
- Posts: 61
- Joined: Wed Jan 14, 2009 3:06 am
Re: First Ship model- 1/350 Nagato with extras!
Hi all,
As previously stated I have been working on the bridge and thought I would post some pics of some of the earlier work
The PE handrails are a nice touch- not sure if they will be seen once the model is finished?


I honestly don't know what this is- something to do with minesweeping?

Some PE parts on the lower deck area

next to the kit piece- a nice improvement I think

More PE

I used some of the resin Veteran Models bits here- searchlight controller?

and more PE

This was all done a few days ago and I have pushed on and done a fair bit more but haven't taken any photos yet- will do later today
Cheers and thanks for looking
As previously stated I have been working on the bridge and thought I would post some pics of some of the earlier work
The PE handrails are a nice touch- not sure if they will be seen once the model is finished?
I honestly don't know what this is- something to do with minesweeping?
Some PE parts on the lower deck area
next to the kit piece- a nice improvement I think
More PE
I used some of the resin Veteran Models bits here- searchlight controller?
and more PE
This was all done a few days ago and I have pushed on and done a fair bit more but haven't taken any photos yet- will do later today
Cheers and thanks for looking
-
Timmy C

- Posts: 12460
- Joined: Mon Jan 10, 2005 6:00 pm
- Location: Ottawa, Canada
Re: First Ship model- 1/350 Nagato with extras!
Looking good!
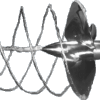
Yep, it's called a paravane. A chain connects it to the ship and I think it works as follows: the paravane's control surfaces ensure that the chain is taut so that when it encounters a mine's chain, the latter will be cut with the former, allowing the mine to float to the surface where it can be disabled by small arms.I honestly don't know what this is- something to do with minesweeping?
De quoi s'agit-il?