Cliffy B wrote:She's really coming together man! Those canvas covered railings are spot on
How did you do the tarps over the GFCSs and guns? Sorry if it was covered already.
Thanks, Mike!
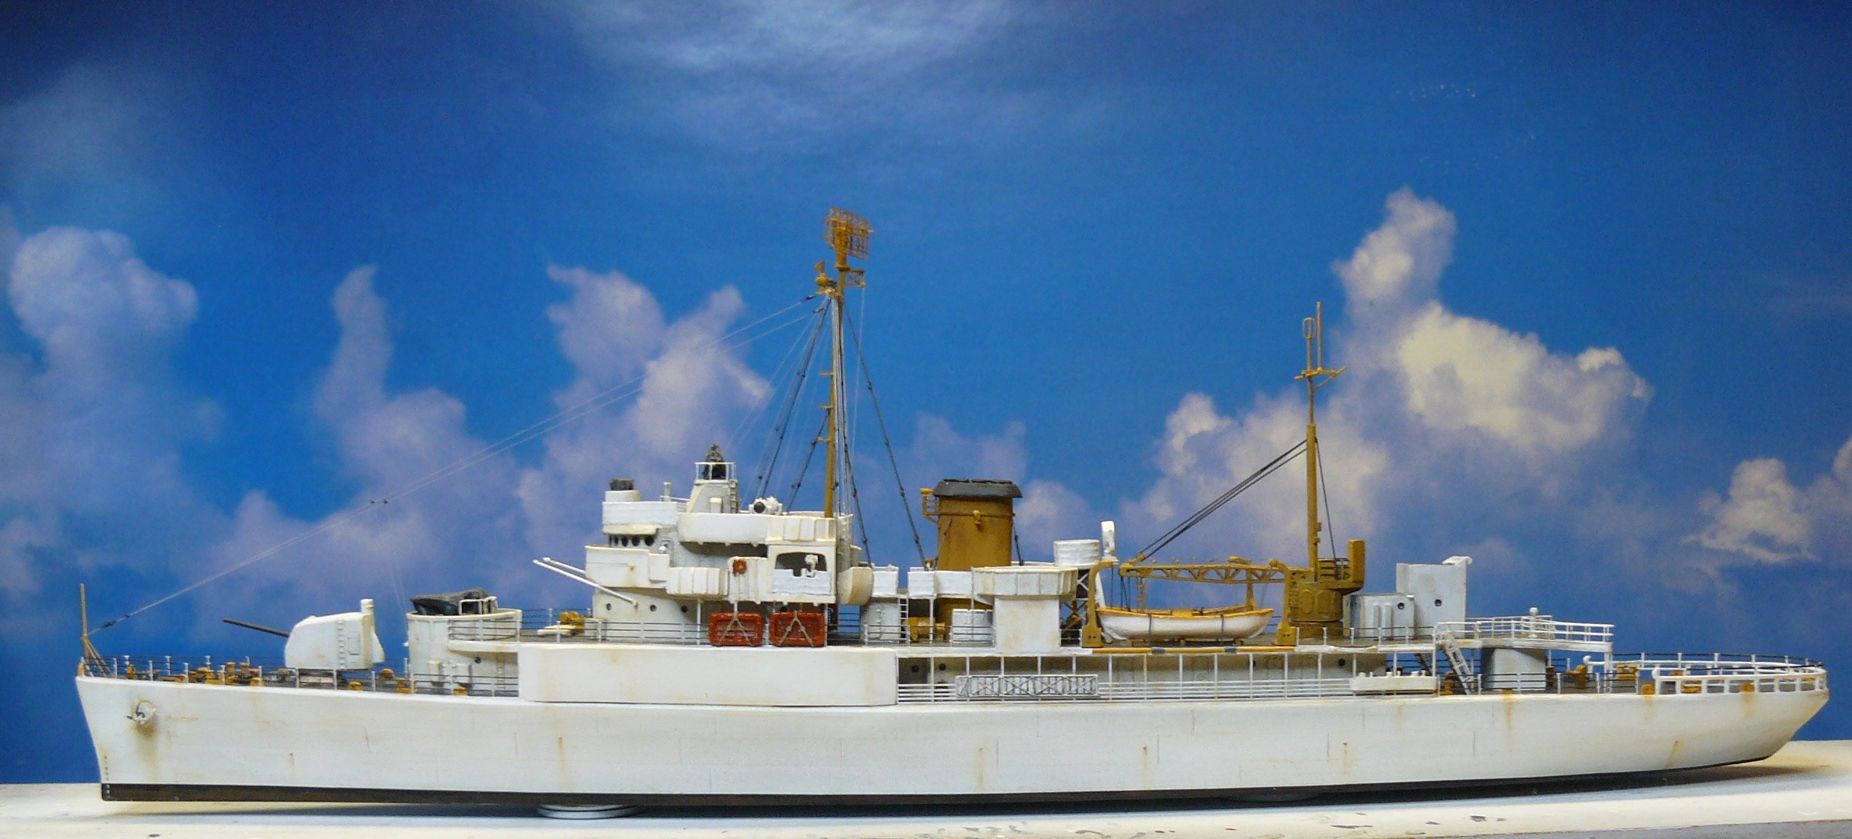
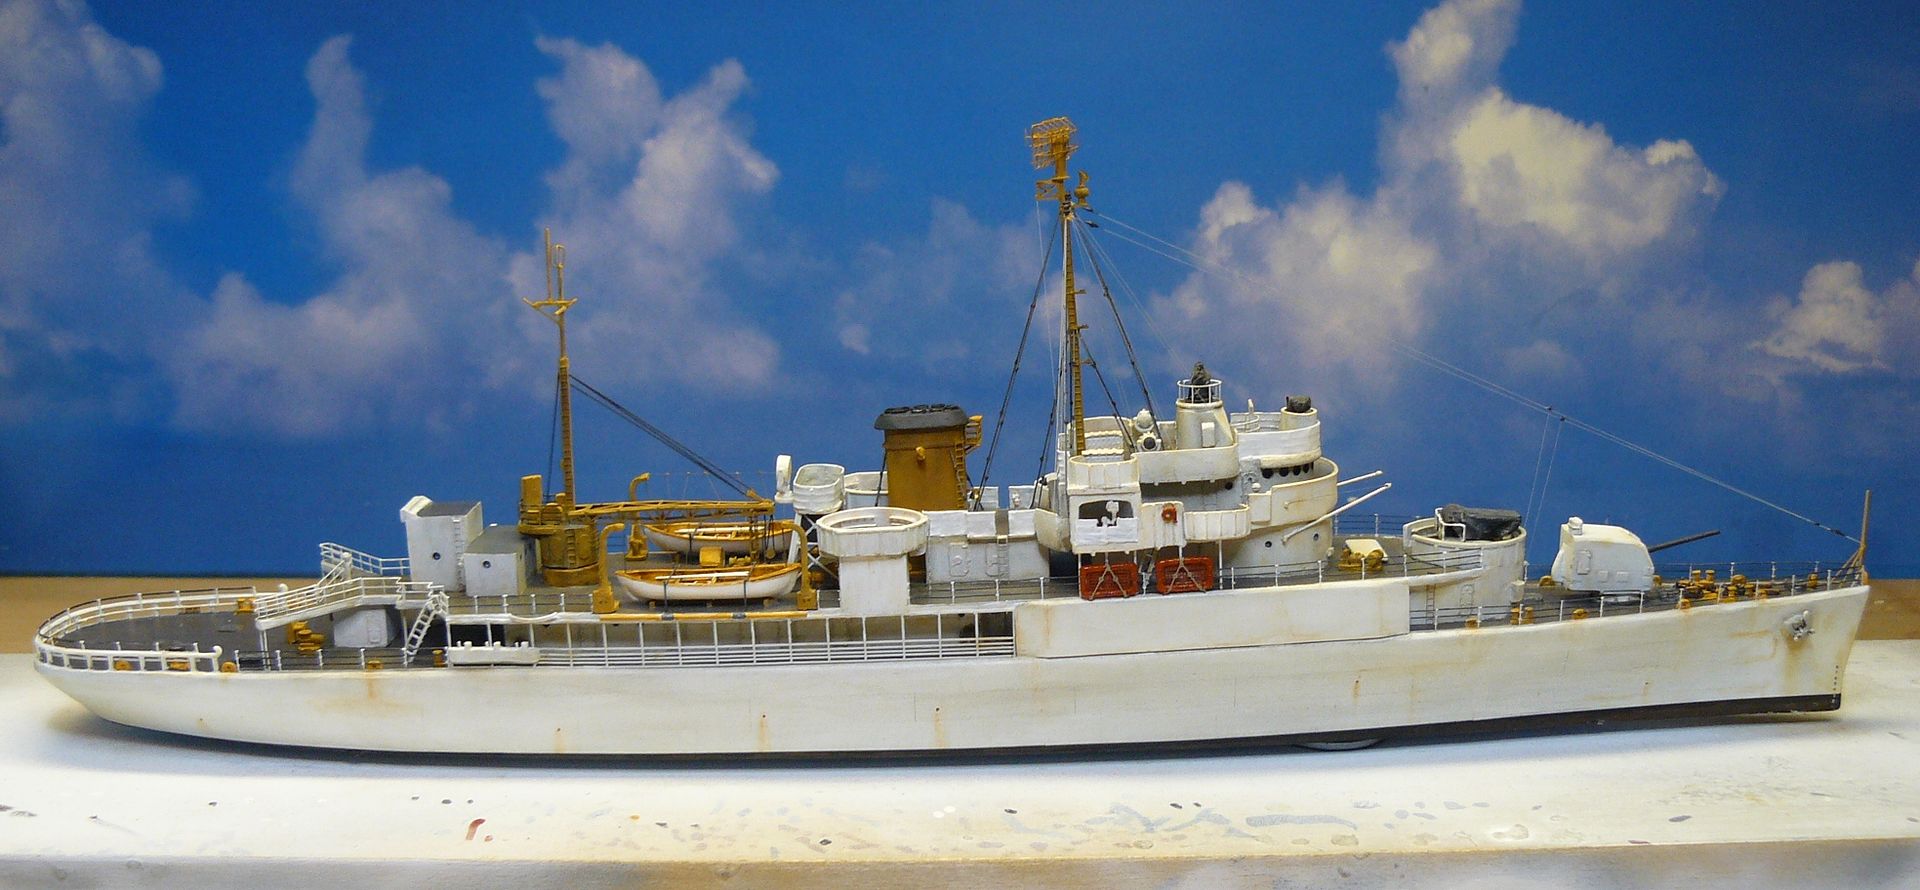
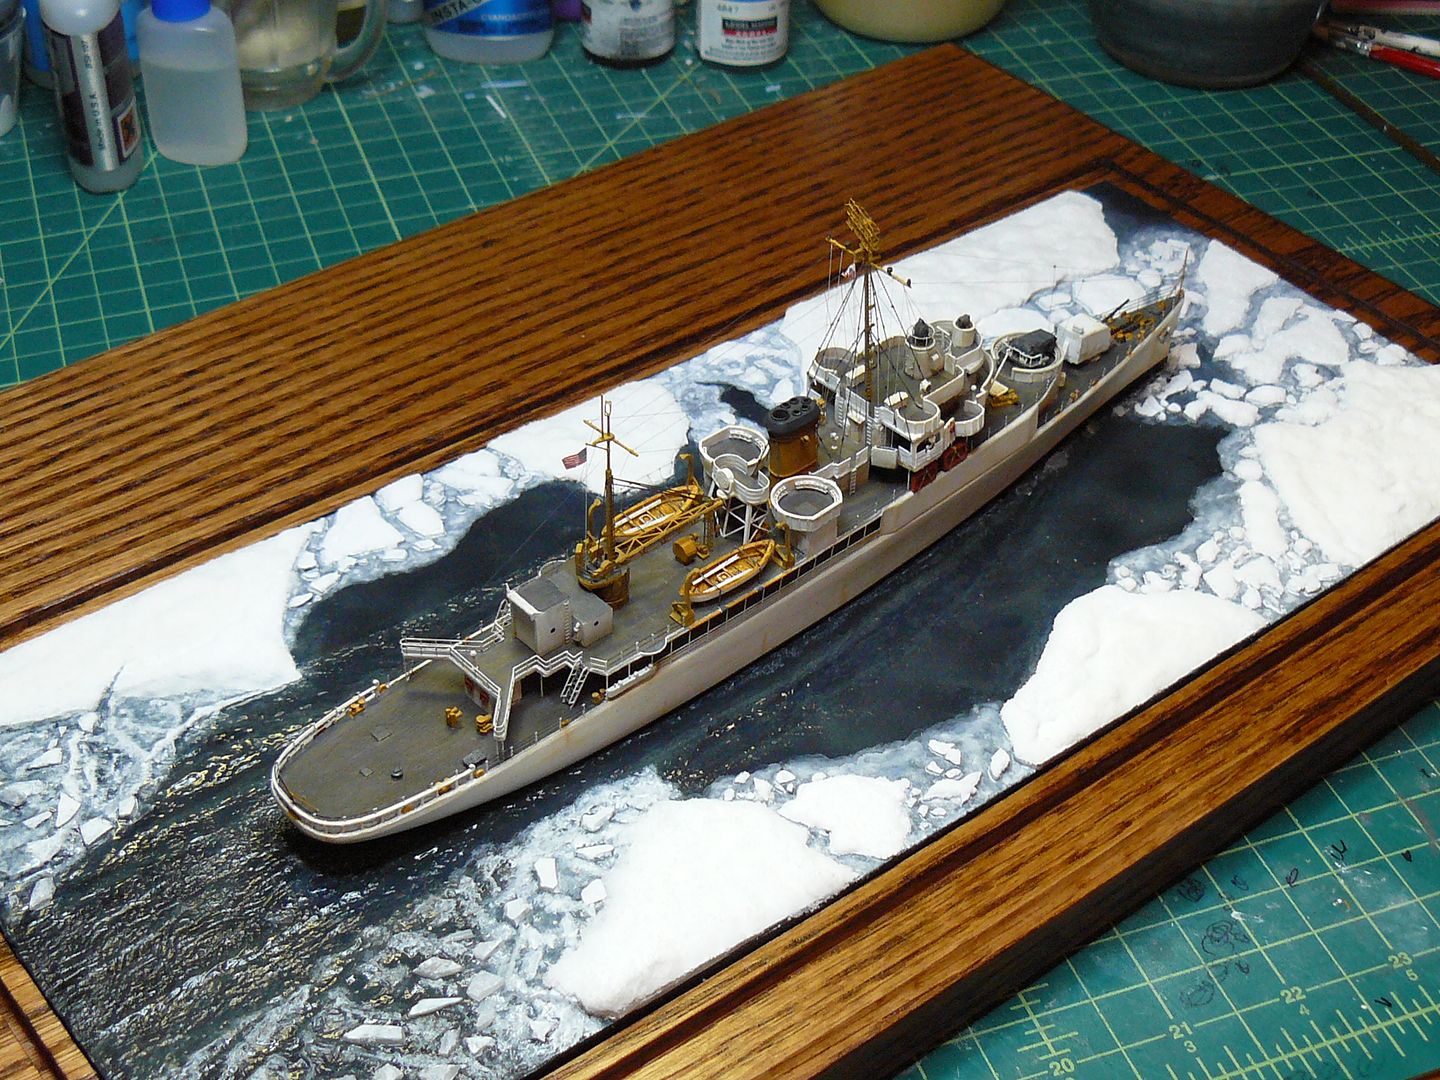
I'm always holding my breath when I do the canvas on the rails. Three-bar rails are easier to do than two-bar rails. Using Krystal Klear and adding a little water at a time to the glue on the rails is a tricky thing, too. With a tiny brush, I use the water to smooth out the glue and to wipe away the overflow around the base of the rails. One wrong move, and the glue can get too, thin and ooze out from between the rails.
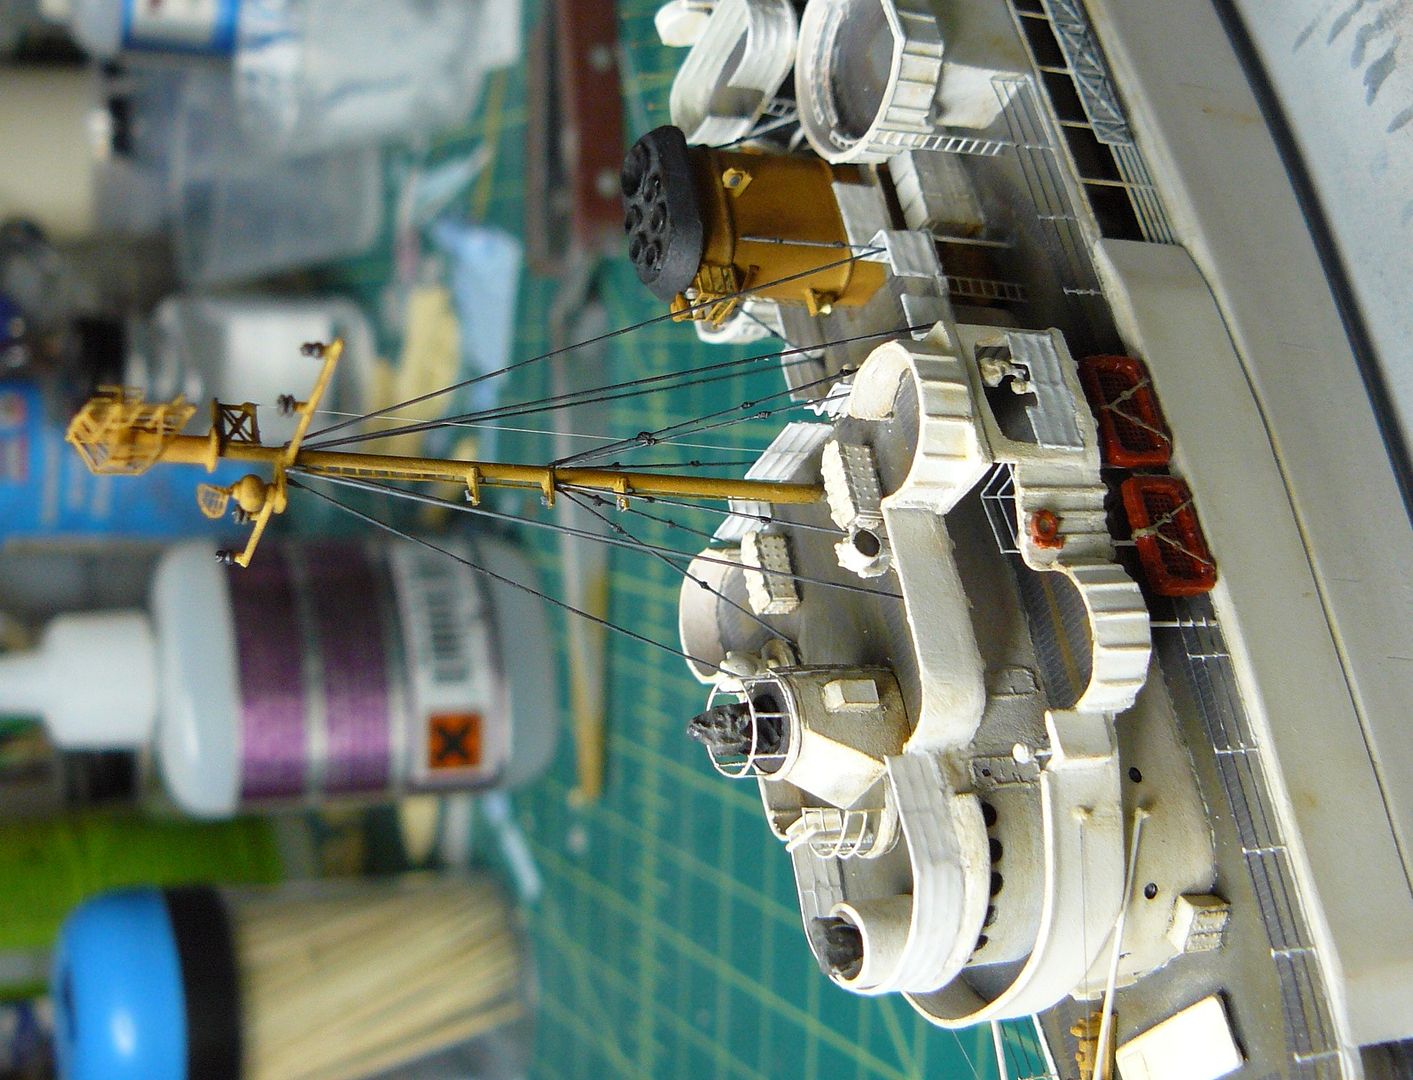
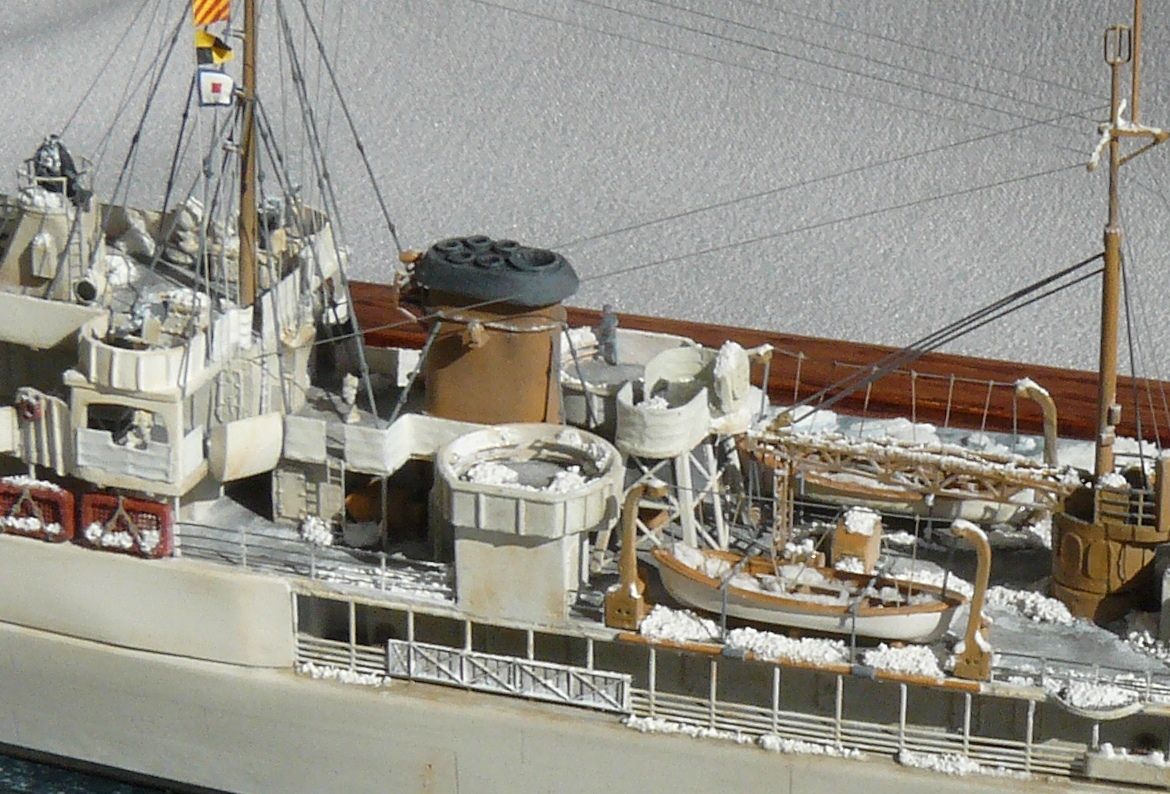
The canvas on the guns and directors is gift wrapping tissue paper with diluted Elmers (white) glue. Not Kleenex type of tissue. I used to use black decal film for such things with Solvaset but, the decal hugged the object(s) beneath too, snuggly. I paint the canvas black or grimey black after it has hardened and then dry brush with Engine Gray and then Gunship Gray. Green Drab is nice as well for the dry brushing.
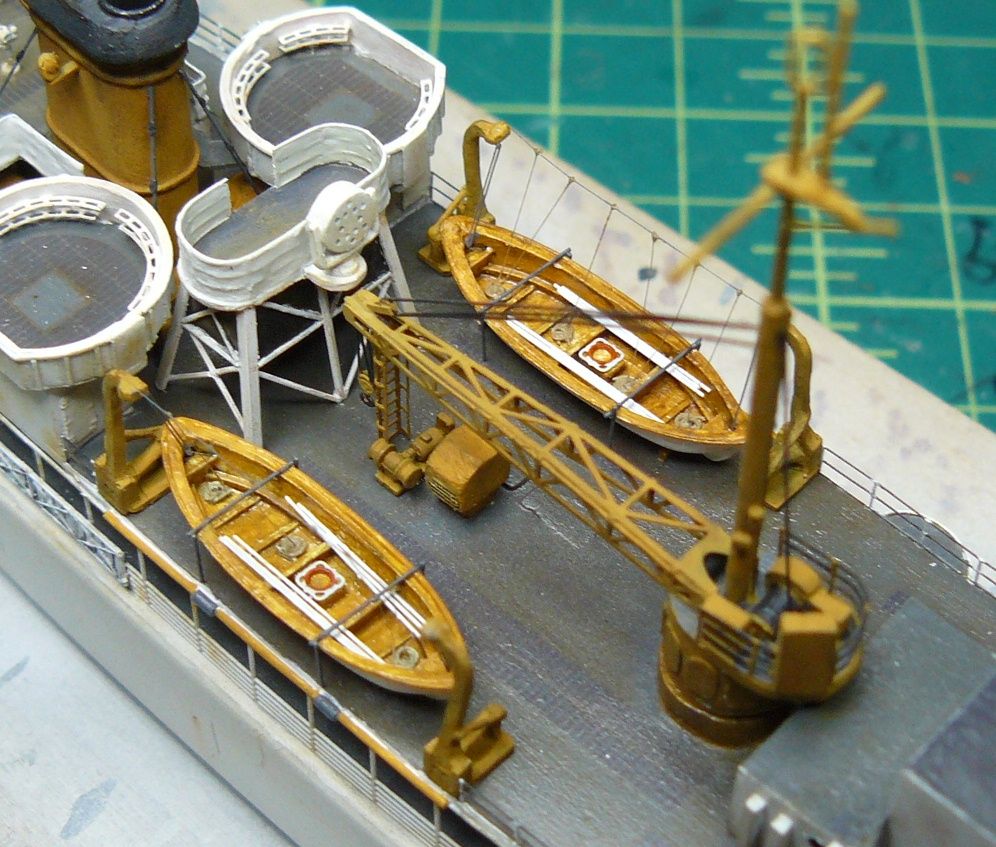
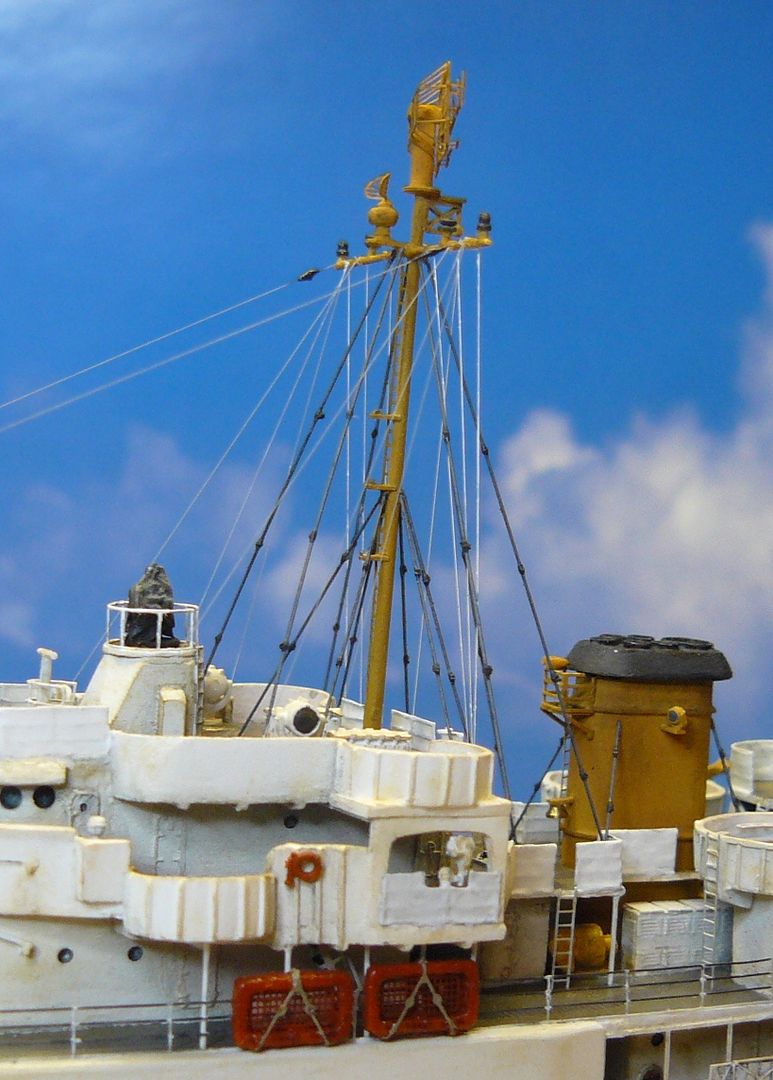
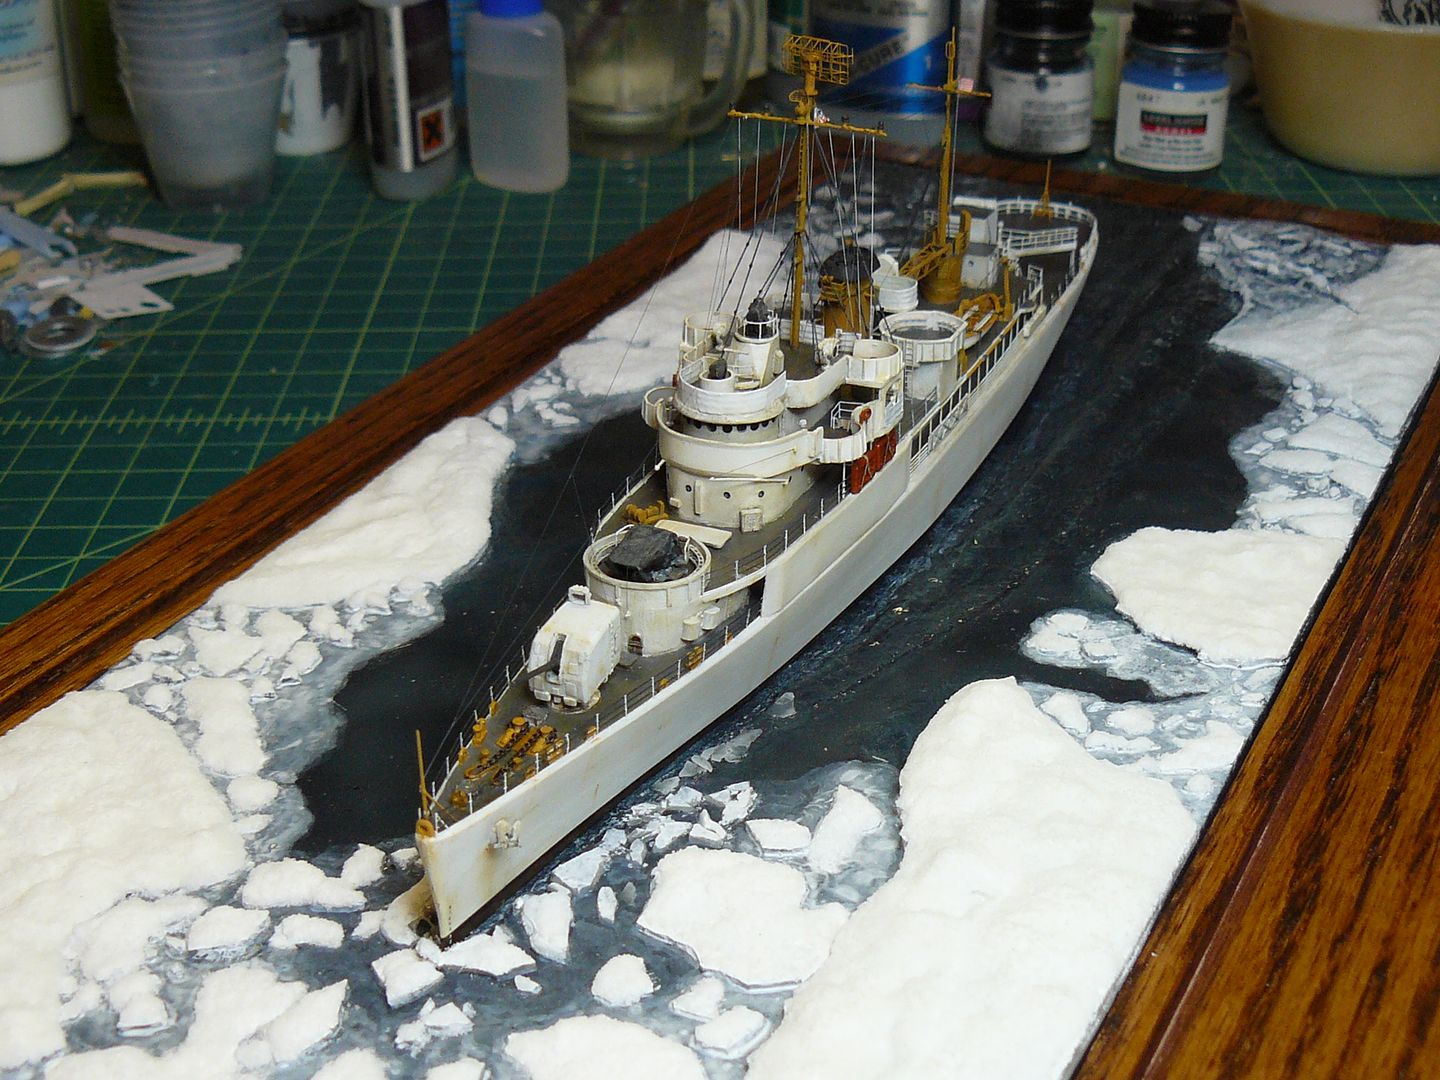
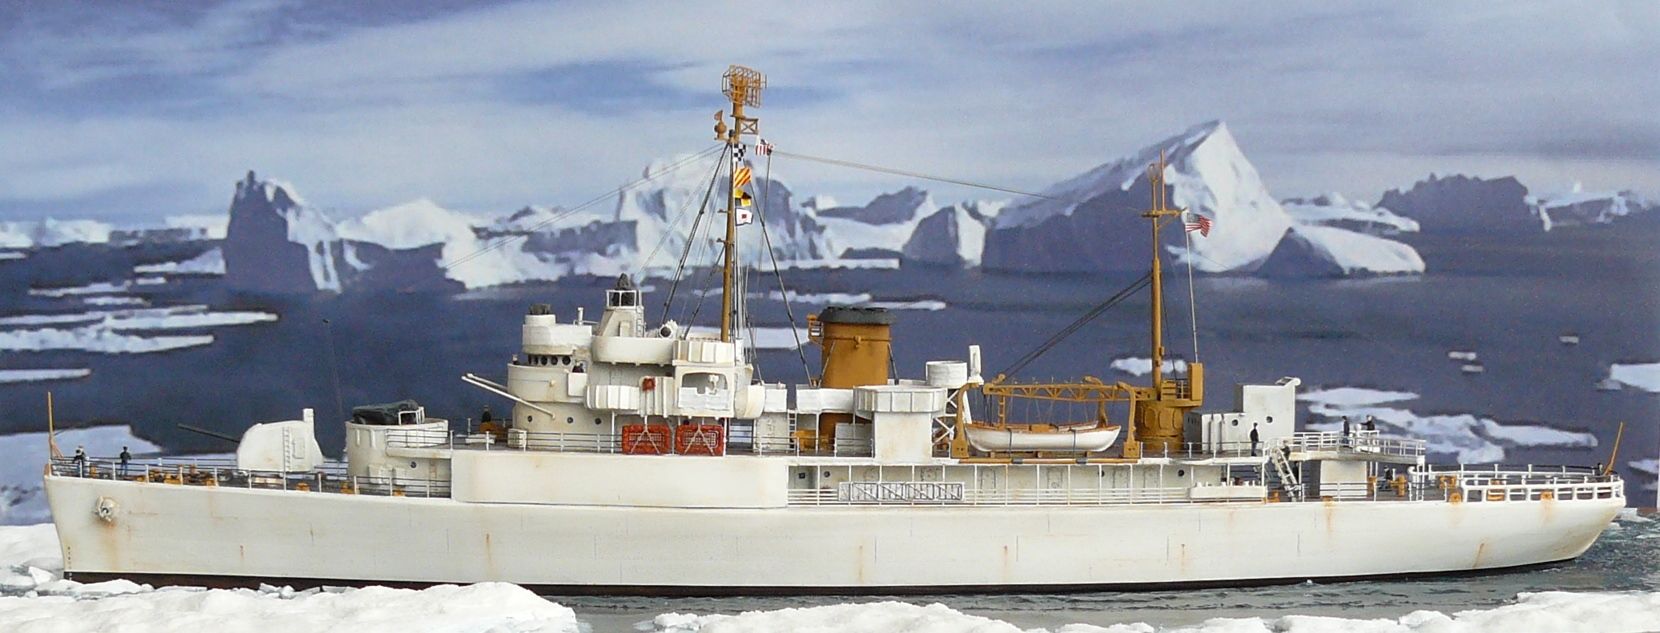
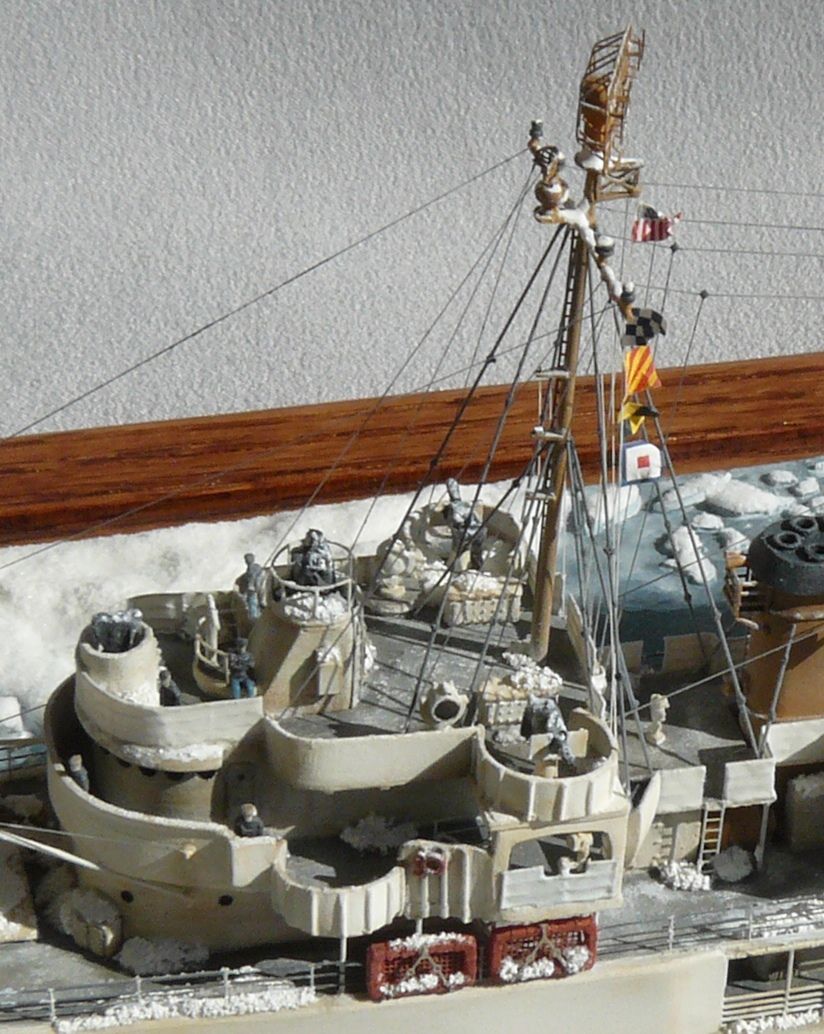
I've added details to the boat deck area. The crane still isn't attached yet but, soon; because I've started rigging the foremast and there'll be antenna rigging between the foremast and the crane mast (Main Mast).
I rigged the boat davits and added tie down bars to the boats. I added the boat "bumpers" (is that what they're called) to the side of the deck. I have previously assembled these separately and then attached them to the ship. This time, I assembled them by attaching each piece to the model, individually.
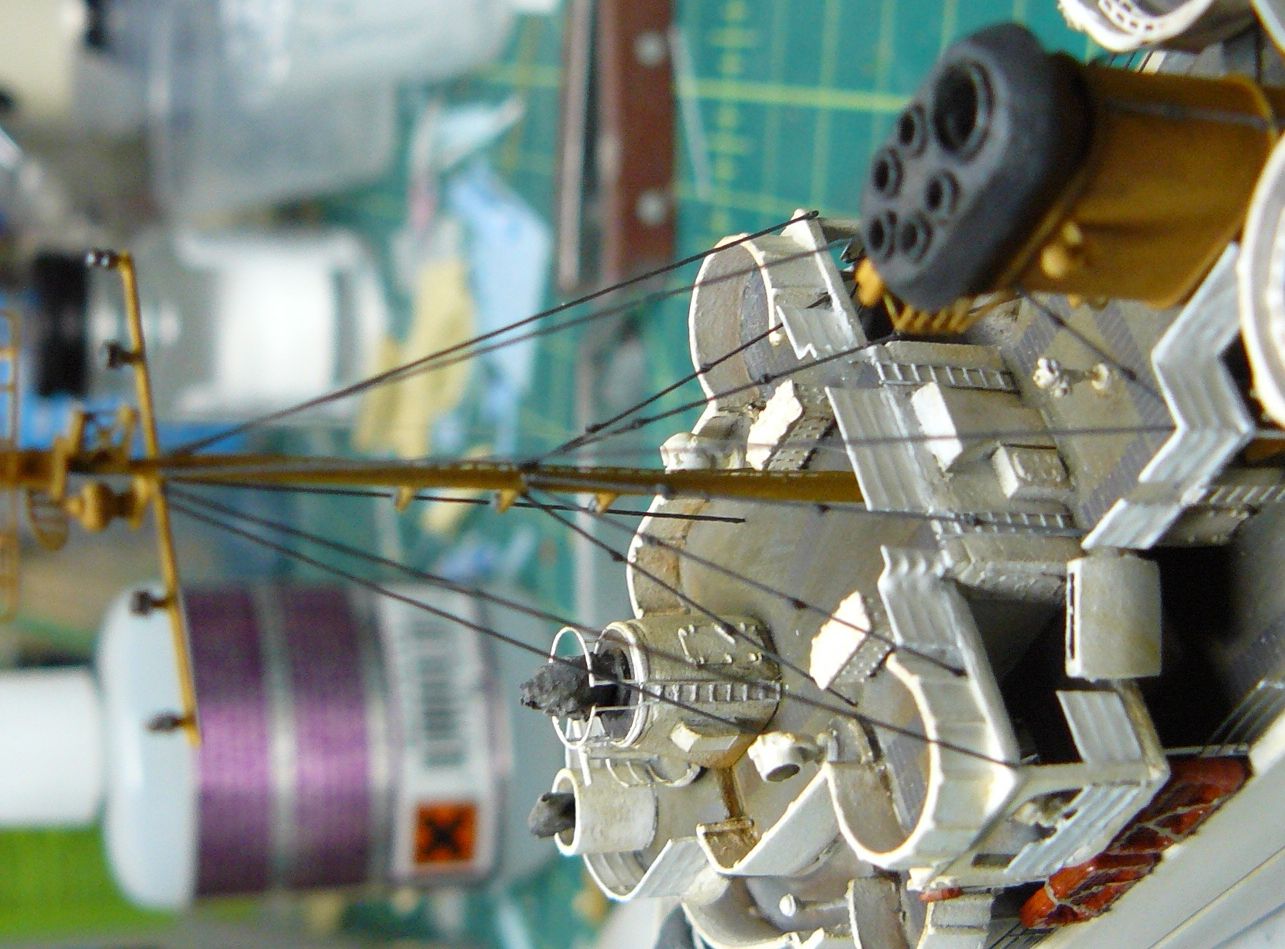
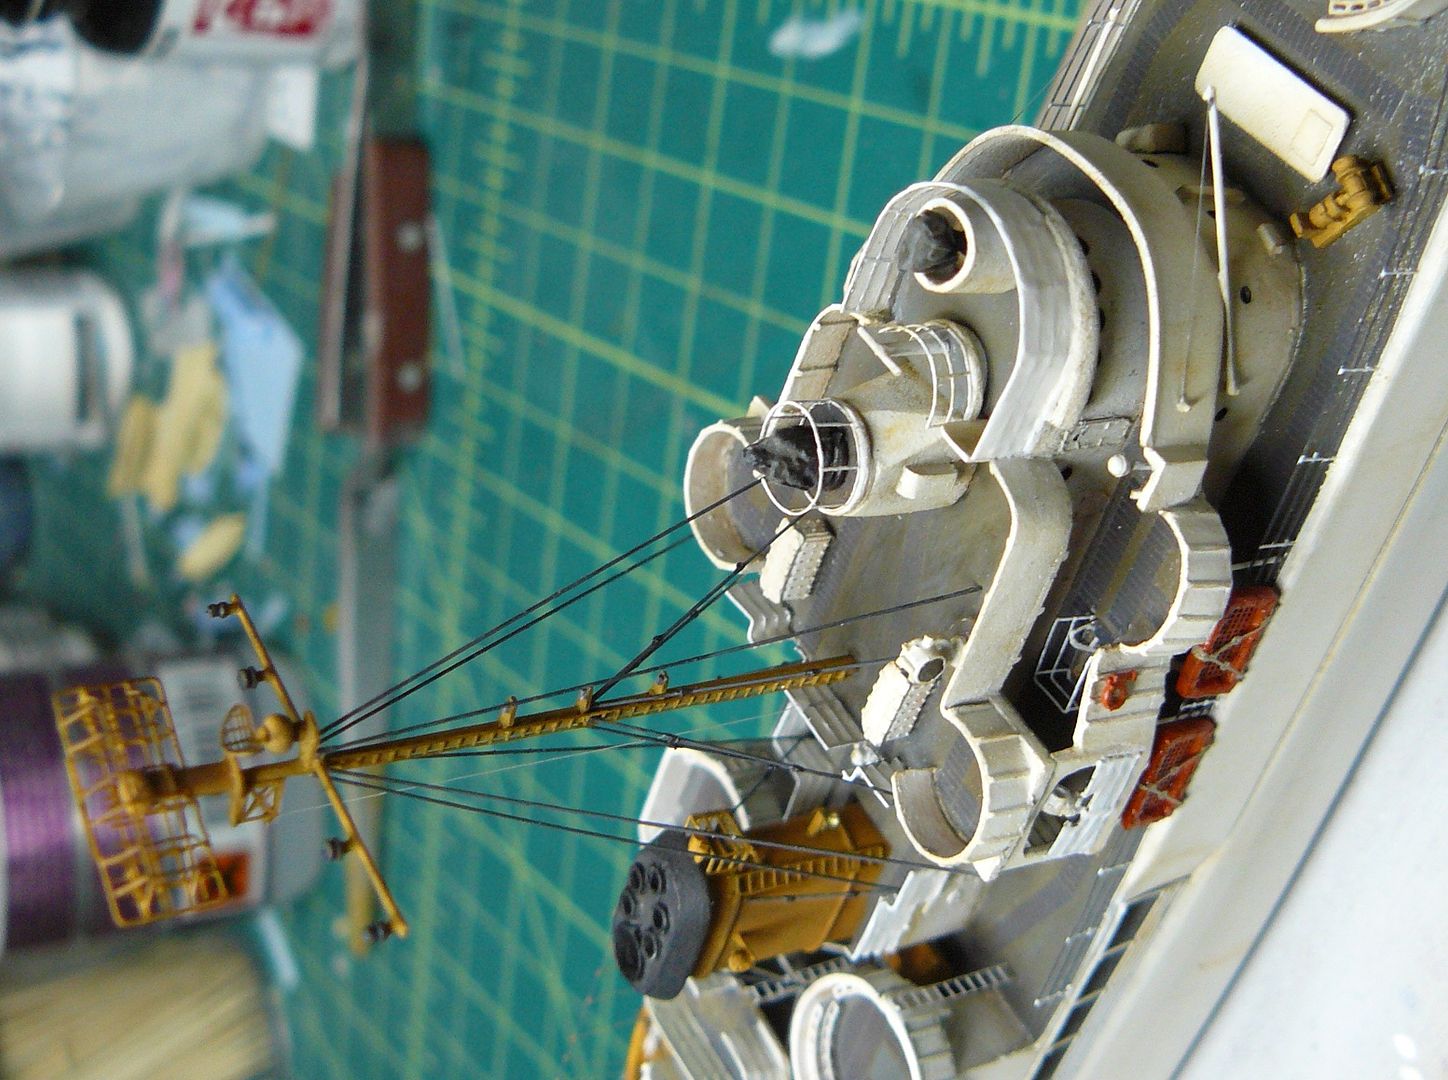
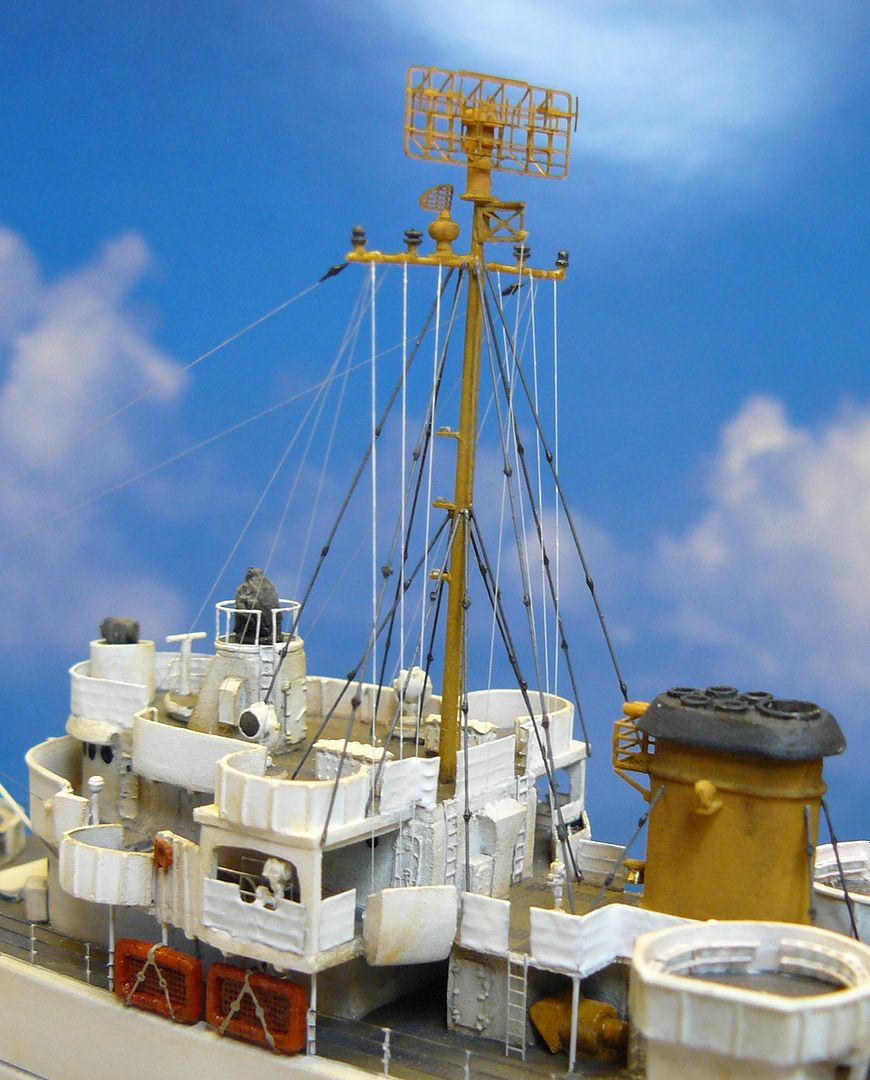
I've attached the foremast and have started rigging it with the upper and lower stays. I still have to add the turnbuckles to the upper stays.
I'm using .008" brass rod for the stays, this time. Before, I've used steel guitar string but, always felt that it was a little too, thick. In the past I've used Krystal Klear for the turnbuckles; just little globs of it. This time, I used CA glue and I seemed to have had better control of the size of the turnbuckles. I paint the brass rod before cutting it to length and attaching it. I'm using Gunship Gray for the stays and black for the turnbuckles.
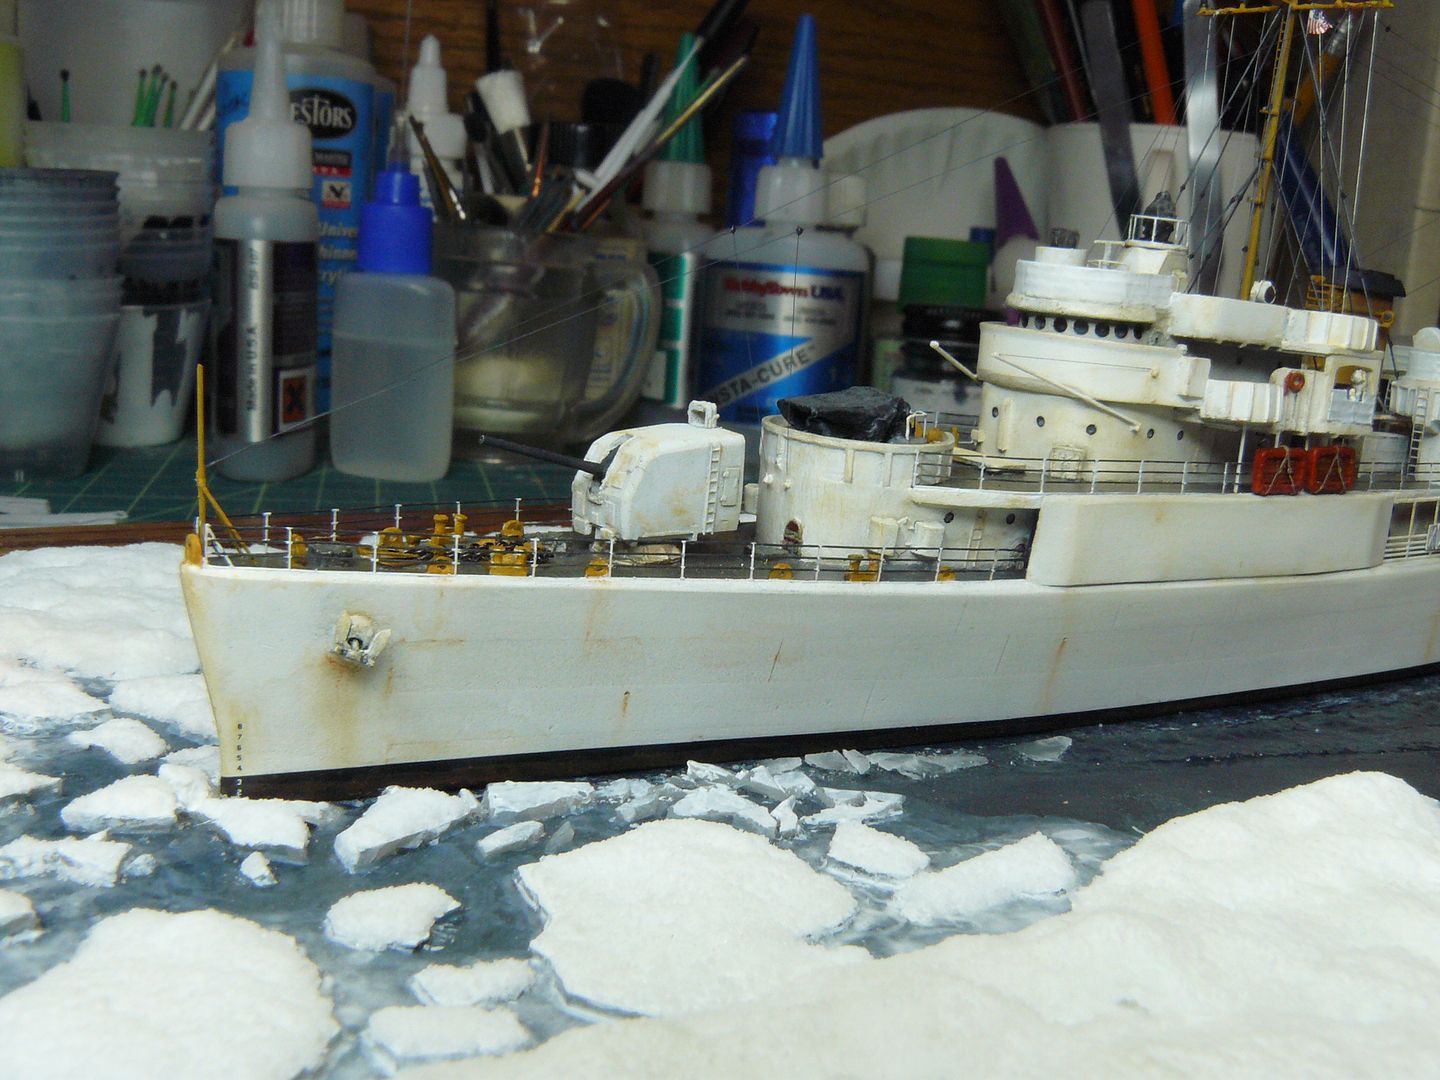
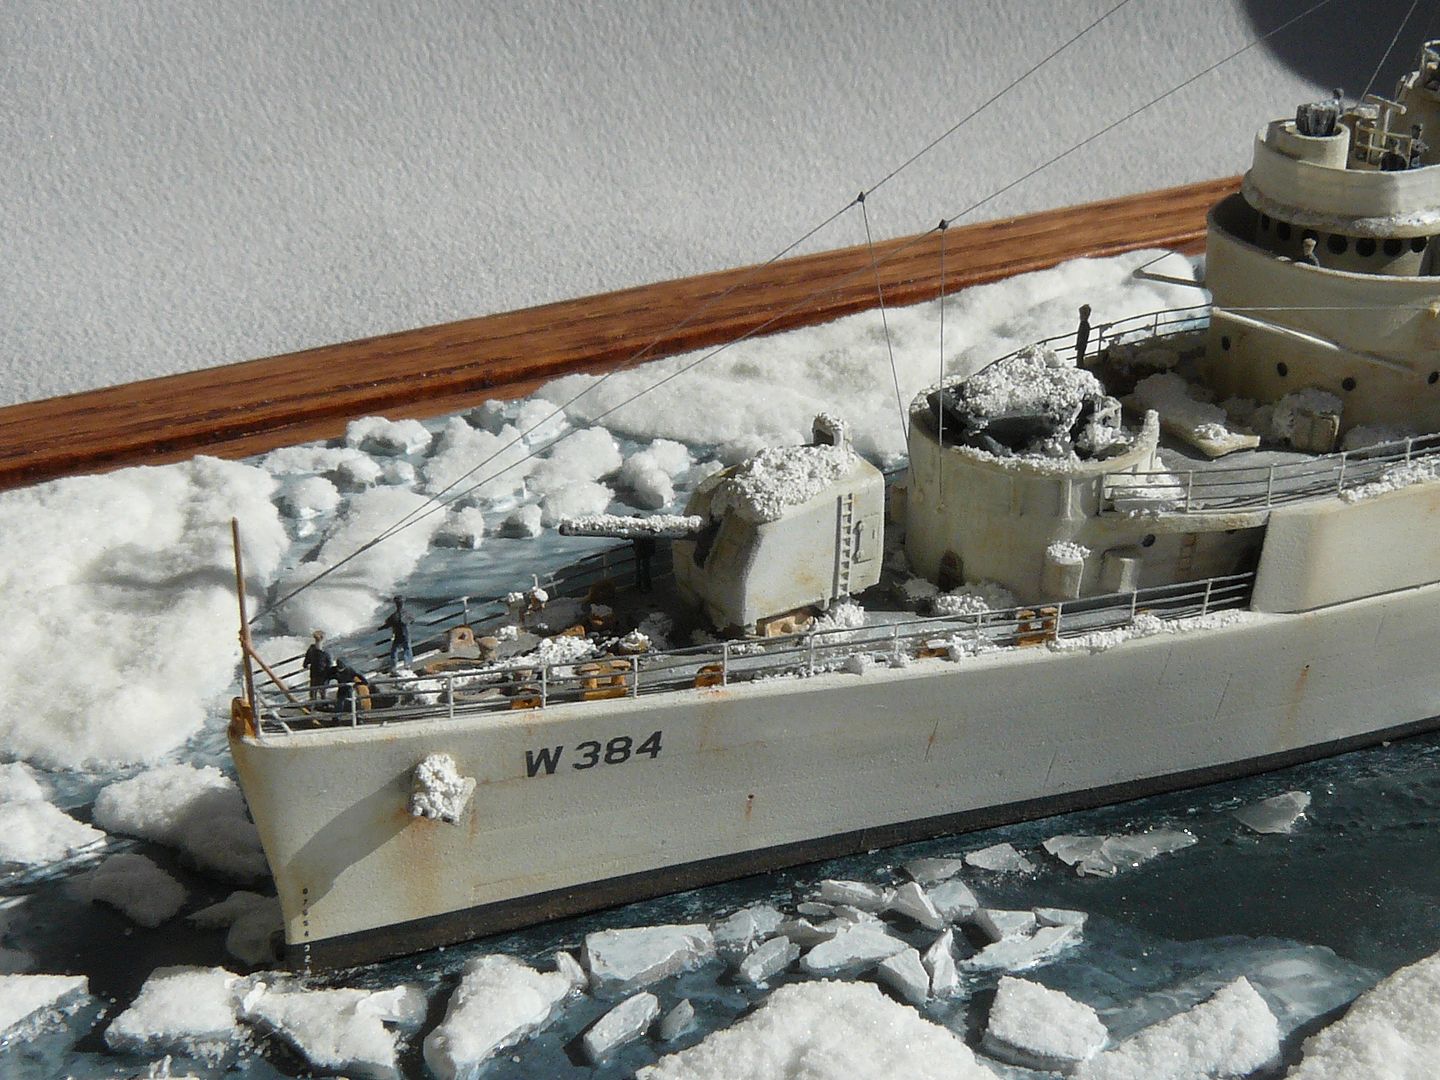
Rigging of the foremast is completed and the 5" gun turret attached. Now to permanently attach the crane and do its rigging. The ensign staff still remains to make and rig an antenna to it. Then two 20mm guns with canvas on the O3 Level.
Carl
If you ever want something to do, you could come over and re-rig all my kits.
God grant me the courage not to give up what I think is right even though I think it is hopeless. ~ Chester W. Nimitz ~
My Builds ~ http://ussnorthcaroilna.shutterfly.com/
Bigdaddy Mark wrote:Carl
If you ever want something to do, you could come over and re-rig all my kits.
Mark,
I actually had to re-rig this one. I got my brand new X-acto blade too, close to the antennas stretching from the yardarm to the jackstaff and clipped one side off. I had to re-do the whole thing, again.
I need to get some black sprue. I've been playing with rigging for a few days now, and I think I'm trying to make it harder than it should be.
God grant me the courage not to give up what I think is right even though I think it is hopeless. ~ Chester W. Nimitz ~
My Builds ~ http://ussnorthcaroilna.shutterfly.com/
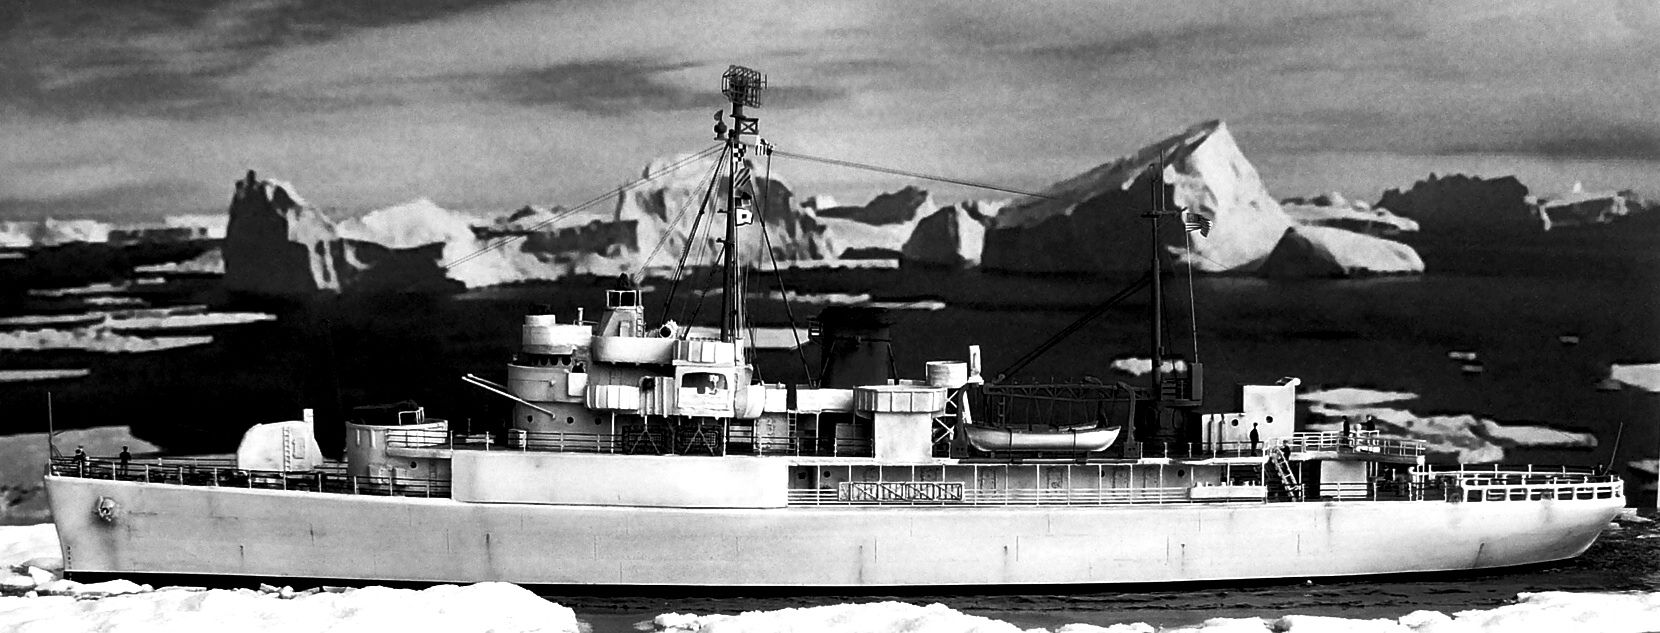
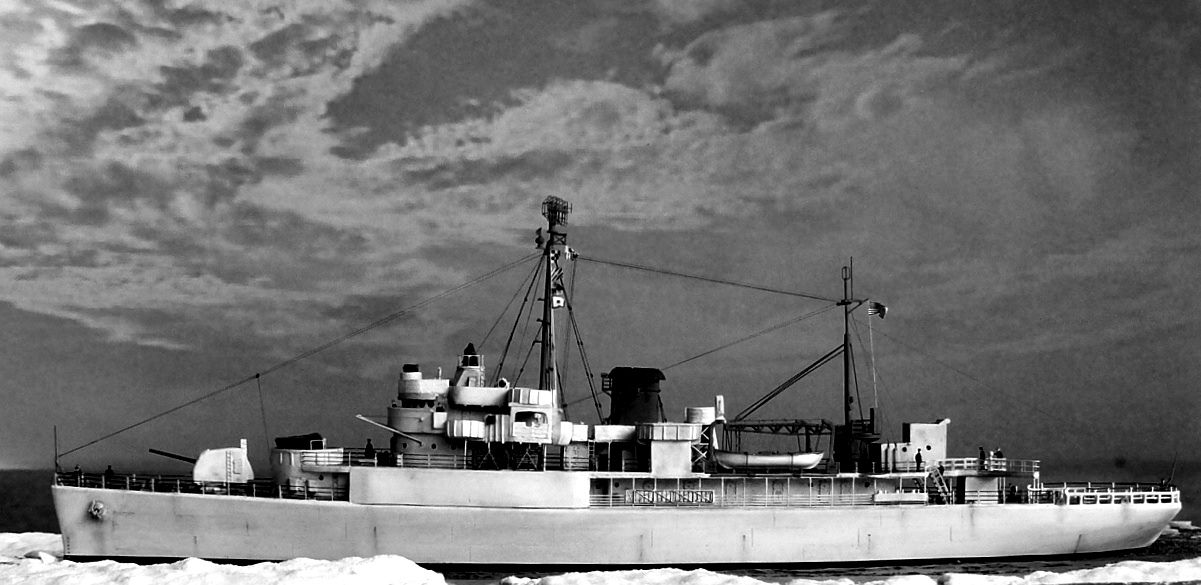
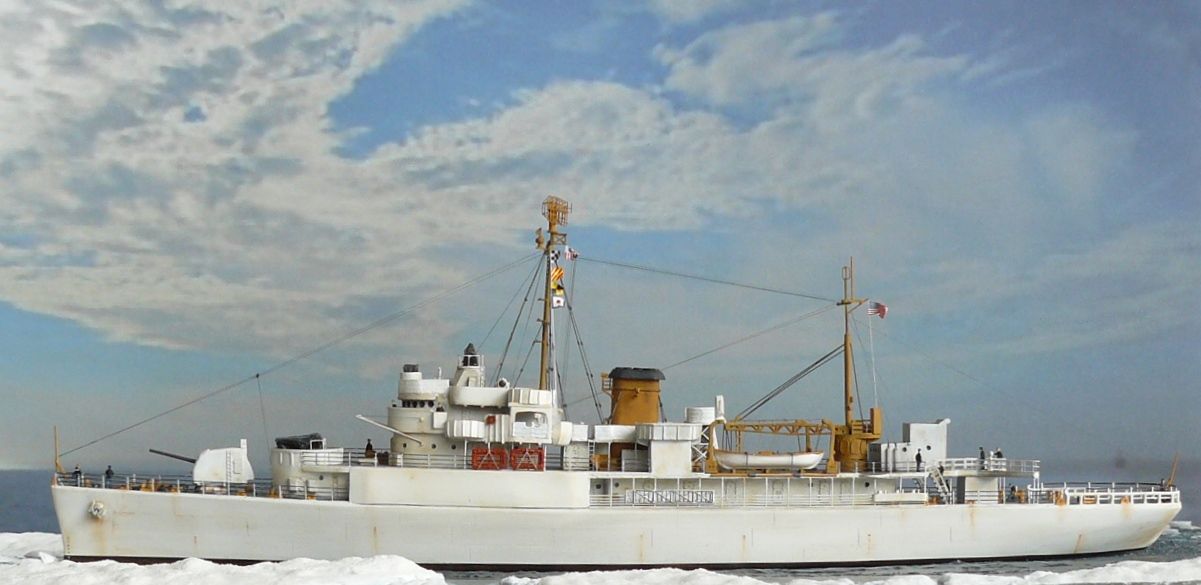
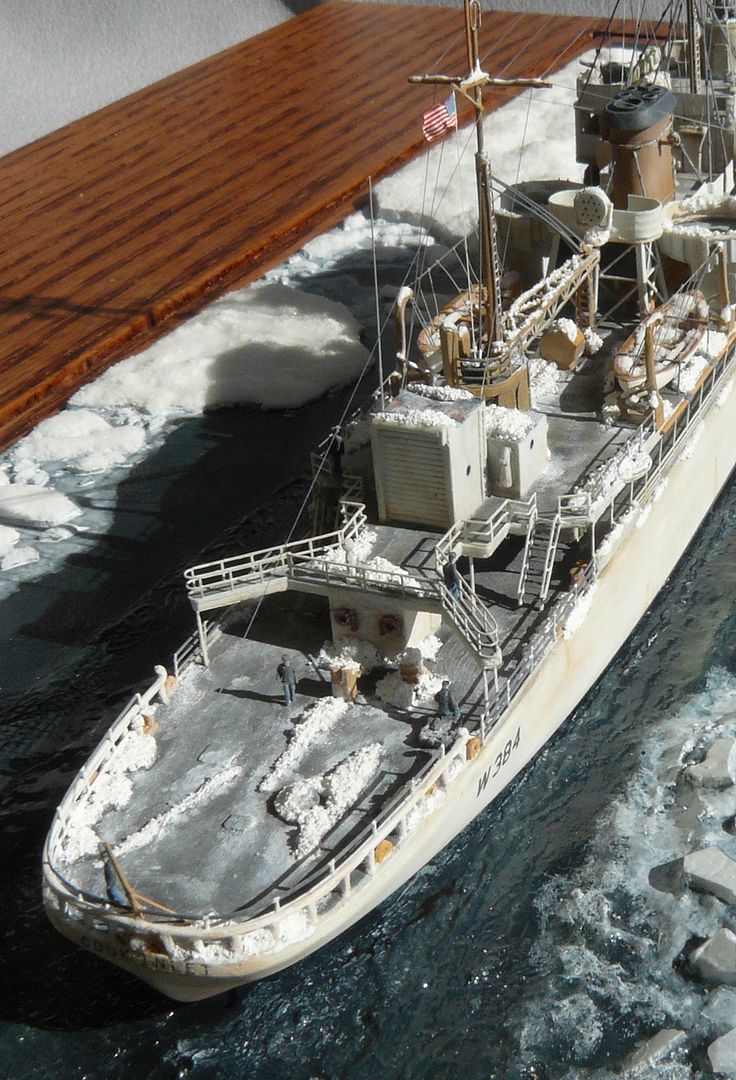
Even before the dio is done, I'm experimenting with the photography. I am finding it more difficult to fool the eye because I haven't quite found the right background pic. The ice in the water, versus an empty ocean, is tougher to match up with a background photo.
Carl
The first two shots look OK. I like the B&W one the best, but with a little photo shop work I think you can lighten up the ice to match yours.
God grant me the courage not to give up what I think is right even though I think it is hopeless. ~ Chester W. Nimitz ~
My Builds ~ http://ussnorthcaroilna.shutterfly.com/
Thank you, Mark! I don't have Photo Shop but, I'll see about trying to enhance the background photos before printing them. I print them out on legal size presentation paper. That's the longest that my printer will do. I wish that it could do banner paper.
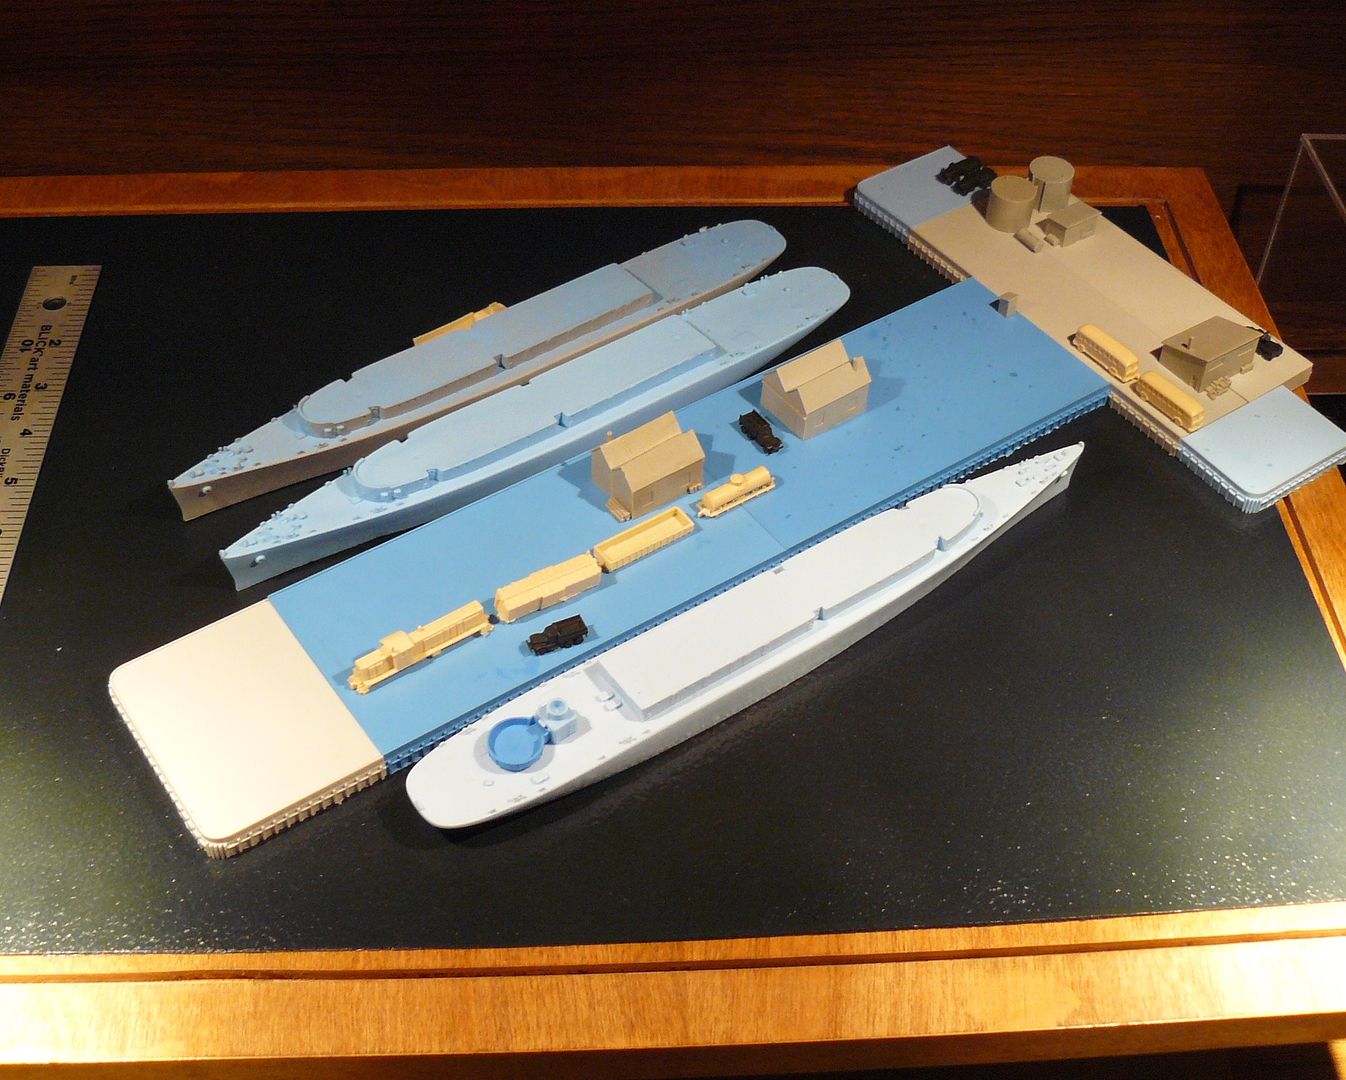
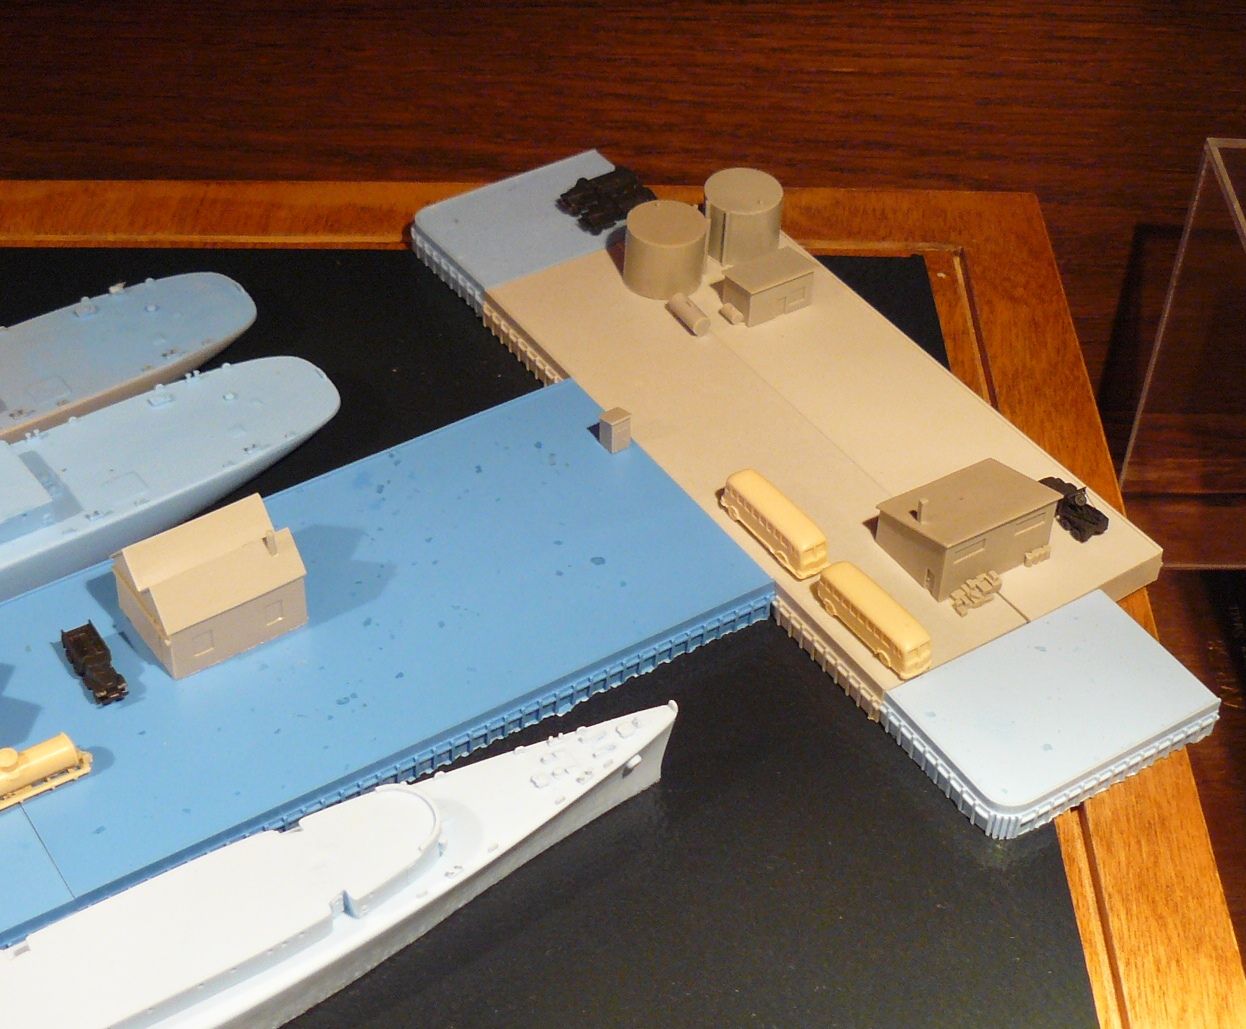
Here, I'm playing around with the layout for my next AVP project. I want to display all three ships of "The Little White Fleet" which served as flagships for COMIDEASTFOR in the 1950's and 1960's. USS Duxbury Bay AVP-38, USS Greenwich Bay AVP-41 and USS Valcour AVP-55.
(I'll create a new base with the dimension indicated by the postion of the ruler.)
Nice Dock Set, although the odd colored ones look a little stange
Harry
BattleFleet Kits, PE & Decals
Alliance PE & Kits
Orange Hobby
Lifecolor Naval Paints
Testors Naval Paints
WEM
ABER Barrels
Atlantic Models PE
LionRoar PE
ModelArt Available from our Online Store http://www.battlefleetmodels.com
You very well know i live in the tropics- though its been cool here lately, everytime i look at your latest works here or at the Photobucket/FB account i feel as if im actually in a cold environment yet having a great feeling of warmth by just staring at your creation! the level of craftmanship you have done for both the dio and of course more importantly the ship is simply jaw dropping! bravo zulu!