Lexingtons last battle, 1//700

Moderators: BB62vet, MartinJQuinn, JIM BAUMANN, Jon, Dan K

User avatar
JIM BAUMANN
Posts: 5681
Joined: Mon Jan 10, 2005 5:30 pm
Location: Nr Southampton England

Re: Lexingtons last hours

Post by JIM BAUMANN »

ha!

Your skills as a renowned figure modeller are showing through....

Very good indeed--

Top modelling!


Jim Baumann :thumbs_up_1:
....I buy them at three times the speed I build 'em.... will I live long enough to empty my stash...?
http://www.modelshipgallery.com/gallery ... index.html

IPMS UK SIG (special interest group) www.finewaterline.com
marijn van gils
Posts: 2686
Joined: Tue Feb 06, 2007 10:24 am
Location: Belgium

Re: Lexingtons last hours

Post by marijn van gils »

I forgot to mention about the glue spots.

The secret is the Tamiya glue in a square glass jar with green cap.
It is a plastic cement that is very thin and leaves no residue. After putting the part in place (or lightly tacking in place with some superglue), you apply the glue with a fine brush to the joint, and cappillary action draws the glue in the join. It simply melts the plastic parts together but has no "gluing" components and therefore leaves no residue. It is very powerful, but evaporates very quickly which makes it perfect for gluing thin items like sprue without melting them too much and thereby damaging them.
Where you apply it, the surface canlook a bit shinier, so in reality you can see some "glue spots" on this model too, but it is barely noticeable and doesn't matter anyway because it is not visible at all after painting.

I love this this glue!

Marijn
marijn van gils
Posts: 2686
Joined: Tue Feb 06, 2007 10:24 am
Location: Belgium

Re: Lexingtons last hours

Post by marijn van gils »

Haha, simultaneous posting! :)

Thanks Jim!
I must say your work is a major inspiration for me to try something with ship models too. So thansk again! :)

Marijn
User avatar
PetrolGator
Posts: 2353
Joined: Fri Jun 22, 2012 12:02 pm
Location: Herndon, VA

Re: Lexingtons last hours

Post by PetrolGator »

marijn van gils wrote:Haha, simultaneous posting! :)

Thanks Jim!
I must say your work is a major inspiration for me to try something with ship models too. So thansk again! :)

Marijn
For what it's worth, your detailed approach is an inspiration to another generation of modelers.
- Chris

1/700 Saratoga w/Pontos (Needs paint)
1/700 Potato w/Kurama (On hold)
1/700 Murdertorpedoboat Ooi
User avatar
Devin
Posts: 2498
Joined: Mon Jan 10, 2005 10:46 am
Location: Hoboken, NJ
Contact:

Re: Lexingtons last hours

Post by Devin »

If I may ask, how do you attach fine brass wire to the stacks, as in the below photo, without excess glue residue? Are you using Future or some similar product as an adhesive?
marijn van gils wrote:
Image
We like our history sanitized and theme-parked and self-congratulatory, not bloody and angry and unflattering. - Jonathan Yardley
marijn van gils
Posts: 2686
Joined: Tue Feb 06, 2007 10:24 am
Location: Belgium

Re: Lexingtons last hours

Post by marijn van gils »

Thanks guys!

On the stack, the only brass wire used is the yardarm (sanded while turning in a Dremel to taper) and small flagpole at the top rear , and the range light boom at the port side centre top. All the other "brass-coloured" long thin items consist of stretched sprue: the rails and conduits on the surface of the stack, the strengthening ribs on the splinter shields, and the support bars under the platforms. They only look like brass because the plastic is tan coloured.

The main advantage is exactly the ease of gluing. It allows me to use plastic cement instead of superglue. I explained how I glued the "conduits" and which glue to use above. For support bars, I use a similar system:
- after dryfitting and cutting to correct lenth, I tack one side in place with a very small amount of gell superglue. If there is one side that needs attaching to resin or metal, this is the side I will choose.
- I move the other end to the correct location, holding the entire model in such an angle that gravity helps keeping the support bar in place.
- next I apply the Tamiya green cap plastic glue to the second end.
- finally I apply the same plastic glue to the first side to strengthen that join. If one side is attached to metal or resin, I use liquid superglue, applied with very thin copper wire, to strengthen the join. If both sides are attached to metal or resin, I use superglue for everything. If there are any glue spots (frequently with superglue), I scrape them of carefully with a sharp scalpel.

Other advantages are ease of obtaining very fine diameters, and ease of cutting (especially handy for cutting the splinter shield ribs to length AFTER gluing oversized pieces in place).

Maybe you noticed I prefer to paint as late as possible, much later than most ship modellers. I just inherited this habit from my armour and figure modelling, but it does make it possible to be very flexible during construction, and to be messy but be able to "clean up" the mess by scraping away any glue spots or other mess.

Hope this helps!

Marijn
Last edited by marijn van gils on Tue Mar 11, 2014 5:03 am, edited 1 time in total.
User avatar
Apophysis
Posts: 164
Joined: Sun Sep 02, 2012 12:36 am
Location: Germany

Re: Lexingtons last hours

Post by Apophysis »

What an amazing detailwork! Love it!!

Regards
Dirk
UNSERE KRIEGSMARINE!
marijn van gils
Posts: 2686
Joined: Tue Feb 06, 2007 10:24 am
Location: Belgium

Re: Lexingtons last hours

Post by marijn van gils »

Thank Dirk!

Meanwhile, I also got the hull ready for painting. Only some of the small stuff is left to do: all the smaller AA-guns (about 60 of them), directors, rangefinders, searchlights, FC antenna, port boat davits, and the safety nets. All of those will be installed after painting. The funnel, island and crane are left separate for painting too and are now only tacked in place with Blue-tack.
Image

Image

Image

Image

Image

Image

Image

The 5inch guns. I used the kit parts, with turned brass arrels (the smallest I've ever seen! :) ), Gold Medal Models railing, and some copper wire, streched sprue and Flyhawk PE detail. You can also see how the splinter shields were thinned and the ribs redone with stretched sprue. Gussets were added under the platforms. Note also the degaussing cables, made with 1.6mm fishing nylon line.
Image

Image

And some more details:
Image

Image

The firehoses on the forward part of the flight deck, inspired on photo's from the event. They are made from 0.2mm copper wire, annealed in the gas coocking fire to remove its' "spring".
Image

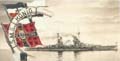
Layout of the planes on the rear part of the flightdeck. The aircraft are not detailed yet (not even cleaned up!), I just placed them with bluetack to check out their position and number. I did this as much as possible according to photo's of the event, but I took the liberty to have one hanging in the safety nets and another on it's nose from an explosion. If you see anything wrong here: please speak up now or hold your peace forever! :) Now I can stil change the layout...
Image

All comments are welcome!

Best wishes,

Marijn
User avatar
PetrolGator
Posts: 2353
Joined: Fri Jun 22, 2012 12:02 pm
Location: Herndon, VA

Re: Lexingtons last hours

Post by PetrolGator »

Did you attach those fire hoses prior to painting?!

Your Lex looks spectacular even without a coat.
- Chris

1/700 Saratoga w/Pontos (Needs paint)
1/700 Potato w/Kurama (On hold)
1/700 Murdertorpedoboat Ooi
marijn van gils
Posts: 2686
Joined: Tue Feb 06, 2007 10:24 am
Location: Belgium

Re: Lexingtons last hours

Post by marijn van gils »

Thanks Chris!

Yes, with all the bends, I could only think of making them from copper wire, which requires CA glue. For a correct look, it is important that they lie flat on the deck, so I had to glue them along most of their length. Because of my clumsyness, I have to scrape away a lot of excess glue to get a clean result, which would ruin a paintjob. Besides, I find it mucht easier to properly paint, shade and highlight them in situ.

I wish I could have done the (stretched sprue) arrester wires after painting though, but the hoses are lying over them...
User avatar
Devin
Posts: 2498
Joined: Mon Jan 10, 2005 10:46 am
Location: Hoboken, NJ
Contact:

Re: Lexingtons last hours

Post by Devin »

Fantastic work, even unpainted. The fire hoses and random spotting of the planes really gives it a look of authenticity.
We like our history sanitized and theme-parked and self-congratulatory, not bloody and angry and unflattering. - Jonathan Yardley
User avatar
Quincy
Posts: 2217
Joined: Fri Apr 08, 2005 9:41 am
Location: Monson, MA.

Re: Lexingtons last hours

Post by Quincy »

Wow!!!! :thumbs_up_1: :thumbs_up_1: :thumbs_up_1: :thumbs_up_1: :cool_1: :cool_2:
Super cool��..


Bob Pink. :wave_1:
User avatar
kylewoody
Posts: 405
Joined: Fri Jun 22, 2012 12:59 am
Location: Shreveport, LA USA

Re: Lexingtons last hours

Post by kylewoody »

:big_eyes:

1/700?! Beautiful, love the hoses across the flightdeck, it will look killer when painted up.

Kyle
User avatar
LE BOSCO
Posts: 2261
Joined: Thu Aug 27, 2009 11:05 am
Location: Paris France

Re: Lexingtons last hours

Post by LE BOSCO »

Hello Marijn


I am speechless ,this is just amazing :thumbs_up_1: congrats for this lexigton,which,I am convinced ,will be a masterpiece
felicitation
Nicolas
marijn van gils
Posts: 2686
Joined: Tue Feb 06, 2007 10:24 am
Location: Belgium

Re: Lexingtons last hours

Post by marijn van gils »

Thanks guys! But a masterpiece, I don't know... :) I'll be already happy if it turnes out close to the image I have in my head. :)

I hope so too Kyle! It is a relatively simple detail that should be a nice contrast from the very busy aft deck, where most of the crew will be abandoning ship and all the planes are, but it should still make this relatively empty part of the deck look busy and attractive enough.

Thanks Devin! I find randomness is one of the most difficult things to achieve when composing something. It takes quite some time and experience, and of course it is always best to use period photo's as guidance. The fire hoses took me multiple hours to position and glue, but since they will be very visible on the finished diorama it is certainly worth it.

Marijn
User avatar
J. Soca
Posts: 2161
Joined: Sun Dec 03, 2006 5:36 pm
Location: About 50 miles away from the Gulf of Mexico ( traveling W is you do so :)

Re: Lexingtons last hours

Post by J. Soca »

This is going to look mighty great when she is on water and tilted a few degrees :thumbs_up_1: awesome job on the spread out hose :thumbs_up_1: :thumbs_up_1:


Jose :wave_1:
J. Aguilar
Posts: 87
Joined: Mon Sep 10, 2012 12:01 pm
Location: Madrid, spain

Re: Lexingtons last hours

Post by J. Aguilar »

Very nice job Marijn. what about your fantastic dioramas?


cheers


JAM
marijn van gils
Posts: 2686
Joined: Tue Feb 06, 2007 10:24 am
Location: Belgium

Re: Lexingtons last hours

Post by marijn van gils »

Thanks guys!

Yes, she will be tilted and a bit down at the bow. There will be a lot of figures on deck, descending from ropes, and in the water. There will be small boats and liferafts around her, and of course the destroyer USS Morris next to her. I hope it will make for a lively scene that leaves no doubt about what is going on.

So JAM, you see I am still making diorama's, only now the subject is naval history. :)
I have always been a diorama modeller at heart, whether working with armour, figures (even single figures), boxed diorama's, or now ships.

Cheers!

Marijn
User avatar
MartinJQuinn
Posts: 8528
Joined: Tue Jan 11, 2005 1:40 pm
Location: New Jersey

Re: Lexingtons last hours

Post by MartinJQuinn »

Holy hell - that is sweet. I envy your level of skill.
Martin

"Tomorrow is the most important thing in life. Comes into us at midnight very clean. It's perfect when it arrives and it puts itself in our hands. It hopes we've learned something from yesterday." John Wayne

Ship Model Gallery
hypno7
Posts: 374
Joined: Tue Sep 17, 2013 12:16 pm

Re: Lexingtons last hours

Post by hypno7 »

I envy too that level of skill, everything looks very beautiful and clean. Masterful work!
Post Reply

Return to “Works in Progress”