HMS Victory and Le Redoutable at Trafalgar (1/300)
Moderators: BB62vet, MartinJQuinn, JIM BAUMANN, Jon, Dan K
- dafi
- Posts: 1005
- Joined: Mon Mar 12, 2012 11:13 am
- Location: Ludwigsburg/Germany
- Contact:
Re: HMS Victory and Le Redoutable at Trafalgar (1/300)
Chuck Marijn

To Victory and beyond ...
viewtopic.php?f=59&t=99050&start=60
See also our german forum for the age of Sail and History:
http://www.segelschiffsmodellbau.com
viewtopic.php?f=59&t=99050&start=60
See also our german forum for the age of Sail and History:
http://www.segelschiffsmodellbau.com
-
marijn van gils
- Posts: 2704
- Joined: Tue Feb 06, 2007 10:24 am
- Location: Belgium
Re: HMS Victory and Le Redoutable at Trafalgar (1/300)
If only I looked half as cool as Chuck Norris...
-
marijn van gils
- Posts: 2704
- Joined: Tue Feb 06, 2007 10:24 am
- Location: Belgium
Re: HMS Victory and Le Redoutable at Trafalgar (1/300)
dafi wrote:... and he always was good in doing miraculous kit bashings: he build a La Sirene out of a Vickers Armstrong Wellington kit !!!
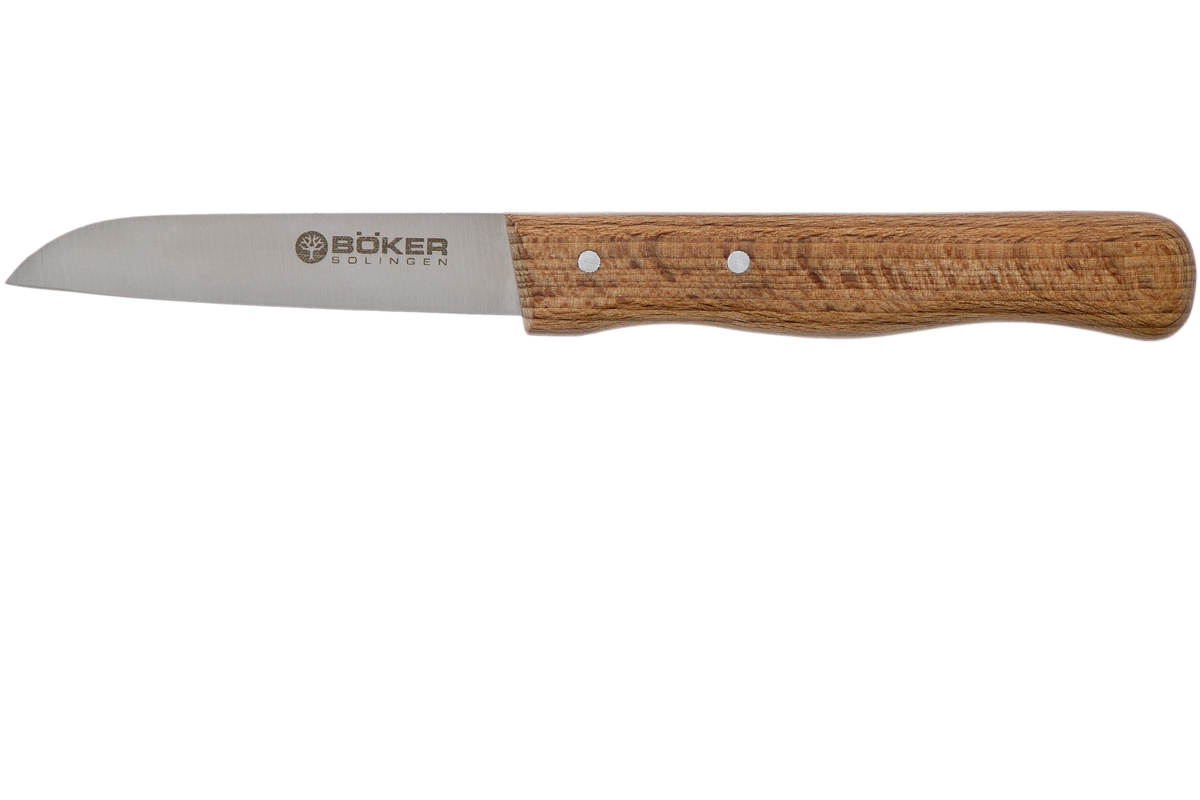
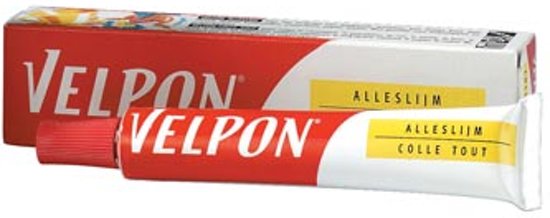
That Wellington was actually the first model I ever built. It was a present from my uncle for my 6th birthday. I still remember me and my mother building it at the dining tale (the same table as in the photo, but 5 years earlier...), using these tools:


I think my mother did most of the work...
Originally, we didn't paint it, but I painted and repainted it many times over the years. It also kept loosing parts over the years, hanging from my bedroom ceiling, getting bumped into weekly and crashing from time to time...
I actually still have it (the only model I took from my parental house...), and it looks like this:

I guess I was using it's box for storing paints at the time...
- dafi
- Posts: 1005
- Joined: Mon Mar 12, 2012 11:13 am
- Location: Ludwigsburg/Germany
- Contact:
Re: HMS Victory and Le Redoutable at Trafalgar (1/300)
Wonderful, thanx for the story!
And even more thanx for all the model making you share with us!
XXXDAn
And even more thanx for all the model making you share with us!
XXXDAn
To Victory and beyond ...
viewtopic.php?f=59&t=99050&start=60
See also our german forum for the age of Sail and History:
http://www.segelschiffsmodellbau.com
viewtopic.php?f=59&t=99050&start=60
See also our german forum for the age of Sail and History:
http://www.segelschiffsmodellbau.com
-
marijn van gils
- Posts: 2704
- Joined: Tue Feb 06, 2007 10:24 am
- Location: Belgium
Re: HMS Victory and Le Redoutable at Trafalgar (1/300)
You too Daniel!
Back on track now�
Spot the 5 differences with the previous posts!

Answer:
1: I added the rail around the poop deck, including belaying pin rails. At the rear end of the deck, the fixtures for the flagpost are added too.

2: Scuppers were drilled in the broadsides: larger square ones for the pump scuppers, round 0,3mm or 0,2mm ones for the rest.
3: Holes were drilled for the gunport lanyards (two 0,1mm holes above each lower gundeck port).
4: Eyebrows were added above the gunports.
The eyebrows at the lower gun deck were a relatively easy shape. I wrapped stretched sprue with the correct thickness around a smooth round object with the correct diameter (a shot glass in this case� ), glued the ends down, dipped it in boiling water for a couple of seconds, and let it cool down. The now curved stretched sprue could then be cut into individual eyebrows, and glued in place with Tamiya Extra Thin.
The {-shaped eyebrows were a bit more work. Each consists of two pieces of 0,2mm copper wire, shaped with tweezers and glued in place with CA. Luckily there were only 2 of those on each side!
I still have to add these to Victory. That will be a bit more work!

5: The steps were added to both sides. Each consists of a tiny strip of plastic sheet, with a piece of stretched sprue below.

Cheers,
Marijn
Back on track now�
Spot the 5 differences with the previous posts!

Answer:
1: I added the rail around the poop deck, including belaying pin rails. At the rear end of the deck, the fixtures for the flagpost are added too.

2: Scuppers were drilled in the broadsides: larger square ones for the pump scuppers, round 0,3mm or 0,2mm ones for the rest.
3: Holes were drilled for the gunport lanyards (two 0,1mm holes above each lower gundeck port).
4: Eyebrows were added above the gunports.
The eyebrows at the lower gun deck were a relatively easy shape. I wrapped stretched sprue with the correct thickness around a smooth round object with the correct diameter (a shot glass in this case� ), glued the ends down, dipped it in boiling water for a couple of seconds, and let it cool down. The now curved stretched sprue could then be cut into individual eyebrows, and glued in place with Tamiya Extra Thin.
The {-shaped eyebrows were a bit more work. Each consists of two pieces of 0,2mm copper wire, shaped with tweezers and glued in place with CA. Luckily there were only 2 of those on each side!
I still have to add these to Victory. That will be a bit more work!

5: The steps were added to both sides. Each consists of a tiny strip of plastic sheet, with a piece of stretched sprue below.

Cheers,
Marijn
-
Dan K
- Posts: 9069
- Joined: Tue Jan 11, 2005 10:56 am
- Location: New York City
Re: HMS Victory and Le Redoutable at Trafalgar (1/300)
Beautiful details, Marijn. I couldn't even begin to see the new additions. 
- MartinJQuinn
- Posts: 8561
- Joined: Tue Jan 11, 2005 1:40 pm
- Location: New Jersey
Re: HMS Victory and Le Redoutable at Trafalgar (1/300)
Simply fantastic work. The details are astounding.
Martin
"Tomorrow is the most important thing in life. Comes into us at midnight very clean. It's perfect when it arrives and it puts itself in our hands. It hopes we've learned something from yesterday." John Wayne
Ship Model Gallery
"Tomorrow is the most important thing in life. Comes into us at midnight very clean. It's perfect when it arrives and it puts itself in our hands. It hopes we've learned something from yesterday." John Wayne
Ship Model Gallery
- Devin
- Posts: 2503
- Joined: Mon Jan 10, 2005 10:46 am
- Location: Hoboken, NJ
- Contact:
Re: HMS Victory and Le Redoutable at Trafalgar (1/300)
Amazing.
We like our history sanitized and theme-parked and self-congratulatory, not bloody and angry and unflattering. - Jonathan Yardley
- zs180
- Posts: 678
- Joined: Sun Oct 12, 2008 3:55 am
- Location: Budapest, Hungary
Re: HMS Victory and Le Redoutable at Trafalgar (1/300)
A pleasure to behold
-
gscott
- Posts: 250
- Joined: Thu Jan 10, 2013 9:25 pm
Re: HMS Victory and Le Redoutable at Trafalgar (1/300)
Incredible detail and accuracy for such small ships. Your WIP threads are always a pleasure to follow, Marijn.
- Greg
-
marijn van gils
- Posts: 2704
- Joined: Tue Feb 06, 2007 10:24 am
- Location: Belgium
Re: HMS Victory and Le Redoutable at Trafalgar (1/300)
Thanks guys! Much appreciated!

- LE BOSCO
- Posts: 2261
- Joined: Thu Aug 27, 2009 11:05 am
- Location: Paris France
Re: HMS Victory and Le Redoutable at Trafalgar (1/300)
HI Marijn
just wonderful to be able to see a job like yours���.completely fan
cheers
Nicolas
just wonderful to be able to see a job like yours���.completely fan
cheers
Nicolas
-
hypno7
- Posts: 380
- Joined: Tue Sep 17, 2013 12:16 pm
Re: HMS Victory and Le Redoutable at Trafalgar (1/300)
Hi Marijn,
very very nice and sharp details. Really impressive work!
I have been lurking around, but I have missed your last updates.
very very nice and sharp details. Really impressive work!
I have been lurking around, but I have missed your last updates.
CV-8: viewtopic.php?f=59&t=153851
DD-436: viewtopic.php?f=59&t=157123
CVL-24 viewtopic.php?f=59&t=158455
DD-436: viewtopic.php?f=59&t=157123
CVL-24 viewtopic.php?f=59&t=158455
-
Joe Simon
- Posts: 825
- Joined: Sat Jan 24, 2009 5:16 pm
- Location: Wisconsin
Re: HMS Victory and Le Redoutable at Trafalgar (1/300)
Amazing work as always!
-
marijn van gils
- Posts: 2704
- Joined: Tue Feb 06, 2007 10:24 am
- Location: Belgium
Re: HMS Victory and Le Redoutable at Trafalgar (1/300)
Many thanks Nicolas, Erick and Joe!
Glad to see you back on the forum guys!
- LE BOSCO
- Posts: 2261
- Joined: Thu Aug 27, 2009 11:05 am
- Location: Paris France
Re: HMS Victory and Le Redoutable at Trafalgar (1/300)
Hi
what i find amazing Marijn is that your work on plastic is just as beautiful as working on wood and makes it just as "noble"
can't wait to see more
cheers
nicolas
what i find amazing Marijn is that your work on plastic is just as beautiful as working on wood and makes it just as "noble"
can't wait to see more
cheers
nicolas
-
marijn van gils
- Posts: 2704
- Joined: Tue Feb 06, 2007 10:24 am
- Location: Belgium
Re: HMS Victory and Le Redoutable at Trafalgar (1/300)
Thanks Nicolas! That a very nice compliment!LE BOSCO wrote:what i find amazing Marijn is that your work on plastic is just as beautiful as working on wood and makes it just as "noble"![]()
can't wait to see more
cheers
nicolas
For this scale, I prefer to avoid the texture/grain of wood, and simulate the feel by painting. I think I can get the final result to feel more in scale that way.
It is also easier and faster to me, as my wooden modelling experience is very limited!
Although I really love wood (my grandfather was a professional carpenter carved big sculptures in wood as a passionate hobby), I don't feel any material is more 'noble' than another. To me, it is the final result that counts...
But much respect to people like Donald McNarry and Philip Reed, who manage(d) to create an illusion of reality in small scale with wooden models!
And here is a little more:
One element of the hull remained: the figurehead.
The decoration of the Redoutable is not known, but a classic Greco-roman style warrior seems a reasonable guess.
I based it l�Hannibal the Spartiate, two of the few French 75�s of the period of which the decoration is known.
Decoration for 17th and 18th century ships can be daunting, especially when sculptures of humans are involved. Maybe this is a reason why we don�t see these ships being scratchbuilt in small scales more often?
Years ago, I sculpted a fair number of 1/35 scale figures, so I was well prepared.
But I know sculpting is very daunting for most modellers. I know I was afraid of it before I ever tried it!
However, I found it to be easier than I had imagined, and also less time-consuming than I thought it would be.
But since most ship-modellers are probably not familiar with the techniques involved, I made a little step by step.
Each step is one sculpting session, with the putty being cured in between sessions. I used Magic Sculp (MS), which cures in about 1 to 1,5 hours. Most sessions only took 0,5 to 1 hour, which gives you an idea of the total time spent (I think about 10 hours in total).
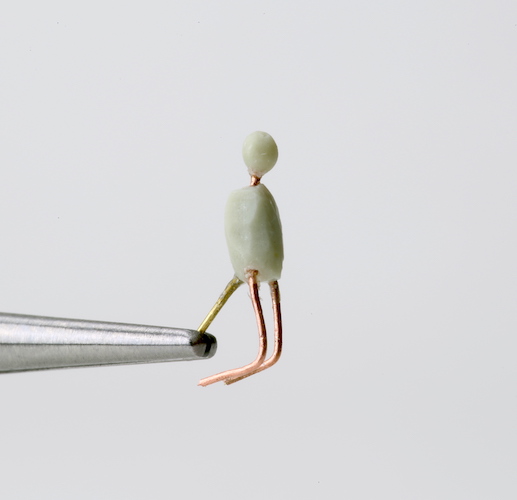
I started with two blobs of MS, one for the head and one for the body.
After hardening, I connected them with 0,2mm copper wire. I added skeleton legs in the same material.
In larger scales, I would normally use separate pieces for the upper torso and pelvis. But because of the scale and the rather static pose, I kept it simpler here.
The figure received a 0,2mm brass wire in an uncomfortable position

The legs were fleshed out with MS, and the neck was filled in. With a sharp scalpel, I carved a groove in the head. This allows place for the putty when sculpting the face later, especially for the eye-sockets.

Next, I added his skirt.
In this session, the belt was treated as part of the folds, delineating it�s lower edge and the buckle before adding the actual folds.

The process goes like this:
- I add a shapeless blob of putty, and push it around the area I want the skirt to be. I remove any excess.
- I push and move the putty around to get the volume of the skirt to my liking.
- I cut the upper and lower limits with a scalpel and remove the excess putty.
- I press the (lower edge of the) belt and the folds in the putty. I first start with rough shapes, like a sketch. Next, I go over them again repeatedly, refining their shape and smoothing the transitions between them. Any excess putty gets pushed to the edge, and is again cut and removed.
- At the end, I smooth the surface a tiny bit with a small brush and (very little) water.
These are the tools I use: toothpicks with their ends sanded smooth to more or less pointy or blunt tips. They are covered in superglue, and then sanded again.
The upper toothpick only has one working end (on the right), the lower one has 2.
A fine needle is used for the deepest creases and thin lines.
Talcum powder and water are used to keep the putty from sticking to the tools too much.

So far, I held the figure in a pin-vice with its brass wire. But this wasn�t too comfortable, so I made a simple handle on which the figure is positioned just like on the stem of the ship.

Next was his scale armour shirt. I cut a slit in the end of a fine aluminium tubing and opened the ends to a U-shape. This was used to press the scales in the soft putty.

Now the face was added. I added a tiny blob of putty to the front of the head, smoothed this over the face, and pressed the facial features in it. Rather than adding a nose on top of it, the areas around the nose were pressed down.

Next, the helmet was added.
When this was hard, I added the skeleton arms. For strength, the sword was made integral to the arm by flattening the end of the wire with pliers and filing the end.

Now, the arms were sculpted.
For smooth and regular items like this (or the legs and the helmet), I usually need to do some carving and shaping with a sharp scalpel after the putty cures.
MS needs to cure overnight. But I usually speed this up by putting it in an oven for 20-30 minutes at 50-60�C, so I can do more sessions in one day. Another advantage of keeping the figurehead separate from the ship as long as possible, as I wouldn�t want the styrene ship exposed to that temperature�

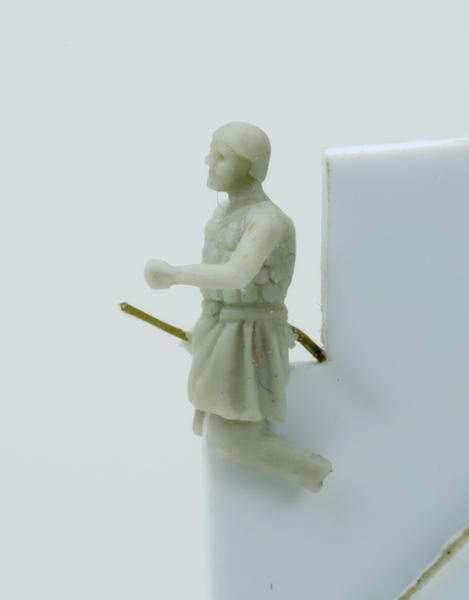
Sleeves were added. At the end of the session, sword details were made too.

A punch and die was used to punch a shield from 0,13mm plastic sheet. 0,2mm copper wire was wrapped around the punch used, providing a rim with the perfect diameter. A smaller plastic disc was glued in the centre.
After gluing the shield to the figure, straps were added in MS. They are sculpted in situ: apply blob of putty, spread around the arm, and remove excess.

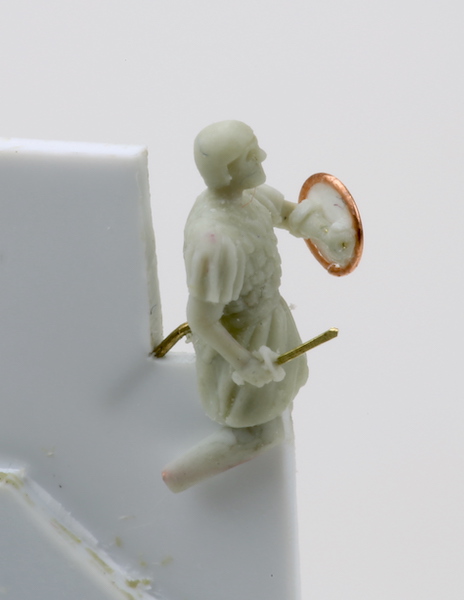
Now, the figure was permanently glued on the stem. Gaps between the ship and legs were filled, and feet sculpted directly to the stem.

A mantle or cape was added next, integrating the figurehead further with the bow.

Finally, feathers were added to the helmet.

Finished!
It�s not the most dynamic pose, but hey, he�s supposed to be a statue!

And a reminder of the scale.
I placed a 1/350 scale figure on the beakhead deck to show how large such a figurehead must have been in reality.
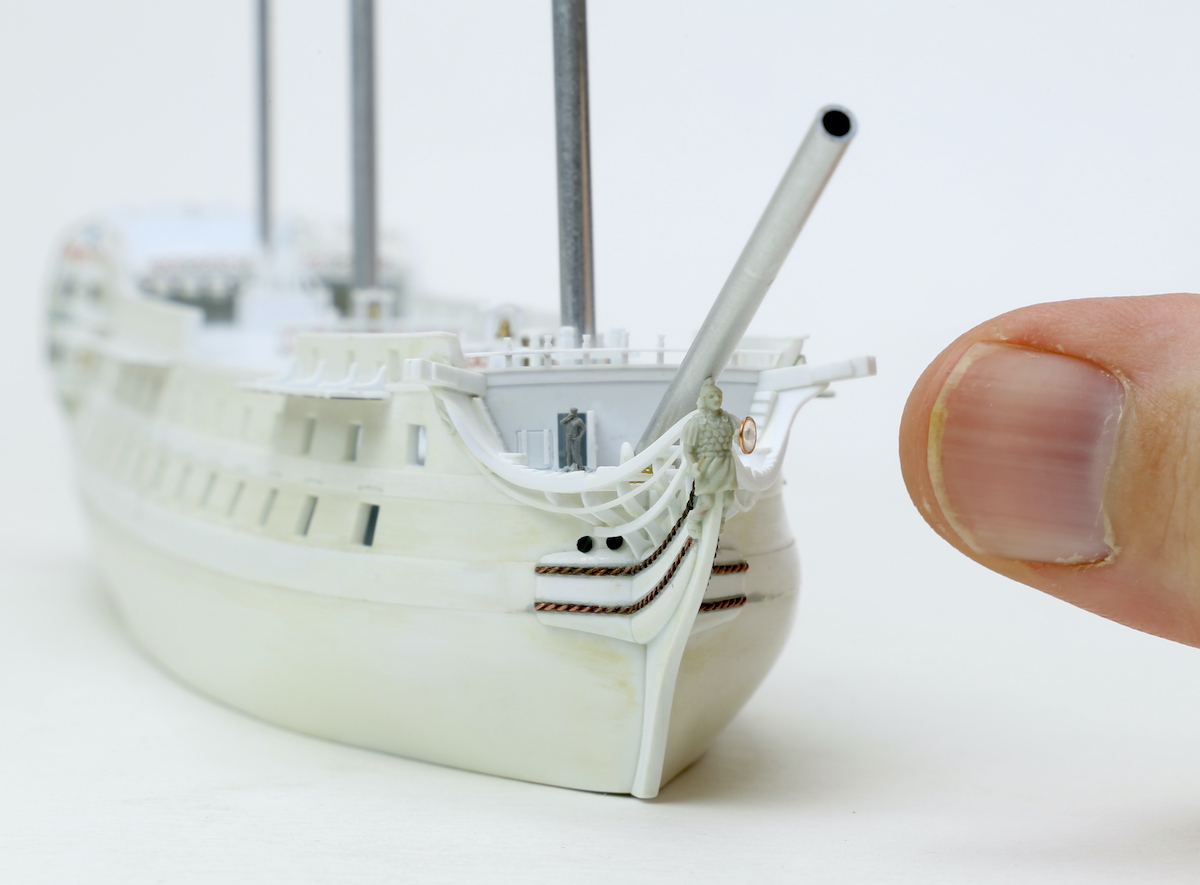
And an overview of the hull. It is now finished, besides elements which can only be added after painting (gunport lids, anchors, etc.), and of course battle damage.

BTW, , I used photo stacking for the last photo to get perfect field of depth. Compare that to the photo before!
All the best,
Marijn
- LE BOSCO
- Posts: 2261
- Joined: Thu Aug 27, 2009 11:05 am
- Location: Paris France
Re: HMS Victory and Le Redoutable at Trafalgar (1/300)
I am completely stunned ........ good ... when I see the work of sculpture of your figurehead, I think that I will stand out my Lego bricks and start playing again with
just superb
cheers
Nicolas
-
kurusu
- Posts: 71
- Joined: Thu Jan 19, 2017 4:33 am
Re: HMS Victory and Le Redoutable at Trafalgar (1/300)
LE BOSCO wrote:![]()
I am completely stunned ........ good ... when I see the work of sculpture of your figurehead, I think that I will stand out my Lego bricks and start playing again with
just superba great lesson
cheers
Nicolas
What he said.
Excellent work.
I know this is in a battle diorama and it is to be this way. But I'll admit that I cringed a little when I read "battle damage".
Maybe you could do a "before the battle" model too.
- wefalck
- Posts: 2117
- Joined: Wed Sep 28, 2011 12:04 pm
- Location: Paris
- Contact:
Re: HMS Victory and Le Redoutable at Trafalgar (1/300)
Really excellent sculpting !
As the figure seems to be about double lifesize, it is about as tall as an N-scale figure - that will be a challenge, once I get to the crew of my gunboat (although I am going to cheat and start with some Preiser figures).
I also admire the miniature work of McNarry, Reed or McCaffery in wood. However, particular the latter one had more artisanal than realistic ambitions and I always felt too that real wood, even if you have access to very densly grained boxwood/costelo, it doesn't really work that well for realistic depiction. I also prefer to simulate the wood with paint. Moreover, there would not be much bare wood (apart from the deck, the gratings, and masts and spars) on a wooden ship, so it doesn't really matter too much what is underneath the paint.
The only concern with styrene is, that it is much less stable over a time-scale of say 100+ years than wood - in consequence museums do not allow styrene in models they commission.
As the figure seems to be about double lifesize, it is about as tall as an N-scale figure - that will be a challenge, once I get to the crew of my gunboat (although I am going to cheat and start with some Preiser figures).
I also admire the miniature work of McNarry, Reed or McCaffery in wood. However, particular the latter one had more artisanal than realistic ambitions and I always felt too that real wood, even if you have access to very densly grained boxwood/costelo, it doesn't really work that well for realistic depiction. I also prefer to simulate the wood with paint. Moreover, there would not be much bare wood (apart from the deck, the gratings, and masts and spars) on a wooden ship, so it doesn't really matter too much what is underneath the paint.
The only concern with styrene is, that it is much less stable over a time-scale of say 100+ years than wood - in consequence museums do not allow styrene in models they commission.
Eberhard
Former chairman Arbeitskreis historischer Schiffbau e.V. (German Association for Shipbuilding History)
--------------------------------------------------------------------------------------------------------------------------------------------------------------------------------------------

Former chairman Arbeitskreis historischer Schiffbau e.V. (German Association for Shipbuilding History)
--------------------------------------------------------------------------------------------------------------------------------------------------------------------------------------------