IJN Zuikaku 1/350
Moderators: BB62vet, MartinJQuinn, JIM BAUMANN, Jon, Dan K
-
Mr. Church
- Posts: 650
- Joined: Tue Oct 23, 2018 2:00 pm
Re: IJN Zuikaku 1/350
Lovely job on the camouflage scheme. And beautiful all round detailing work.
-
StevenVD
- Posts: 605
- Joined: Fri Dec 27, 2013 6:32 pm
Re: IJN Zuikaku 1/350
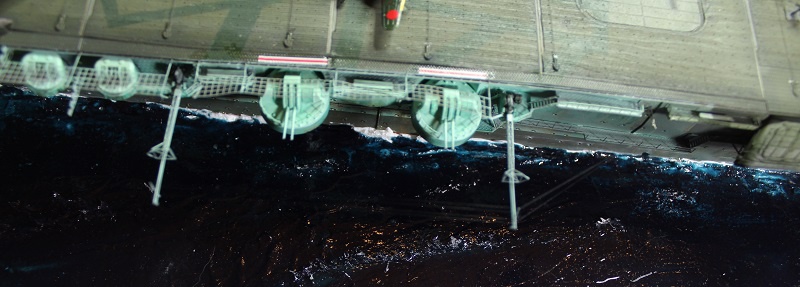
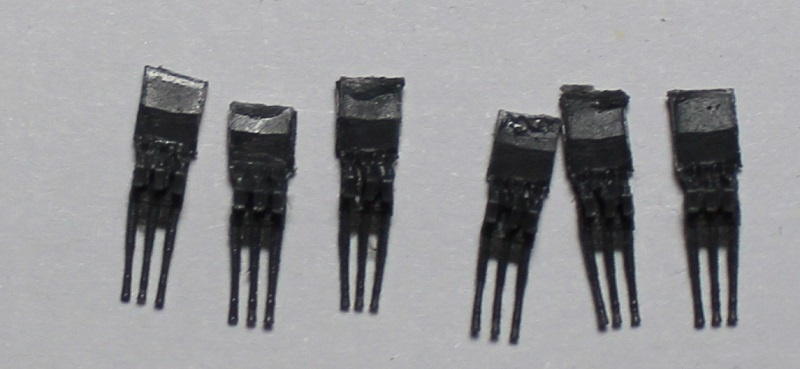
Thanks, Mr. Church! Today an important step is taken, the ship is launched. But first, all accessories for the lower decks had to be fixed. Amongst those, 8 single 25mm guns that had tiny holes drilled for them in the deck. These can be seen in this picture left of the green deck camo, near the ladder.

This ladder was probably not calculated in the space provided for these guns. It appeared too crammed to put 4 aside. Also, the metal pins would probably not sink to the bottom of the holes. I would have to remove these pins entirely, but they were the hardest part of the gun. So I had to grind them off.

Each of the 8 guns had to be pushed against this stone for 10 seconds to remove the pin. One wrong move and it would be launched in to the room.

But it was worth the effort, now the guns could be spread.

One of the triple gun barrels is still unpainted. I remembered that I lacked two of these, so I chose to omit the pair at the island. These would be easiest to place later on.

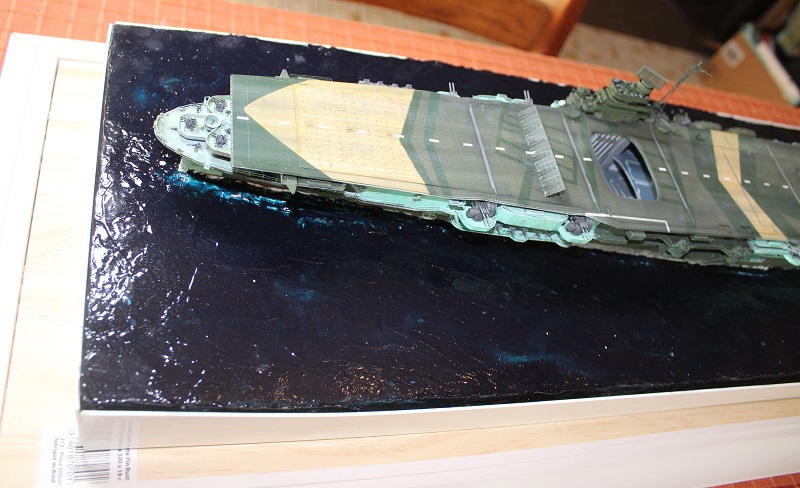
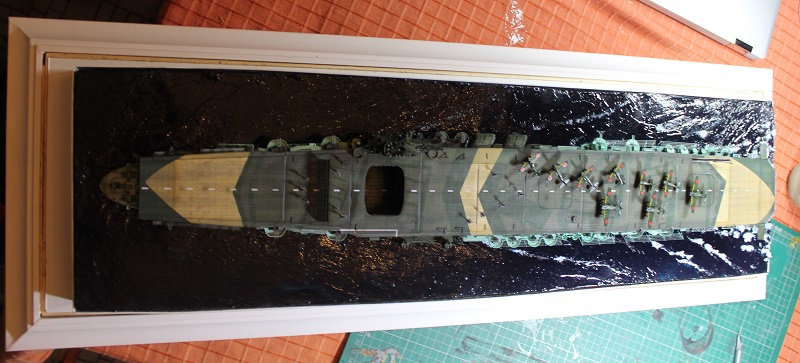
Now, the ship is fixed in the diorama with kit.

Because the kit is spread evenly on the edge, the hull has to be lowered carefully to not smear glue on the bow section.


The ship rests in its crevice, with some areas still needing filling.

With extra plaster, I tried to have still some red paint visible, but this is minimal. The Plimsoll marks are still showing though.


The waterline is filled up and the block edges are better adapted to the plastic casing.


I then added a second layer of Ammo Mig Pacific Blue paste. I started a new jar on the port side and this was colored much lighter still. I hope this is due to less exposure and both sides will eventually meet up in darkness. If not, I can add more on the starboard side. I suppose the color palette we see on these pictures will even out this night.
This ladder was probably not calculated in the space provided for these guns. It appeared too crammed to put 4 aside. Also, the metal pins would probably not sink to the bottom of the holes. I would have to remove these pins entirely, but they were the hardest part of the gun. So I had to grind them off.
Each of the 8 guns had to be pushed against this stone for 10 seconds to remove the pin. One wrong move and it would be launched in to the room.
But it was worth the effort, now the guns could be spread.
One of the triple gun barrels is still unpainted. I remembered that I lacked two of these, so I chose to omit the pair at the island. These would be easiest to place later on.
Now, the ship is fixed in the diorama with kit.
Because the kit is spread evenly on the edge, the hull has to be lowered carefully to not smear glue on the bow section.
The ship rests in its crevice, with some areas still needing filling.
With extra plaster, I tried to have still some red paint visible, but this is minimal. The Plimsoll marks are still showing though.
The waterline is filled up and the block edges are better adapted to the plastic casing.
I then added a second layer of Ammo Mig Pacific Blue paste. I started a new jar on the port side and this was colored much lighter still. I hope this is due to less exposure and both sides will eventually meet up in darkness. If not, I can add more on the starboard side. I suppose the color palette we see on these pictures will even out this night.
-
Landlubber Mike
- Posts: 54
- Joined: Sun Jun 30, 2019 1:59 pm
Re: IJN Zuikaku 1/350
What an epic build! Really enjoying this one. Thanks for taking the time to share your techniques and research, I've learned a lot!
-
StevenVD
- Posts: 605
- Joined: Fri Dec 27, 2013 6:32 pm
Re: IJN Zuikaku 1/350
Thank you, Mike. Today I show you how to finish the wooden base for the diorama.

The water still has a nice sheen in it.


The difference with a CVL is apparent in the flight deck dimensions. Princeton seems to have a realtively higher freeboard. I was amazed that its anchors dwarf those of the larger ship.

This piece of multiplex will be cut to the inside size of the glass cover. Because the ripsaw damages the painted edges, I took of a slightly oversized piece.

Doing all four sides with a cutter, this makes you feel like your index is broken.
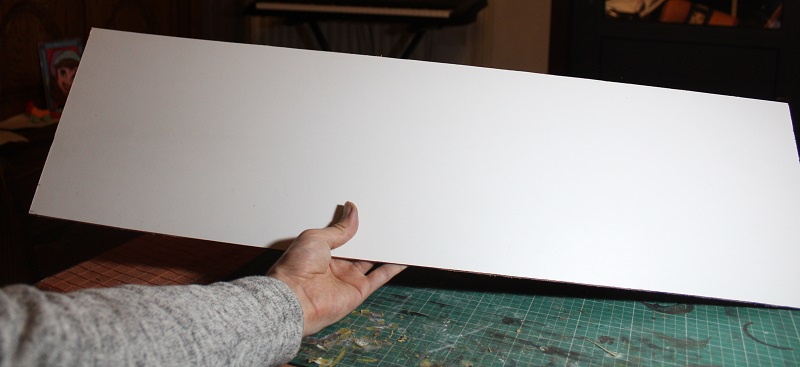
But the edges are smooth now. It can be glued to the base.


Tomorrow, the dio can be screwed to the base and we can continue the funnier stuff.
The water still has a nice sheen in it.
The difference with a CVL is apparent in the flight deck dimensions. Princeton seems to have a realtively higher freeboard. I was amazed that its anchors dwarf those of the larger ship.
This piece of multiplex will be cut to the inside size of the glass cover. Because the ripsaw damages the painted edges, I took of a slightly oversized piece.
Doing all four sides with a cutter, this makes you feel like your index is broken.
But the edges are smooth now. It can be glued to the base.
Tomorrow, the dio can be screwed to the base and we can continue the funnier stuff.
-
StevenVD
- Posts: 605
- Joined: Fri Dec 27, 2013 6:32 pm
Re: IJN Zuikaku 1/350
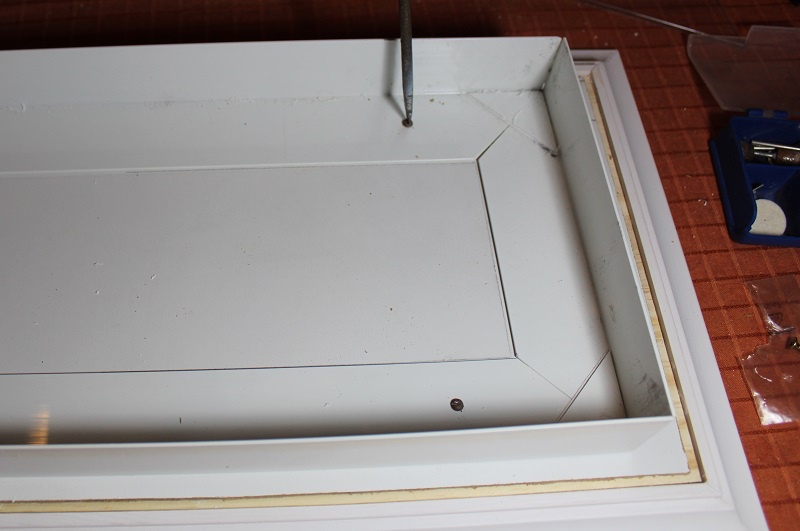
As I said, the screws are fastened and the diorama is now fixed to the plank.


The mobile 25mm-guns are located like in the Fujimi manual, though I still have about 6 guns left. If I don't find any stationary gunnery points left while finishing the ship, these will go to the aft of the deck, like in the banzai picture with the gun. To place these, I drill a hole for the pin and then I remove a little square around it to clean up the edges to assure a tight fit of the gun platform.

All of the safety netting had to be repositioned. The almost tansparent LSO platforms are now placed too.

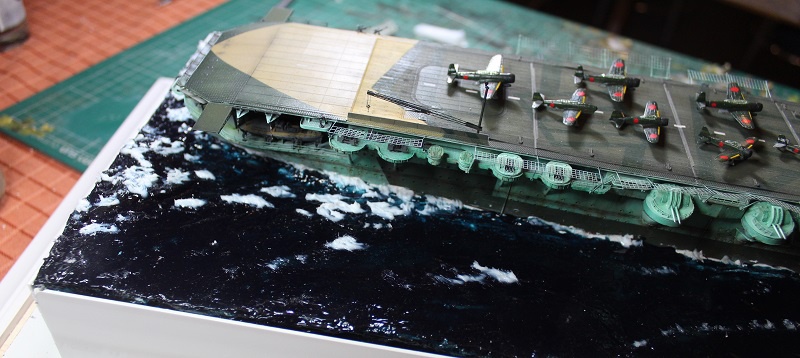
Placing the wavetops now with the same kit used for fixing the ship.

An old scalpel is used to stir up the kit.

Most of the stirring is done in the wake of the ship. The planes are posed here as preliminary, they still have to be weathered and panelline-washed. Some images of the wake:


-
StevenVD
- Posts: 605
- Joined: Fri Dec 27, 2013 6:32 pm
Re: IJN Zuikaku 1/350
Using Uschi Van Der Rosten threads 0.03 and 0.001 and watching the large illustration in Gakken I did the rigging of the mast and antennas. A few small pylons had to be scratched to lead the incoming wires away from the netting. Some should have been slack, but this is not possible with the thin thread.


The two missing triple AA-guns at the island will be provided with an Alliance set I bought on Ebay.
The two missing triple AA-guns at the island will be provided with an Alliance set I bought on Ebay.
-
Dan K
- Posts: 9037
- Joined: Tue Jan 11, 2005 10:56 am
- Location: New York City
Re: IJN Zuikaku 1/350
Coming along very nicely, Steven.
-
StevenVD
- Posts: 605
- Joined: Fri Dec 27, 2013 6:32 pm
Re: IJN Zuikaku 1/350
Fujimi offers a nice sticker and plastic nameplate in the kit, so I painted this Motip gold. It's in Japanese, but I presume on this forum all will recognise the ship once they see it. Repeating it in Roman capitals would be somewhat double.

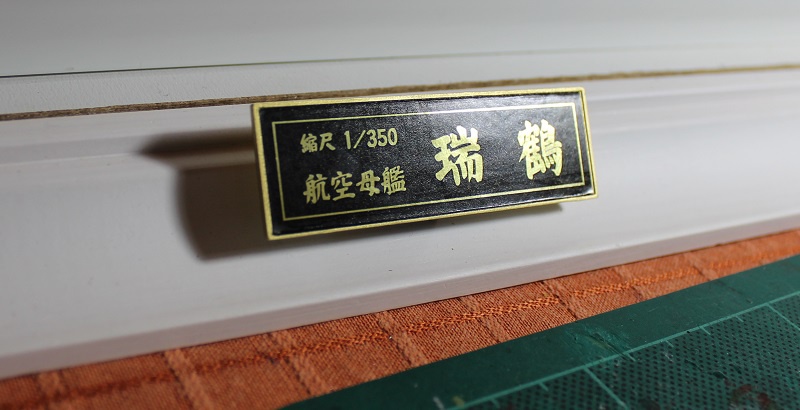
I did a preliminary fix with some gum, later on it will be screwed on with a spacer.
The Fujimi crash barrier in PE looks as tight as a piece of railing, I thought it would look more like netting if it would be scratched. The Shipyard arms span wider anyway, so I used the thread for the cabling and the Ammo 0.03 wire for the cross-stitch.

The Gakken 1/100 model pictures showed some lanterns, so I rigged these too.

I did a preliminary fix with some gum, later on it will be screwed on with a spacer.
The Fujimi crash barrier in PE looks as tight as a piece of railing, I thought it would look more like netting if it would be scratched. The Shipyard arms span wider anyway, so I used the thread for the cabling and the Ammo 0.03 wire for the cross-stitch.
The Gakken 1/100 model pictures showed some lanterns, so I rigged these too.
-
marijn van gils
- Posts: 2686
- Joined: Tue Feb 06, 2007 10:24 am
- Location: Belgium
Re: IJN Zuikaku 1/350
Almost there!
Those crash barriers look more realistic indeed compared to the flat and perfectly straith PE types.
Those crash barriers look more realistic indeed compared to the flat and perfectly straith PE types.
-
Dan K
- Posts: 9037
- Joined: Tue Jan 11, 2005 10:56 am
- Location: New York City
Re: IJN Zuikaku 1/350
Nice rigging and crash barriers.
-
StevenVD
- Posts: 605
- Joined: Fri Dec 27, 2013 6:32 pm
Re: IJN Zuikaku 1/350
Thanks for the appraisal, I just received the Alliance gun replacement set I ordered from Missouri. I only needed the PE and one barrel, some Infini parts were not completely depleted.


Like I had read, the barrel sets are quite warped.

The dimensions are different too, Alliance PE parts are all heavier and the resin is shorter. This causes problems for the one barrel I still need from this set.

I could finish the front gun at the island with mostly Infini details.

But the aft one now misses one barrel. Here I want to build a barrel replacement scene with some loose resin barrels, so the difference is not notable.

Further it should be noticed that none of the figures I bought is capable of sitting on a gun seat, so they will be disposed otherwise.
Like I had read, the barrel sets are quite warped.
The dimensions are different too, Alliance PE parts are all heavier and the resin is shorter. This causes problems for the one barrel I still need from this set.
I could finish the front gun at the island with mostly Infini details.
But the aft one now misses one barrel. Here I want to build a barrel replacement scene with some loose resin barrels, so the difference is not notable.
Further it should be noticed that none of the figures I bought is capable of sitting on a gun seat, so they will be disposed otherwise.
-
StevenVD
- Posts: 605
- Joined: Fri Dec 27, 2013 6:32 pm
Re: IJN Zuikaku 1/350
Good news, I scavenged one barrel of the few single guns I did not know where to place. So I could finish the second additional triple gun.

The planes are varnished and chipped with a pencil.

The Gakken cover was useful in showing a feature I had overlooked while building the antenna. In the kit this antenna is posed on the ship without a change to the deck. There really should be a way to make it sink into the deck and this is visible on the drawing. If you look at the wire antenna pole left in this Gakken illustration, another unique detail comes in view, a second radar antenna like on the main mast that is only added to this pole. It is indicated only in this Gakken artist's rendition and not even in the Morskie technical drawings.

Because the planes were still dry-fit, I was able to remove the antenna.

With a Swann&Morton holding an Airwaves-micro saw I made a hole where I had drilled the deck. I wanted to keep the elevator PE because the deck was not planked under it. They could hav left the elevator under the antenna and just fixed the base to it.

I fitted the base a bit more to the front, so the antenna would not touch the arrestor wire.

That means a round dot will have to be repainted, but now the antenna looks retractable at least. I put the removed bit of painted deck back as a hatch.

Now all planes and figures were mounted on the ship, they came off the steel pin with a chisel knife. I admit I left the sailors in their summer dress because this looks better on the green deck. It was remarked also that the deck would have been weathered more in the end and I have left it quite sharply delineated.
So here's a series of action stills, don't mind the glue and missing rigging yet. That will come.


The planes are varnished and chipped with a pencil.
The Gakken cover was useful in showing a feature I had overlooked while building the antenna. In the kit this antenna is posed on the ship without a change to the deck. There really should be a way to make it sink into the deck and this is visible on the drawing. If you look at the wire antenna pole left in this Gakken illustration, another unique detail comes in view, a second radar antenna like on the main mast that is only added to this pole. It is indicated only in this Gakken artist's rendition and not even in the Morskie technical drawings.
Because the planes were still dry-fit, I was able to remove the antenna.
With a Swann&Morton holding an Airwaves-micro saw I made a hole where I had drilled the deck. I wanted to keep the elevator PE because the deck was not planked under it. They could hav left the elevator under the antenna and just fixed the base to it.
I fitted the base a bit more to the front, so the antenna would not touch the arrestor wire.
That means a round dot will have to be repainted, but now the antenna looks retractable at least. I put the removed bit of painted deck back as a hatch.
Now all planes and figures were mounted on the ship, they came off the steel pin with a chisel knife. I admit I left the sailors in their summer dress because this looks better on the green deck. It was remarked also that the deck would have been weathered more in the end and I have left it quite sharply delineated.
So here's a series of action stills, don't mind the glue and missing rigging yet. That will come.
-
Iceman 29

- Posts: 1945
- Joined: Tue Sep 29, 2020 4:35 pm
- Location: Bretagne, France
Re: IJN Zuikaku 1/350
Amazing job! Bravo! Very realistic
Pascal
�Battleship Bretagne 3D: https://vu.fr/FvCY
�SS Delphine 3D: https://vu.fr/NeuO
�SS Nomadic 3D: https://vu.fr/tAyL
�USS Nokomis 3D: https://vu.fr/kntC
�USS Pamanset 3D: https://vu.fr/jXGQ
�Battleship Bretagne 3D: https://vu.fr/FvCY
�SS Delphine 3D: https://vu.fr/NeuO
�SS Nomadic 3D: https://vu.fr/tAyL
�USS Nokomis 3D: https://vu.fr/kntC
�USS Pamanset 3D: https://vu.fr/jXGQ
-
drizzt73
- Posts: 61
- Joined: Wed Jan 14, 2009 3:06 am
Re: IJN Zuikaku 1/350
Outstanding work! Love it
Cheers
Anthony
Cheers
Anthony
-
marijn van gils
- Posts: 2686
- Joined: Tue Feb 06, 2007 10:24 am
- Location: Belgium
Re: IJN Zuikaku 1/350
Great work Steven!
The proximity of the figures to the open elevator well makes me wonder if the Japanese had temporary railing around the elevators, like USN carriers had?
The proximity of the figures to the open elevator well makes me wonder if the Japanese had temporary railing around the elevators, like USN carriers had?
-
StevenVD
- Posts: 605
- Joined: Fri Dec 27, 2013 6:32 pm
Re: IJN Zuikaku 1/350
Thanks, guys! @Marijn, I doubt it. Remember the story of the sinking of Shokaku and the large number of sailors that fell into the opened aft elevator after the sudden heaving of the bow? I think not as many might have fallen in if there would have been railing, though it would have been too much weight to carry.
-
Pieter
- Posts: 1602
- Joined: Sat Sep 17, 2005 9:19 am
Re: IJN Zuikaku 1/350
Love all the little 'stories' going on at the deck. Carriers are really a nice stage for this.
-
Dan K
- Posts: 9037
- Joined: Tue Jan 11, 2005 10:56 am
- Location: New York City
Re: IJN Zuikaku 1/350
Just great, Steven.
-
StevenVD
- Posts: 605
- Joined: Fri Dec 27, 2013 6:32 pm
Re: IJN Zuikaku 1/350
Thanks for the lovely comments, today I concluded this project with a series of pictures basking in our sunny garden. But before that, some stuff had still been in the works.

The nameplate weighed in lighter than on Princeton, so I wanted to attach it with plastic rather than metal inserts. I strained the Dremel on these pinholes, all diameters had to be used.

The insert was painted like the plate and fixed with superglue.

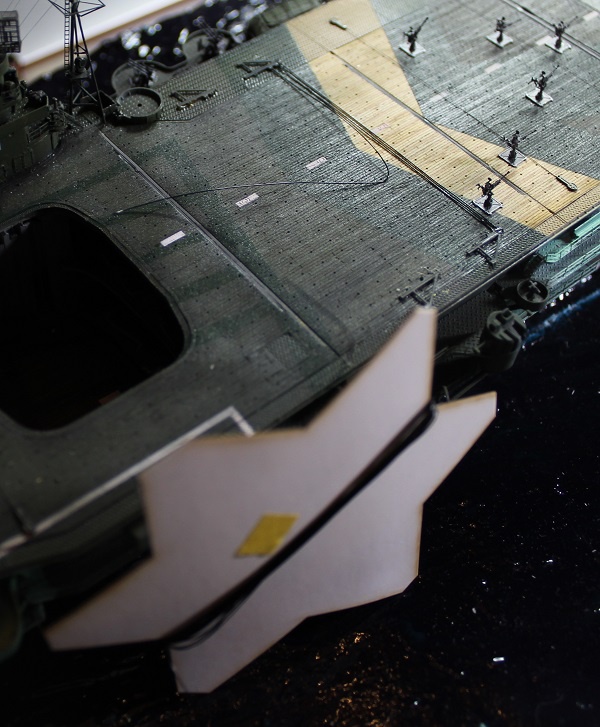
I evened out the edges of the base with some Evergreen L-profile, filled it up and painted this white. It's not perfectly straight but a lot more appeasing.


The two whaleboats needed some extra rigging like on these illustrations. Only, I didn't like the cross-ties like in Gakken and decided to leave these off.

Add-On PE chain is fixed to the boat and some Ammo 0.03 thread is used for rigging.


These guys were not far off and some got so curious as not staying on their allotted planks.

The one useful Fujimi decal is pending in the mast. The others are too thick or too rectangular. I also avoided any signaling flags.


The bow wave is improved a bit with extra water paste and gloss white Vallejo paint.

I also blended in the waves with white spray.

After removing all glue stains with matt varnish, the glazing of the bridge windscreen was dine with PVA glue.


The next morning all was ready for the shoot. That's it for today, I will add some afterthoughts later.


The nameplate weighed in lighter than on Princeton, so I wanted to attach it with plastic rather than metal inserts. I strained the Dremel on these pinholes, all diameters had to be used.
The insert was painted like the plate and fixed with superglue.
I evened out the edges of the base with some Evergreen L-profile, filled it up and painted this white. It's not perfectly straight but a lot more appeasing.
The two whaleboats needed some extra rigging like on these illustrations. Only, I didn't like the cross-ties like in Gakken and decided to leave these off.
Add-On PE chain is fixed to the boat and some Ammo 0.03 thread is used for rigging.
These guys were not far off and some got so curious as not staying on their allotted planks.
The one useful Fujimi decal is pending in the mast. The others are too thick or too rectangular. I also avoided any signaling flags.
The bow wave is improved a bit with extra water paste and gloss white Vallejo paint.
I also blended in the waves with white spray.
After removing all glue stains with matt varnish, the glazing of the bridge windscreen was dine with PVA glue.
The next morning all was ready for the shoot. That's it for today, I will add some afterthoughts later.
Last edited by StevenVD on Sat Apr 24, 2021 7:13 pm, edited 2 times in total.
-
MartinJQuinn

- Posts: 8512
- Joined: Tue Jan 11, 2005 1:40 pm
- Location: New Jersey
Re: IJN Zuikaku 1/350
Really nice work. She looks great.
Martin
"Tomorrow is the most important thing in life. Comes into us at midnight very clean. It's perfect when it arrives and it puts itself in our hands. It hopes we've learned something from yesterday." John Wayne
Ship Model Gallery
"Tomorrow is the most important thing in life. Comes into us at midnight very clean. It's perfect when it arrives and it puts itself in our hands. It hopes we've learned something from yesterday." John Wayne
Ship Model Gallery