bought a 1/700 kit after a long long time since as a young kid. Now that i'm nearing middle age, thought i'll build it more seriously than just using CA.
I'm having problems with sanding the very fine parts in hard to reach area(like the searchlights), it seems i sanding my fingers and tweezers more than the plastic itself......
Also have problems with the deck plates and hull plates. The kit i'm building(Aoshima Bismark) have some gaps between the pieces over a long stretch. How do i apply the putty without destroying the deck line details?
Thanks for the advice in advance.
Beginner help with putty
Moderator: JIM BAUMANN
-
MatthewB
- Posts: 2269
- Joined: Wed Aug 05, 2015 9:25 am
- Location: Los Angeles and Houston
Re: Beginner help with putty
Good question.
Just watching thread to see the reply, when someone who knows what they are doing says something.
MB
Just watching thread to see the reply, when someone who knows what they are doing says something.
MB
OMG LOOK! A signature
Working on:
1/700 (All Fall 1942):
HIJMS Nagara
HIJMS Aoba & Kinugasa
USS San Francisco
USS Helena
USS St. Louis
USS Laffey & Farenholt
HIJMS Sub-Chasers No. 4 - 7
HIJMS Sub-Chasers No. 13 - 16
Working on:
1/700 (All Fall 1942):
HIJMS Nagara
HIJMS Aoba & Kinugasa
USS San Francisco
USS Helena
USS St. Louis
USS Laffey & Farenholt
HIJMS Sub-Chasers No. 4 - 7
HIJMS Sub-Chasers No. 13 - 16
-
davidwaples

- Posts: 775
- Joined: Thu May 03, 2007 10:39 pm
- Location: Westminster, Colorado
- Contact:
Re: Beginner help with putty
It's hard to tell what you're dealing with without photos but I'll share some of my favorite tools with some explanation...
Sanding:
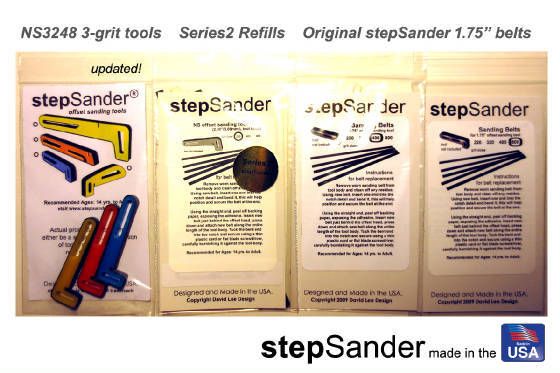
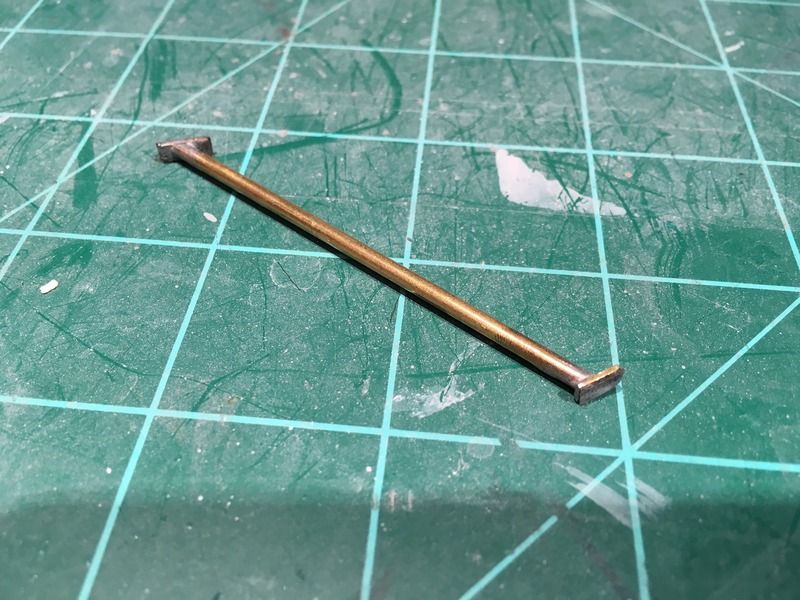
My favorite sanders for ship models are the Step Sanders. They come in different sizes and grits. I would recommend the small three pack they sell. What's special about these is that the sanding strips use self adhesive to lock them in place. They fit perfectly on the handles. It allows you to do precise sanding in small areas. I've even taken it a step farther and made my own jig out of brass and cut small pieces of the self adhesive strips and stick them on the jig. Check out their web site at
http://www.stepsander.com
Home made sander for tight areas.
Scraping:
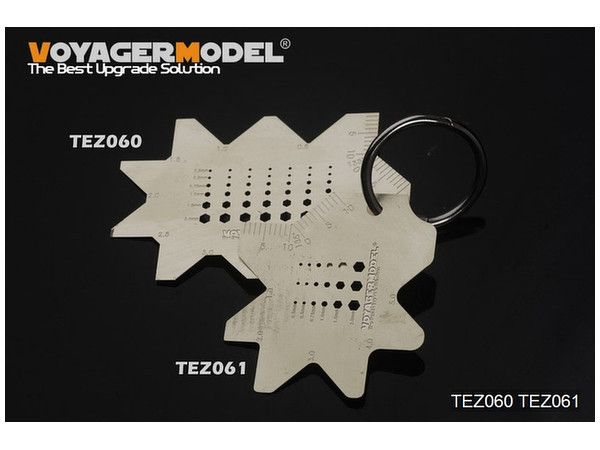
Don't feel like you have to sand everything. Consider scraping small parts. You can do this with a small hobby knife or you can use some purpose built scrapers such as these from Voyager. They are really nice for rounding, smoothing, and truing masts and all other kinds of shapes. Scraping tends to leave a much smoother finish. I got mine from Hobby Link Japan.
Chisels:
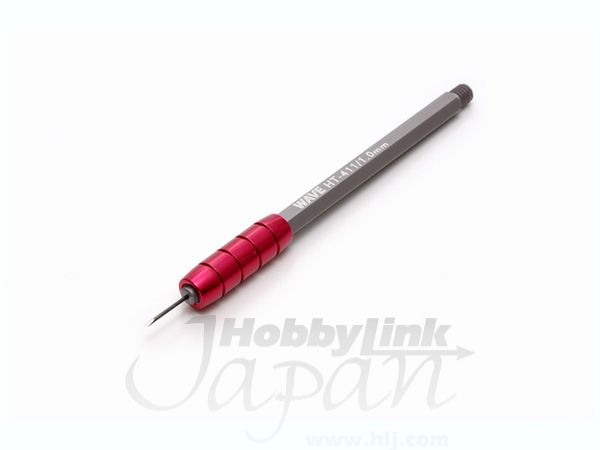
I have a couple of micro chisels that I find very handy for cleaning up unwanted flash, blemishes in the plastic, etc. I don't have this one but here's an example available from Hobby Link Japan.
 [/URL]
Filling with plastic:
My feeling is that you should always try and minimize the use of putty. When I have some nasty gaps due to poor fitting, etc. I use plastic strips to fill the gaps. I use a lot of .010, .015 and .020 plastic in different widths, cut to size, and glue into the gap. There there's much less to fill and a more solid construction.
Filler/Putty:
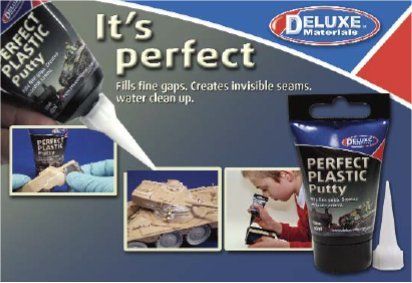
There are times when you need a filler. My favorite is Perfect Plastic Putty. The reason is that it is water based. Apply and you can use a wet brush to smooth it and clean up any excess. Sometimes it may take a couple of application but you'll be very happy with the results.
I hope this helps. I'm interested to see what others do as well.
Dave
Sanding:
My favorite sanders for ship models are the Step Sanders. They come in different sizes and grits. I would recommend the small three pack they sell. What's special about these is that the sanding strips use self adhesive to lock them in place. They fit perfectly on the handles. It allows you to do precise sanding in small areas. I've even taken it a step farther and made my own jig out of brass and cut small pieces of the self adhesive strips and stick them on the jig. Check out their web site at
http://www.stepsander.com
Home made sander for tight areas.
Scraping:
Don't feel like you have to sand everything. Consider scraping small parts. You can do this with a small hobby knife or you can use some purpose built scrapers such as these from Voyager. They are really nice for rounding, smoothing, and truing masts and all other kinds of shapes. Scraping tends to leave a much smoother finish. I got mine from Hobby Link Japan.
Chisels:
I have a couple of micro chisels that I find very handy for cleaning up unwanted flash, blemishes in the plastic, etc. I don't have this one but here's an example available from Hobby Link Japan.
[/URL]Filling with plastic:
My feeling is that you should always try and minimize the use of putty. When I have some nasty gaps due to poor fitting, etc. I use plastic strips to fill the gaps. I use a lot of .010, .015 and .020 plastic in different widths, cut to size, and glue into the gap. There there's much less to fill and a more solid construction.
Filler/Putty:
There are times when you need a filler. My favorite is Perfect Plastic Putty. The reason is that it is water based. Apply and you can use a wet brush to smooth it and clean up any excess. Sometimes it may take a couple of application but you'll be very happy with the results.
I hope this helps. I'm interested to see what others do as well.
Dave
-
MatthewB
- Posts: 2269
- Joined: Wed Aug 05, 2015 9:25 am
- Location: Los Angeles and Houston
Re: Beginner help with putty
I don't know about the OP, but the Micro-chisels and Perfect Putty are things I will be (buying and) using.
Thanks.
MB
Thanks.
MB
OMG LOOK! A signature
Working on:
1/700 (All Fall 1942):
HIJMS Nagara
HIJMS Aoba & Kinugasa
USS San Francisco
USS Helena
USS St. Louis
USS Laffey & Farenholt
HIJMS Sub-Chasers No. 4 - 7
HIJMS Sub-Chasers No. 13 - 16
Working on:
1/700 (All Fall 1942):
HIJMS Nagara
HIJMS Aoba & Kinugasa
USS San Francisco
USS Helena
USS St. Louis
USS Laffey & Farenholt
HIJMS Sub-Chasers No. 4 - 7
HIJMS Sub-Chasers No. 13 - 16
-
biggles2
- Posts: 1980
- Joined: Thu May 30, 2013 1:50 pm
Re: Beginner help with putty
I have an inexpensive tiny modelling file set. The edge of an Xacto or scalpel blade is good for scraping mold seams from small places. 
-
samloi
- Posts: 4
- Joined: Tue Dec 01, 2015 8:25 am
Re: Beginner help with putty
thanks for the advises guys. The mini chisel definitely looks like a must get tool. And the mini DIY-jig........thats the one i want. Time to go shopping again.
For the putty, i'm using the Mr surfacer 500 and Tamiya basic. The Tamiya seems to dry up faster than i want to so maybe i'll try thinning with some lacquer thinner. Is the perfect putty much different?
One more thing i notice last night, there is a big gap between the the island and the deck...... I would note down where the gap is and apply a layer of Mr surfacer 500 on the island side where it meets the deck. then layer by layer till the gap becomes negligible. Its a painstaking slow process(took about 4-5 times) and the result is still not perfect. Any tips?
For the putty, i'm using the Mr surfacer 500 and Tamiya basic. The Tamiya seems to dry up faster than i want to so maybe i'll try thinning with some lacquer thinner. Is the perfect putty much different?
One more thing i notice last night, there is a big gap between the the island and the deck...... I would note down where the gap is and apply a layer of Mr surfacer 500 on the island side where it meets the deck. then layer by layer till the gap becomes negligible. Its a painstaking slow process(took about 4-5 times) and the result is still not perfect. Any tips?
-
biggles2
- Posts: 1980
- Joined: Thu May 30, 2013 1:50 pm
Re: Beginner help with putty
To protect adjacent areas with raised, or engraved, detail, put masking tape down both sides of where you want to putty, or fill. That will keep messy putty spills or tooling marks off detail.
-
davidwaples
- Posts: 775
- Joined: Thu May 03, 2007 10:39 pm
- Location: Westminster, Colorado
- Contact:
Re: Beginner help with putty
Don't discount the Perfect Plastic Putty. Because it's water based it is incredibly easy to swab up any unwanted putty with a wet paint brush. Another great product I almost forgot about is Apoxie Sculpt by Aves. It's a two part water based epoxy that cleans up with water. First time I saw this used was by Floyd Werner when he made a joint surrounded by rivets disappear without any damage to the rivets.
Dave
Dave
-
gott_cha

- Posts: 382
- Joined: Wed Nov 17, 2010 10:51 am
- Location: S.C.
Re: Beginner help with putty
Keep in mind that putty or fillers will shrink as they dry thus the reason to "close" the gap as much as possible first. Also too thick a layer may crack or split as it dries.
On that large gap you are dealing with,..see if you can close it up a bit by using "shims" of styrene sheet or small styrene round or half round stock... Then work your choice of putty in the smaller gap with the edge of a xacto blade. And as stated above...tape off the area on either side to limit the repair area as small as possible to avoid damaging surrounding detail.
Some fillers like Squadron white or green can be thinned a bit with acetone.. Also another product to help you with deck seams is "white-out" correction fluid...apply it sparingly with a small paint brush.
But The best I have found is what Davidwaples has recommended.. PPP
On that large gap you are dealing with,..see if you can close it up a bit by using "shims" of styrene sheet or small styrene round or half round stock... Then work your choice of putty in the smaller gap with the edge of a xacto blade. And as stated above...tape off the area on either side to limit the repair area as small as possible to avoid damaging surrounding detail.
Some fillers like Squadron white or green can be thinned a bit with acetone.. Also another product to help you with deck seams is "white-out" correction fluid...apply it sparingly with a small paint brush.
But The best I have found is what Davidwaples has recommended.. PPP
-
Rob-UK

- Posts: 586
- Joined: Fri Feb 27, 2009 10:06 am
- Location: Leeds, UK.
Re: Beginner help with putty
Anyone use this? 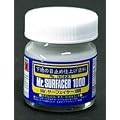
Can be painted into a gap with a fine brush, seems to shrink down when set, but sets quickly so another layer can be added on top fairly quickly after (may need a few layers).
Sands down like normal putty when set, but hopefully with less overspill onto surrounding areas. It does need a fairly strong spirit to clean the brush soon after use.
Can be painted into a gap with a fine brush, seems to shrink down when set, but sets quickly so another layer can be added on top fairly quickly after (may need a few layers).
Sands down like normal putty when set, but hopefully with less overspill onto surrounding areas. It does need a fairly strong spirit to clean the brush soon after use.
-
biggles2
- Posts: 1980
- Joined: Thu May 30, 2013 1:50 pm
Re: Beginner help with putty
I've used that once or twice. It's very toxic. As soon as I open it, my wife upstairs knows! "Use only in a well-ventilated area!" 
-
Jon

- Posts: 438
- Joined: Fri Nov 02, 2007 9:20 am
Re: Beginner help with putty
I use it, don't need much of it, but it also removes easily with nail polish remover. No sanding required. I apply it with a fine stretched sprue tip.Rob-UK wrote:Anyone use this?
Can be painted into a gap with a fine brush, seems to shrink down when set, but sets quickly so another layer can be added on top fairly quickly after (may need a few layers).
Sands down like normal putty when set, but hopefully with less overspill onto surrounding areas. It does need a fairly strong spirit to clean the brush soon after use.
I also use stretched sprue tips to fill round holes. Just thread it in till the tip gets thick enough to stop, jam it in lightly, apply a small amount of very thin glue. Once cured, cut it off flat against the surface and lightly wet sand.
-
samloi
- Posts: 4
- Joined: Tue Dec 01, 2015 8:25 am
Re: Beginner help with putty
I'm using this but with the 500grit type. As said this thing shrinks quite abit. I tried to cover the seam lines with it and it looks to have fully covered the seams when wet. But once it dries, the seamlines are visible again and then you'll need sand off the excess parts and apply the the stuffs again.........Rob-UK wrote:Anyone use this?
Can be painted into a gap with a fine brush, seems to shrink down when set, but sets quickly so another layer can be added on top fairly quickly after (may need a few layers).
Sands down like normal putty when set, but hopefully with less overspill onto surrounding areas. It does need a fairly strong spirit to clean the brush soon after use.
-
biggles2
- Posts: 1980
- Joined: Thu May 30, 2013 1:50 pm
Re: Beginner help with putty
As it's called, "Mr Surfacer", it's meant to be a surface primer and to repair sanding scratches and shallow gouges. Not meant as a joint filler.
-
DWPC

- Posts: 108
- Joined: Fri Jan 22, 2016 11:10 am
- Location: Northern Arizona
Re: Beginner help with putty
Does water-based Perfect Plastic Putty stand up under lacquer primer applied over it?
Will primer adequately shield it from breaking down from water-based acrylic paint applied over it?
If not, what sandable putty (eg not epoxy) can be used under lacquer without fear of solvent breakdown?
I'm asking about general use for filling pinholes, minor gaps, and low areas in larger flat parts.
Will primer adequately shield it from breaking down from water-based acrylic paint applied over it?
If not, what sandable putty (eg not epoxy) can be used under lacquer without fear of solvent breakdown?
I'm asking about general use for filling pinholes, minor gaps, and low areas in larger flat parts.
Last edited by DWPC on Mon Jan 25, 2016 11:03 am, edited 1 time in total.
Dennis
On the ways: USS Oregon 1/225 by Glencoe
On the ways: USS Oregon 1/225 by Glencoe
-
robertmelvin

- Posts: 2025
- Joined: Thu Aug 19, 2010 11:39 am
- Location: Harlan, Kentucky, U.S.A.
Re: Beginner help with putty
Don't ignore the possible use of strip styrene to fill gaps, or in some instances to hide them with small diameter quarter-round sections. A possible alternative to putty to keep in mind. I also like the Apoxie Sculpt. Been using it for years. Easy to use, long working time. You might look at Mike Ashey's site to get an idea of what I'm talking about as far as using strip styrene to fill/mask gaps.
Bob
Bob
Last edited by robertmelvin on Mon Jan 25, 2016 11:57 am, edited 1 time in total.
Give me a fast ship, for I would like to get out of harm's way!
-
biggles2
- Posts: 1980
- Joined: Thu May 30, 2013 1:50 pm
Re: Beginner help with putty
I'm doing this for hairline gaps: glue a section of stretched sprue along the hairline, and saturate it with liquid glue. When the piece of stretched sprue is soft enough, squash it down flat to fill the gap, and let it set for a few hours, or overnight, until the kit and the sprue have fused into one, then sand with graded sandpapers. The hairline will disappear. If using different color plastics is an issue, use stretched sprue from the same kit.
-
gott_cha
- Posts: 382
- Joined: Wed Nov 17, 2010 10:51 am
- Location: S.C.
Re: Beginner help with putty
That is a good technique I have used on Aircraft fuselages where simply "puttying" the gap would fail due to stress over the area, and or, the area was too large to hide with just applications or layers of puttybiggles2 wrote:I'm doing this for hairline gaps: glue a section of stretched sprue along the hairline, and saturate it with liquid glue. When the piece of stretched sprue is soft enough, squash it down flat to fill the gap, and let it set for a few hours, or overnight, until the kit and the sprue have fused into one, then sand with graded sandpapers. The hairline will disappear. If using different color plastics is an issue, use stretched sprue from the same kit.
-
biggles2
- Posts: 1980
- Joined: Thu May 30, 2013 1:50 pm
Re: Beginner help with putty
DANG!!! And I thought I invented that just this weekend!  I'll have to rush and put a patent on it!
I'll have to rush and put a patent on it! -
Harquebus

- Posts: 138
- Joined: Thu Sep 12, 2013 9:33 am
Re: Beginner help with putty
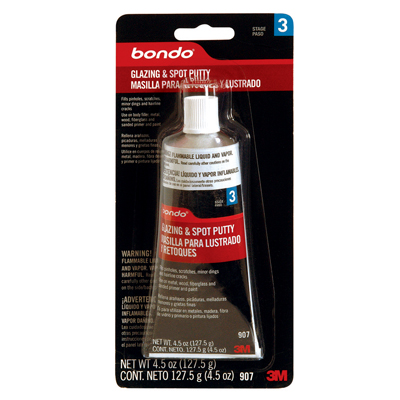
Anyone use Bondo Glazing and Spot Putty? It's a one part putty intended for auto bodywork but works great on plastic models. Dries fast and is easy to sand. I use denatured alcohol for thinning and clean up. It has a red oxide color so for me it's easy to see on any model. When sanded it sort of turns pink.
~Harq