To HMS Victory and beyond
Moderators: BB62vet, MartinJQuinn, JIM BAUMANN, Jon, Dan K
-
EJFoeth
- Posts: 2907
- Joined: Wed Jan 21, 2009 1:51 pm
Re: To HMS Victory and beyond
That colour effect on the brass barrels is pretty convincing, correct or otherwise
-
kurusu
- Posts: 71
- Joined: Thu Jan 19, 2017 4:33 am
Re: To HMS Victory and beyond
I will leave the answer to someone who was there, and painted itdafi wrote:Slow progress ...
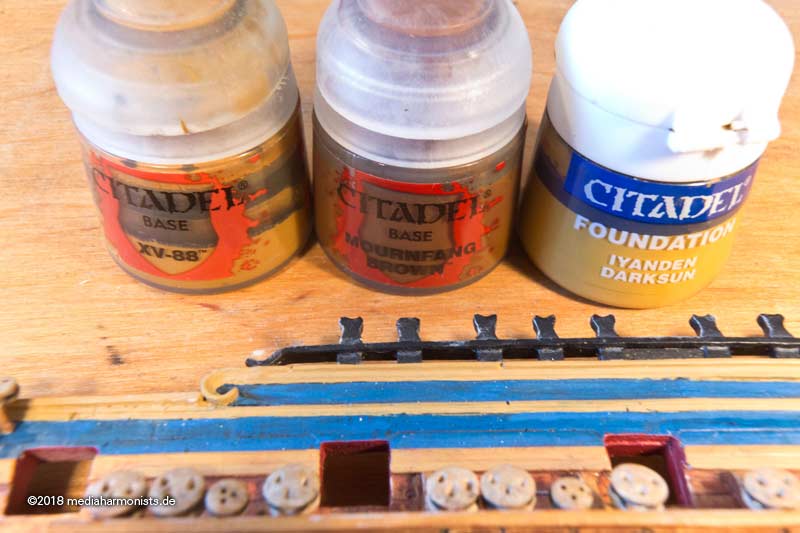
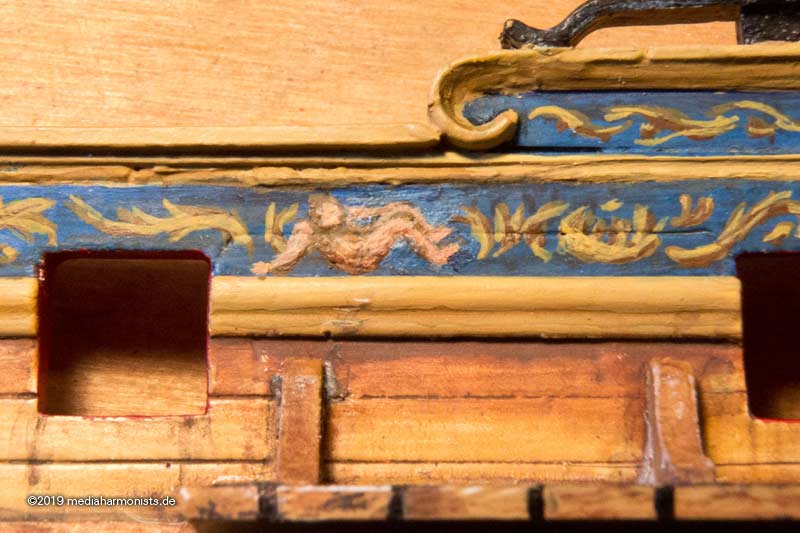
Next came the frieze:
3 colors ...
... first the middle one ...
... then into darkness they dwell ...
... then come the highlights ...
... gonna be fine enough
The same way the cherub was done.
Then tried some shading for the bronze guns.
The huibrol bronze was the first test. Some brown already helps a lot
From the museums one knows green or polished in brass-look. But how did they look in real life when in use?
Questionmarks!!!
XXXDAn

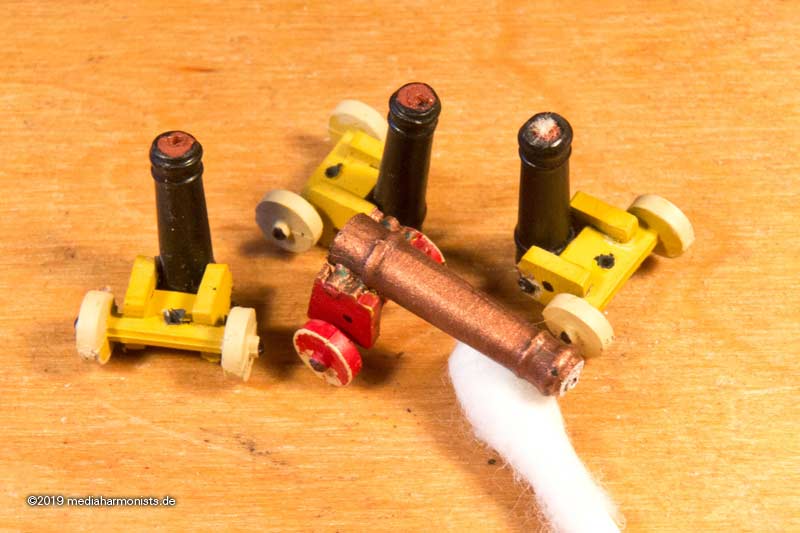
Some of the guns seem to have some sort of "t shirt tan
Edit. I also wonder if all those guns were bronze.
- Attachments
-
-
-
dafi

- Posts: 996
- Joined: Mon Mar 12, 2012 11:13 am
- Location: Ludwigsburg/Germany
- Contact:
Re: To HMS Victory and beyond
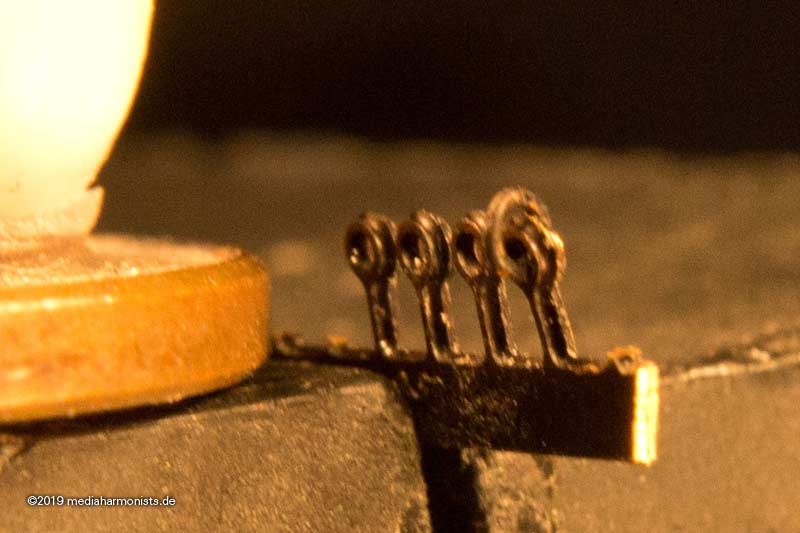
Some more tinkering around happened ...
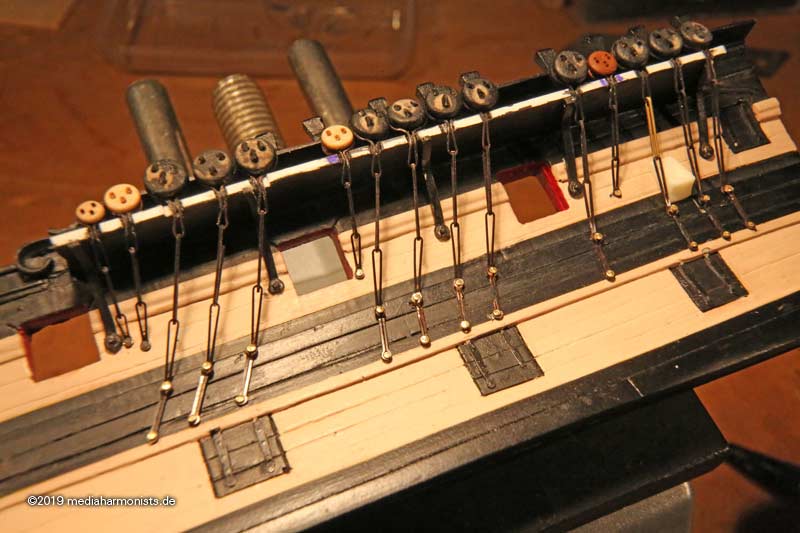
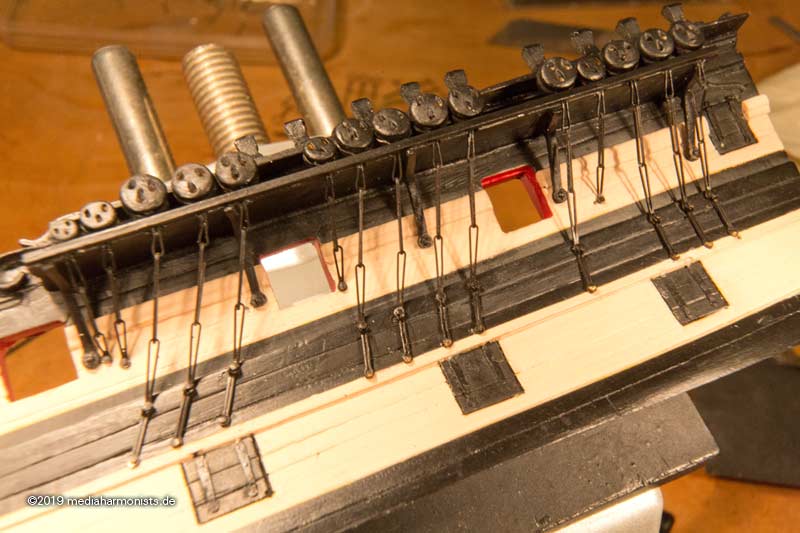
Some 0,6 mm brass wire was bend on the template ...
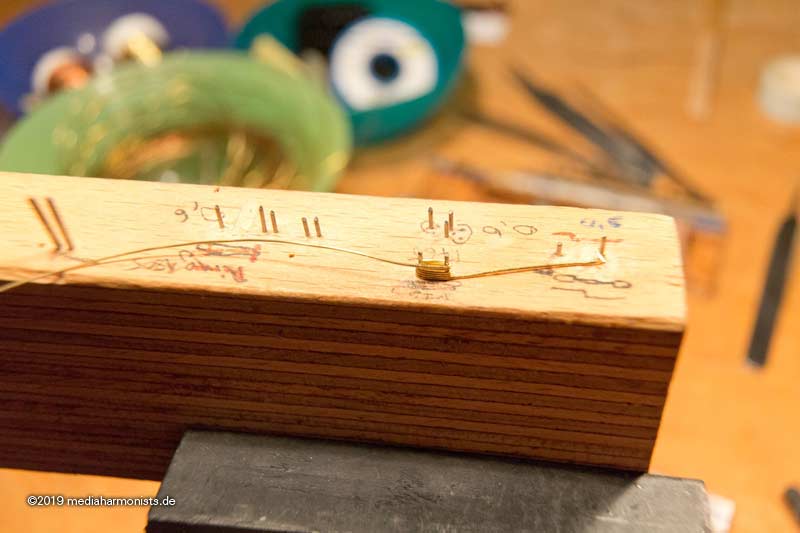
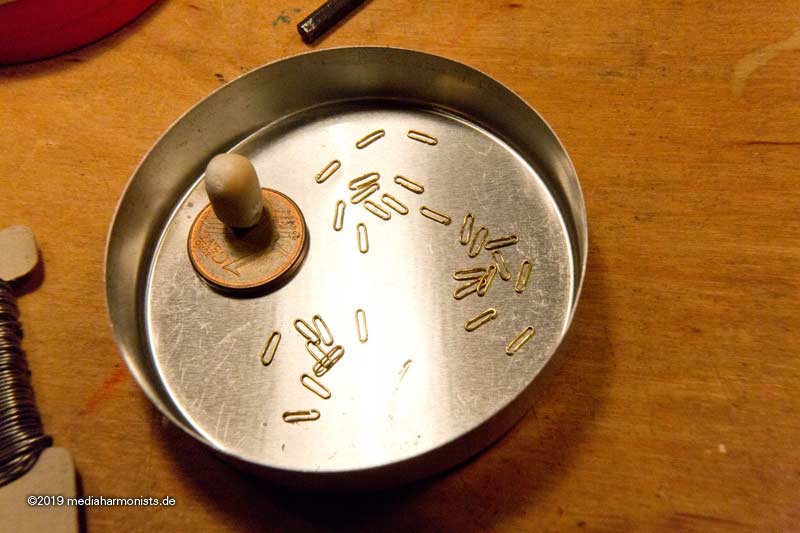
... cut open ...
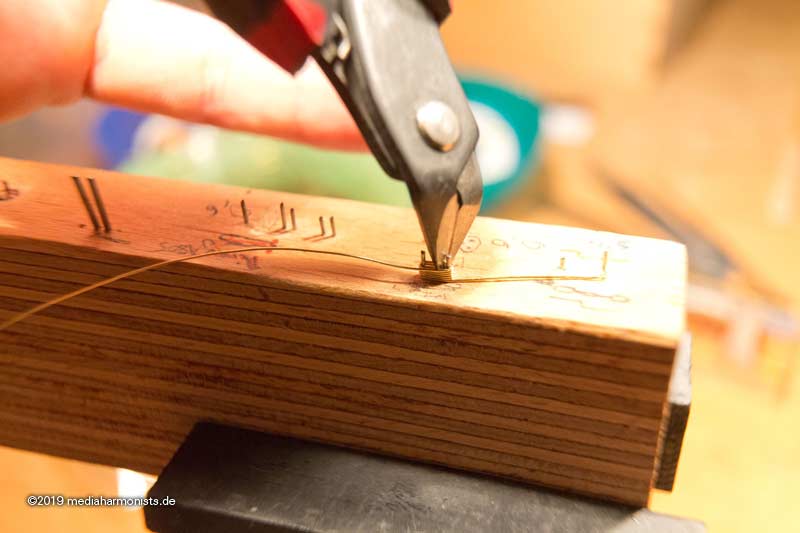
...collected ...
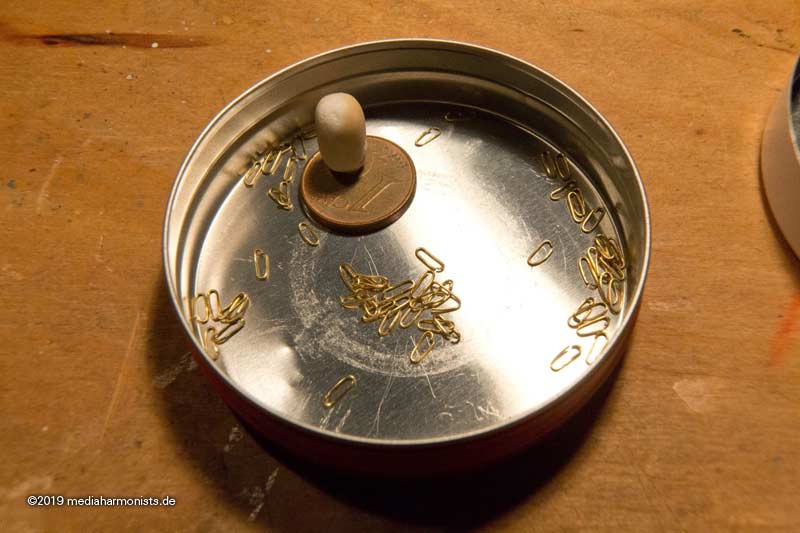
... alined ...

... and looks ok.
Then soldered with homeopathic dosages of solder ...
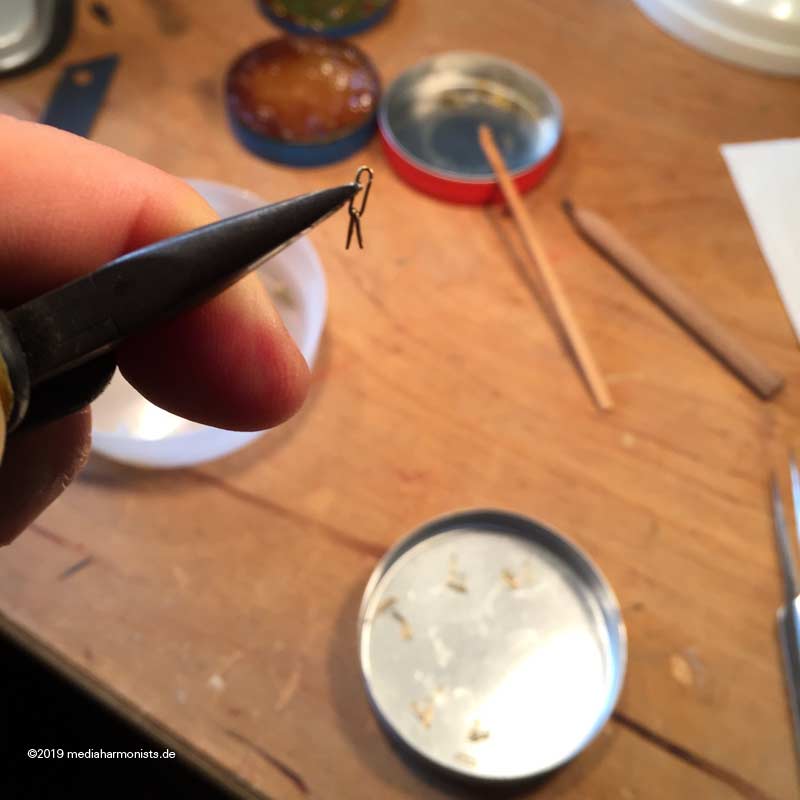
... and blackened.
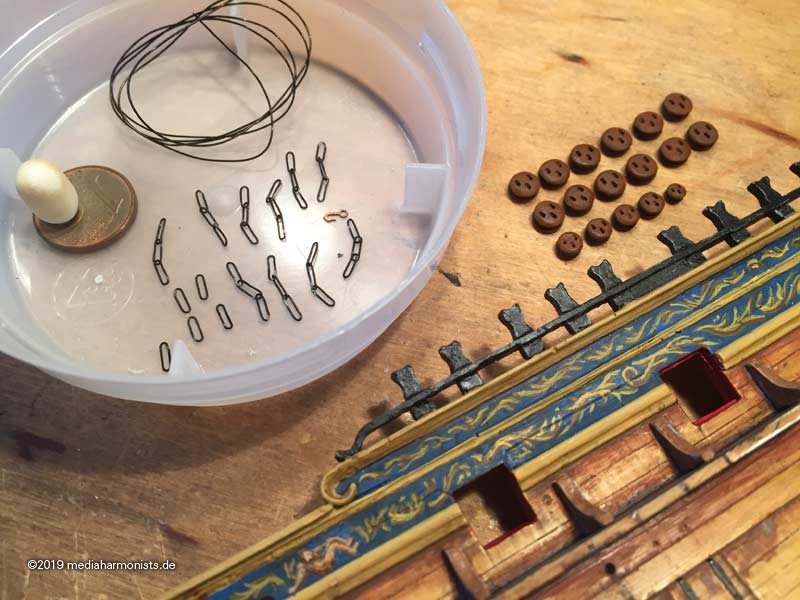
XXXDAn
Some 0,6 mm brass wire was bend on the template ...
... cut open ...
...collected ...
... alined ...
... and looks ok.
Then soldered with homeopathic dosages of solder ...
... and blackened.
XXXDAn
Last edited by dafi on Sat Aug 17, 2019 3:51 am, edited 1 time in total.
To Victory and beyond ...
viewtopic.php?f=59&t=99050&start=60
See also our german forum for the age of Sail and History:
http://www.segelschiffsmodellbau.com
viewtopic.php?f=59&t=99050&start=60
See also our german forum for the age of Sail and History:
http://www.segelschiffsmodellbau.com
-
dafi
- Posts: 996
- Joined: Mon Mar 12, 2012 11:13 am
- Location: Ludwigsburg/Germany
- Contact:
Re: To HMS Victory and beyond
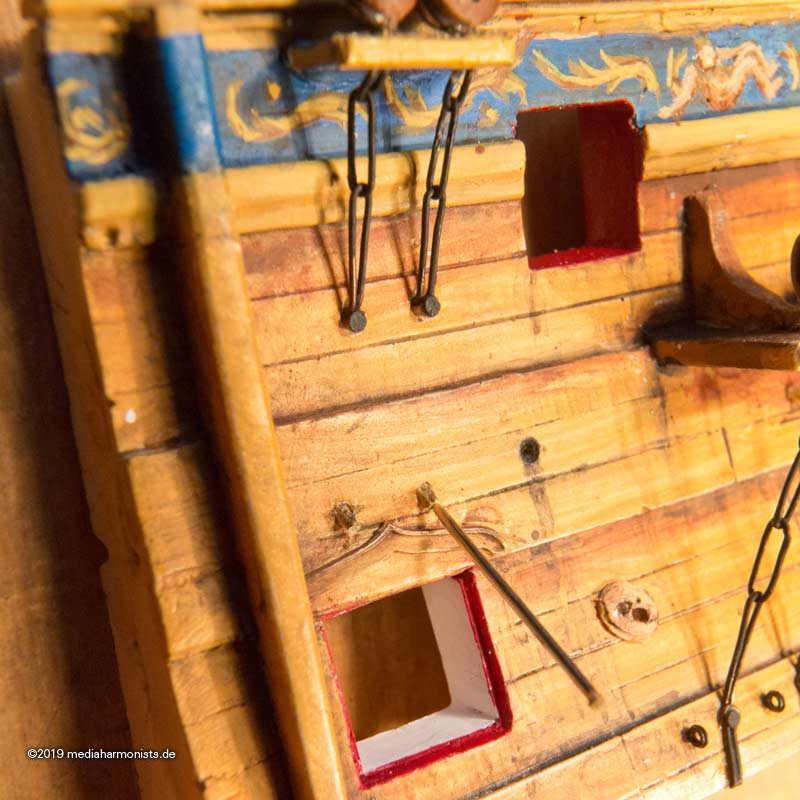
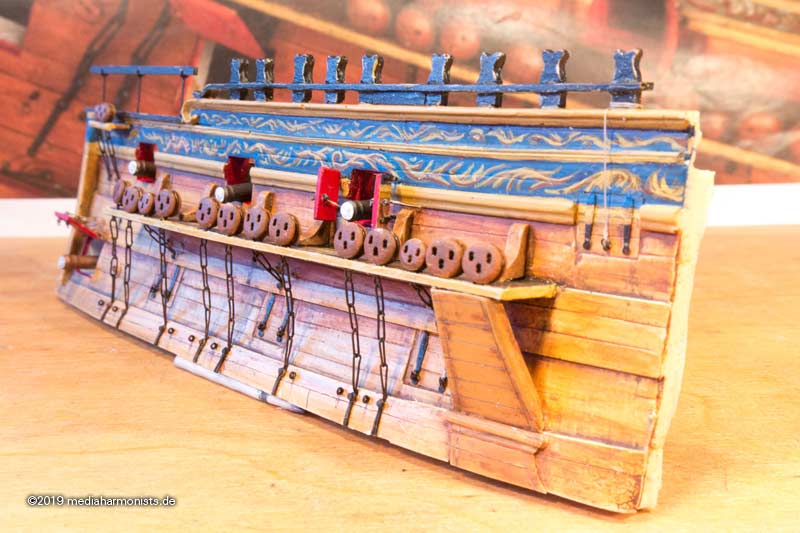
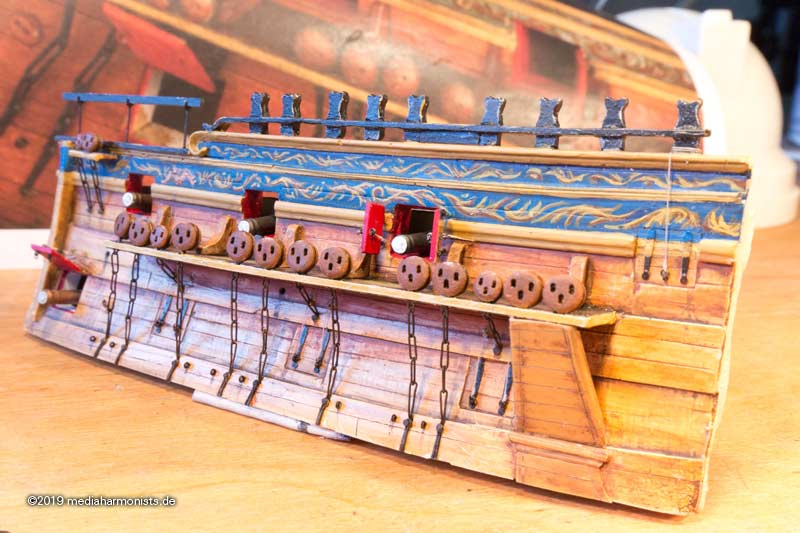
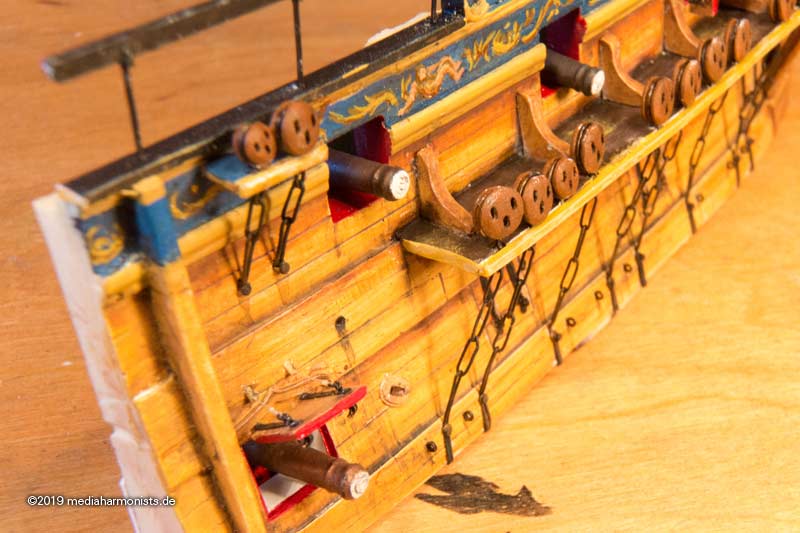
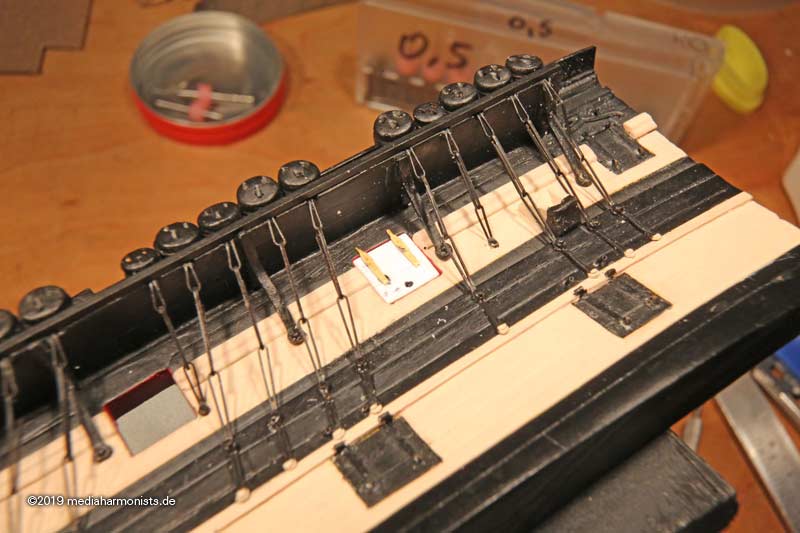
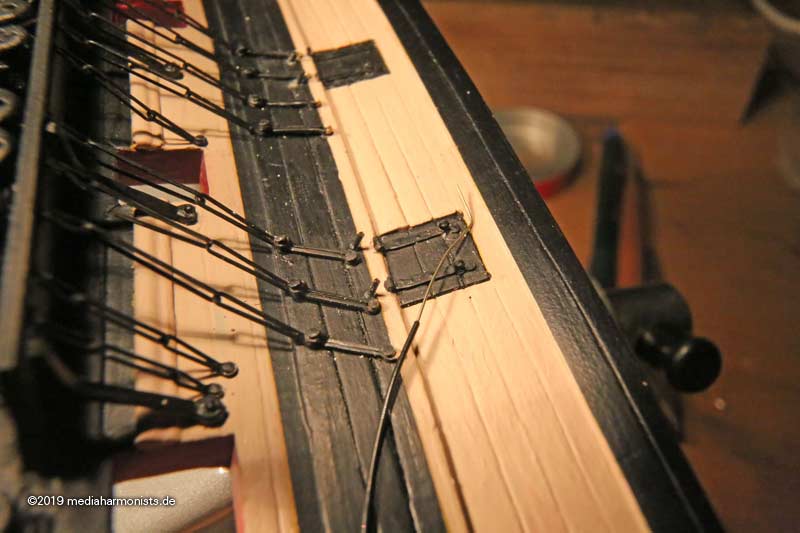
Once the irons being fixed one can see the difference in V1 to the actual version. As the first build just developed without further planing, it was not possible to fix all the irons properly as for the ports, so it was good to have a fall back version and to start anew 
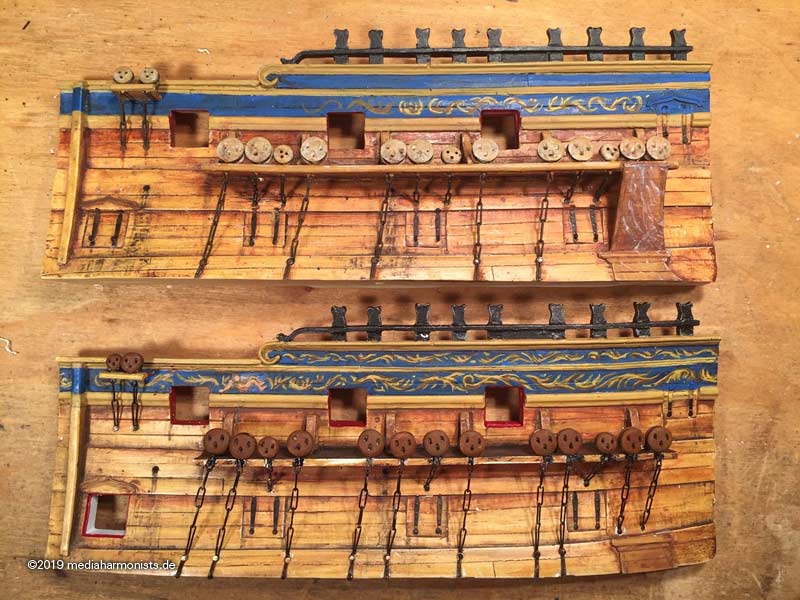
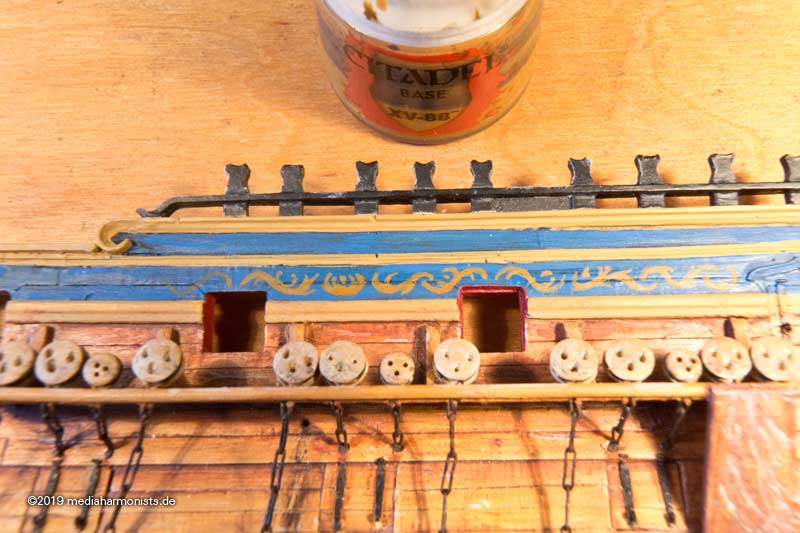
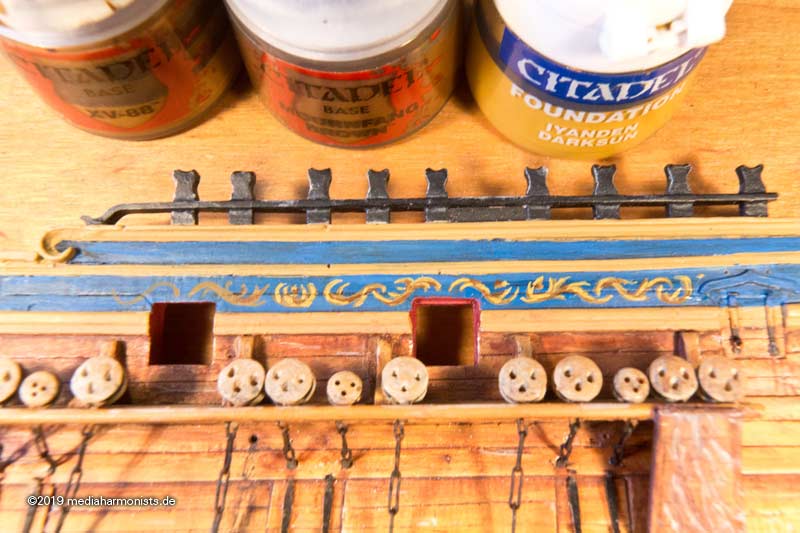
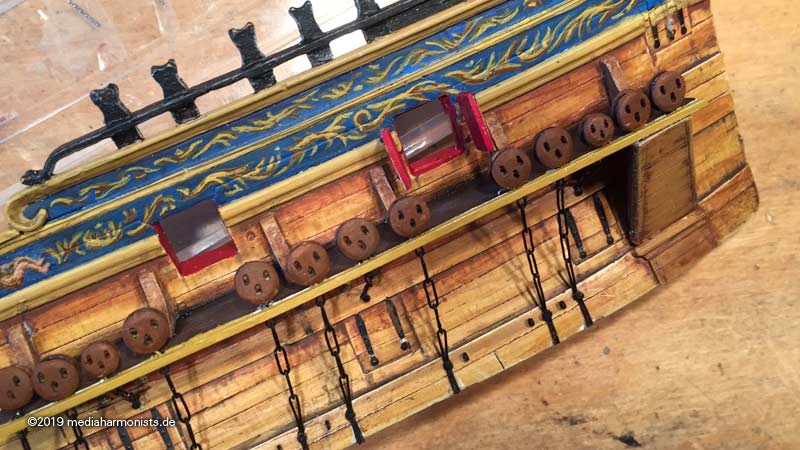
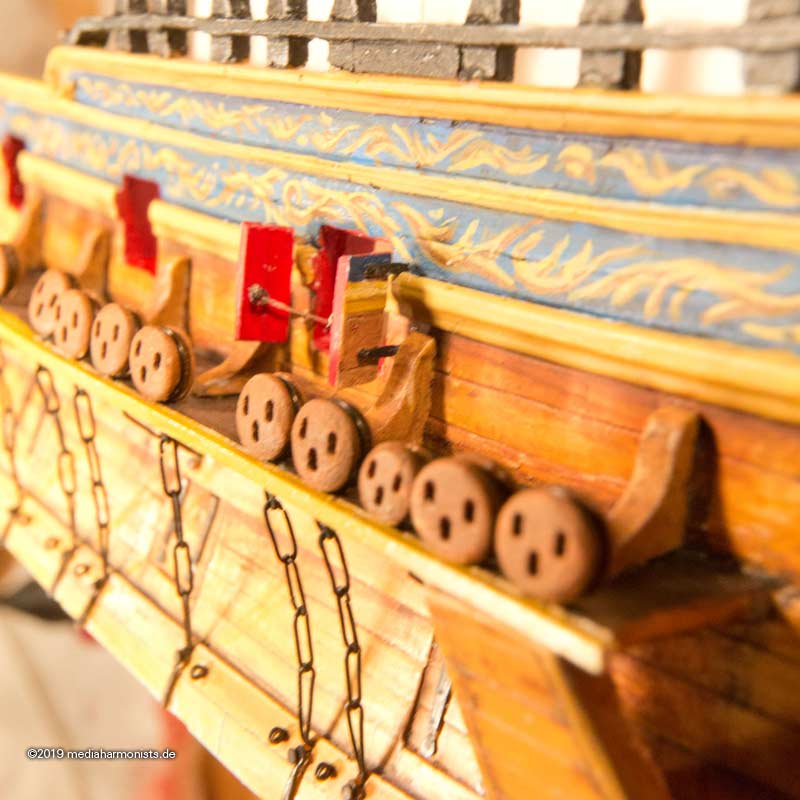
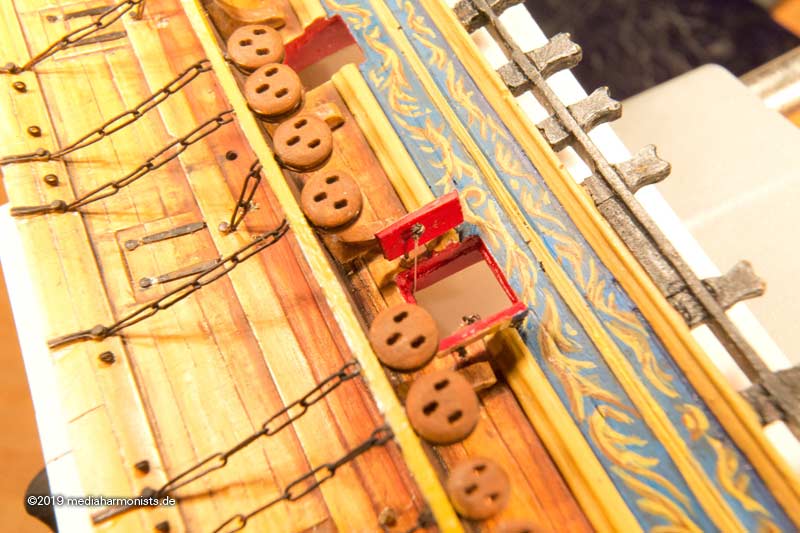
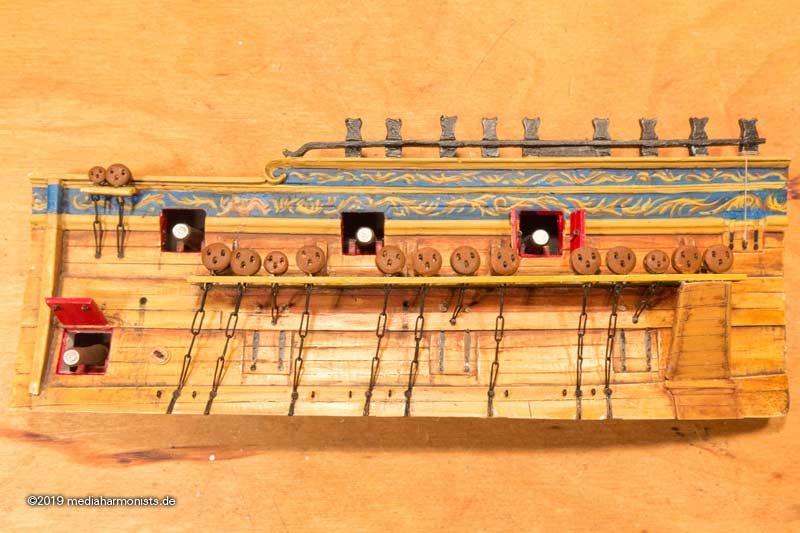
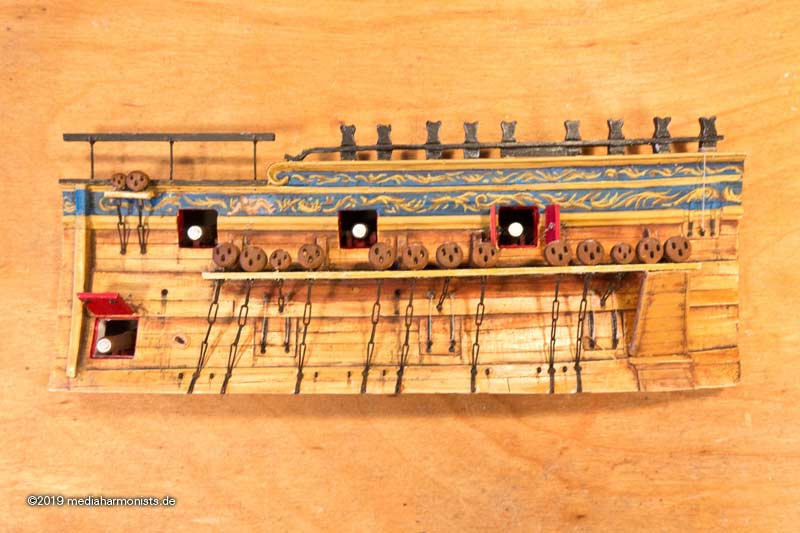
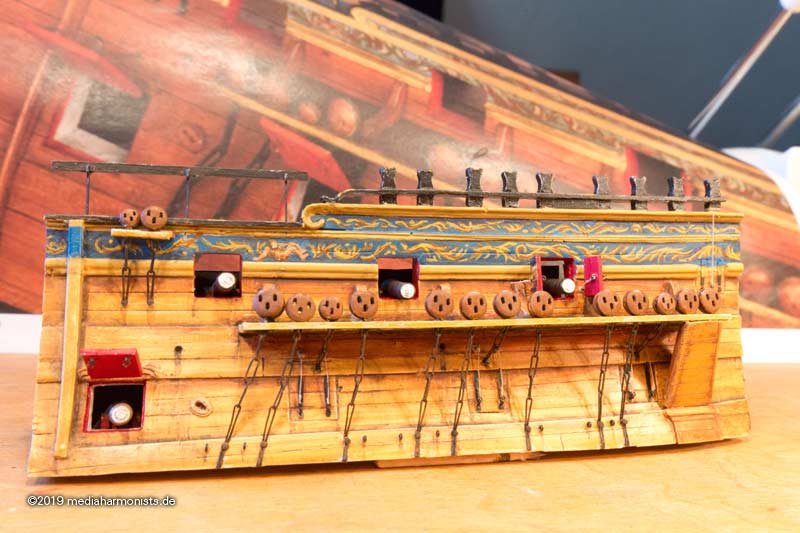
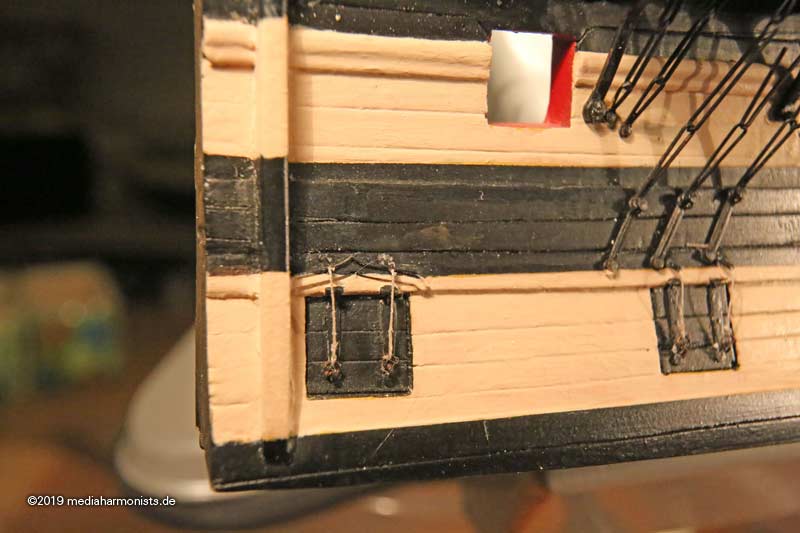
An after all this fiddling with the small tiny chain links it was good to fix something bigger in a decent size ...

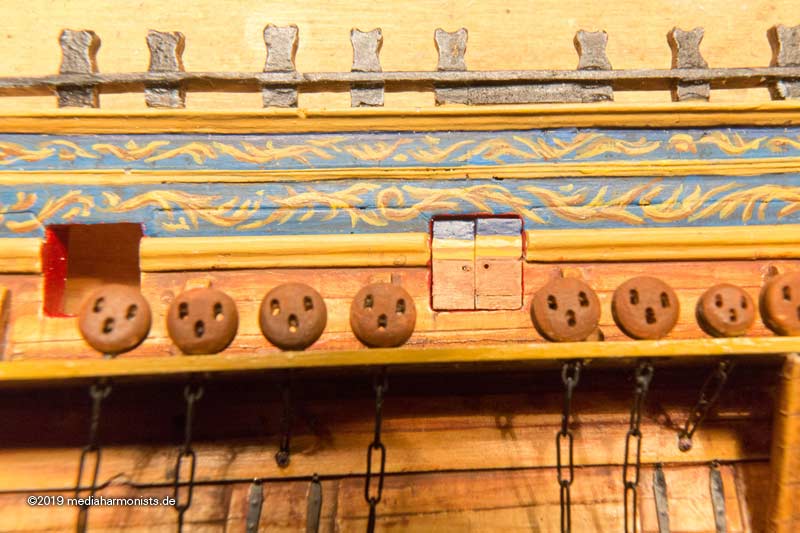
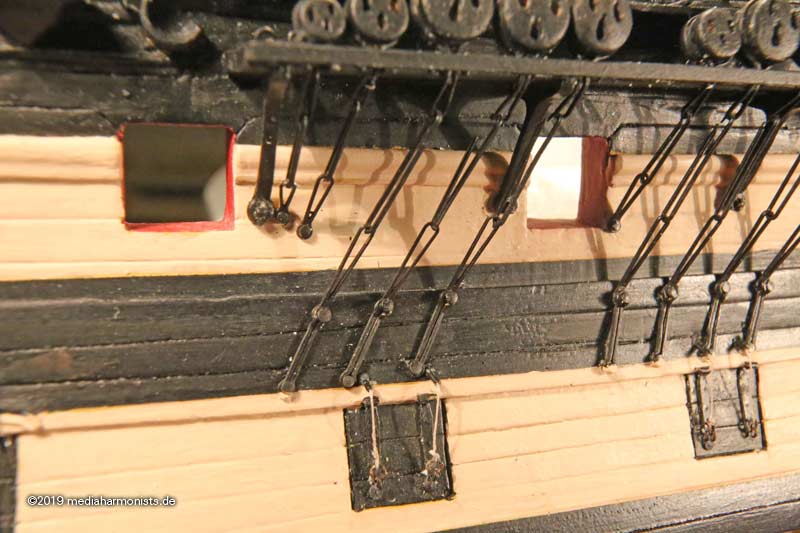
... the port for the main tack, the batten for the channel board being fixed, some ringbolts to straighten the shrouds and the missing port lids ...
... splashed some paint ...
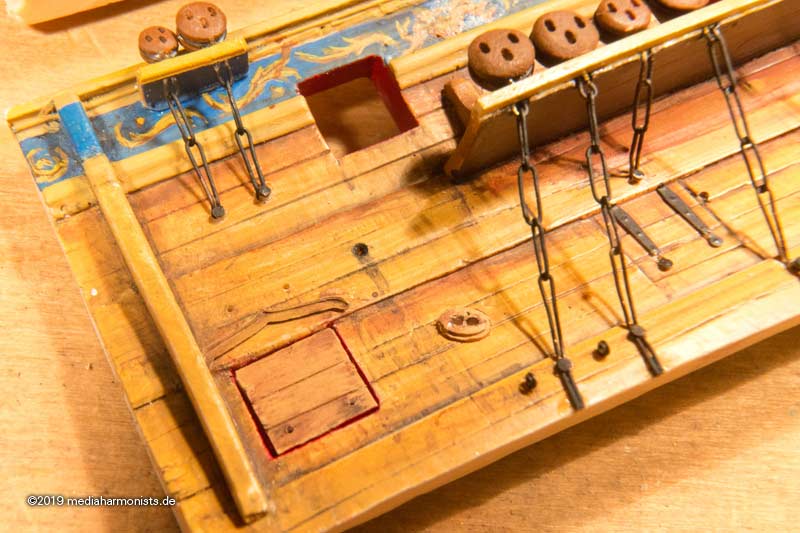
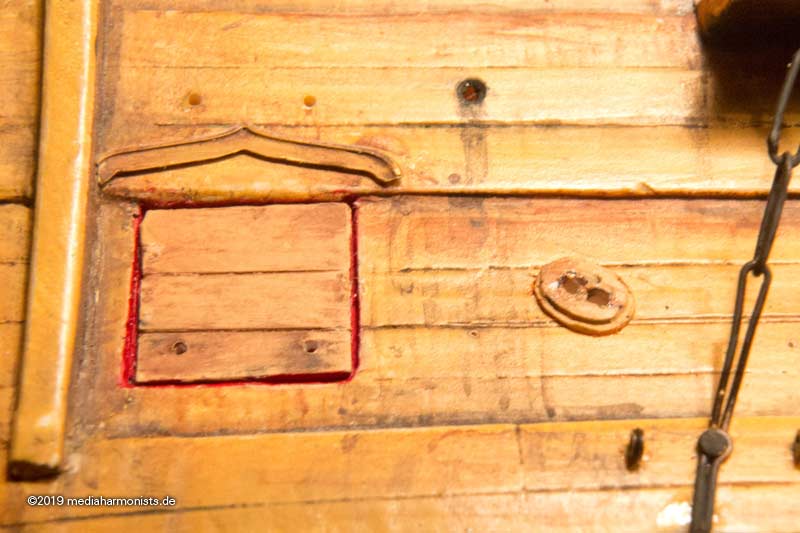
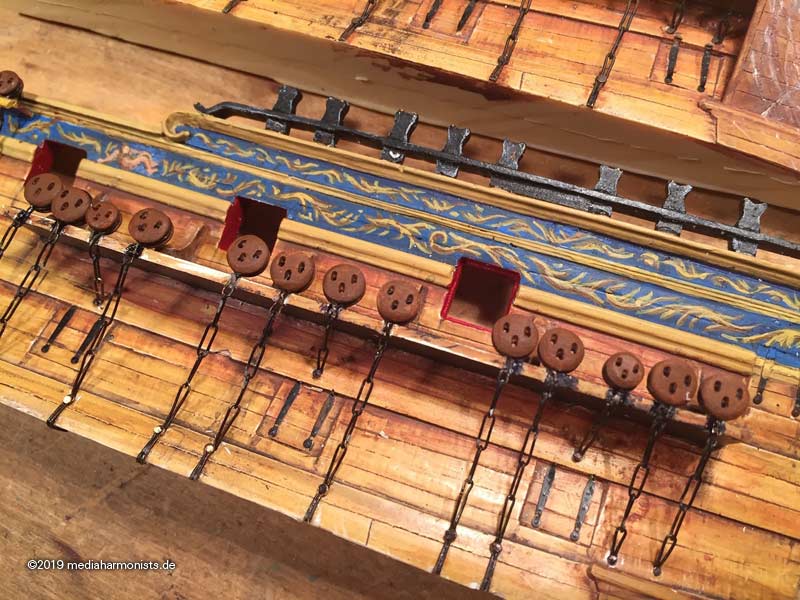
... the side half door lids with the painted frieze ...

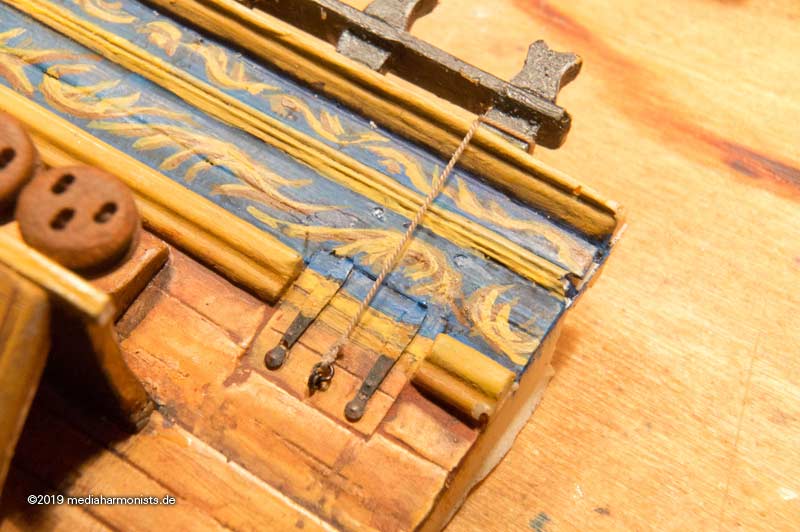
... and the very elegant conduct of the lifting halliard of the foremost gun port lid
XXXDAn
An after all this fiddling with the small tiny chain links it was good to fix something bigger in a decent size ...
... the port for the main tack, the batten for the channel board being fixed, some ringbolts to straighten the shrouds and the missing port lids ...
... splashed some paint ...
... the side half door lids with the painted frieze ...
... and the very elegant conduct of the lifting halliard of the foremost gun port lid
XXXDAn
To Victory and beyond ...
viewtopic.php?f=59&t=99050&start=60
See also our german forum for the age of Sail and History:
http://www.segelschiffsmodellbau.com
viewtopic.php?f=59&t=99050&start=60
See also our german forum for the age of Sail and History:
http://www.segelschiffsmodellbau.com
-
Jabberwock

- Posts: 502
- Joined: Thu Mar 31, 2016 1:52 pm
- Location: Inverness
Re: To HMS Victory and beyond
Cheers, Jabb
HMS Hood, the big one!
I used to be indecisive, now I'm not so sure.
I used to be indecisive, now I'm not so sure.
-
dafi
- Posts: 996
- Joined: Mon Mar 12, 2012 11:13 am
- Location: Ludwigsburg/Germany
- Contact:
Re: To HMS Victory and beyond
Final sprint in view
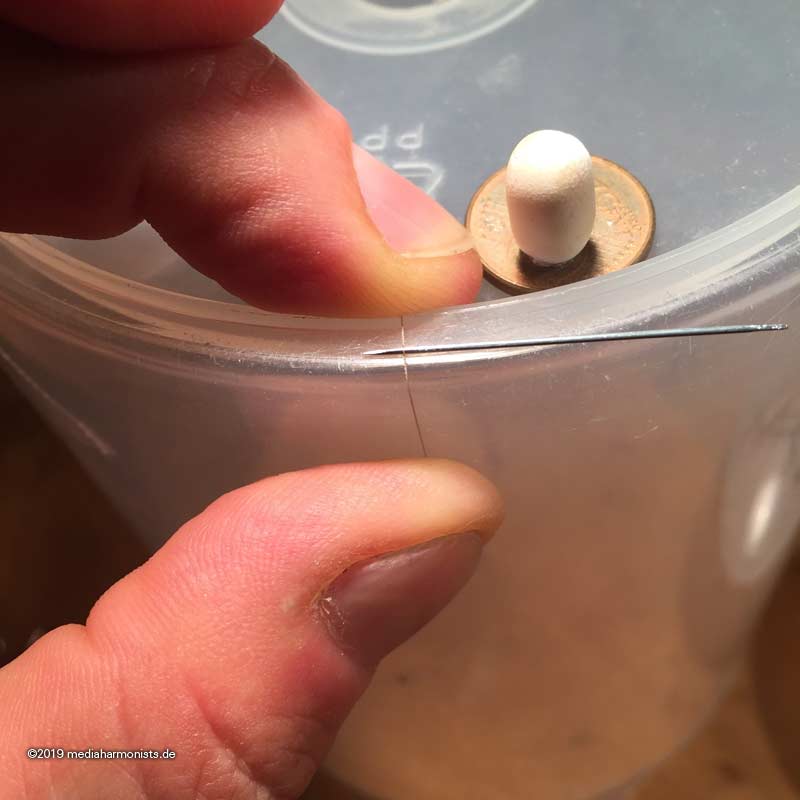
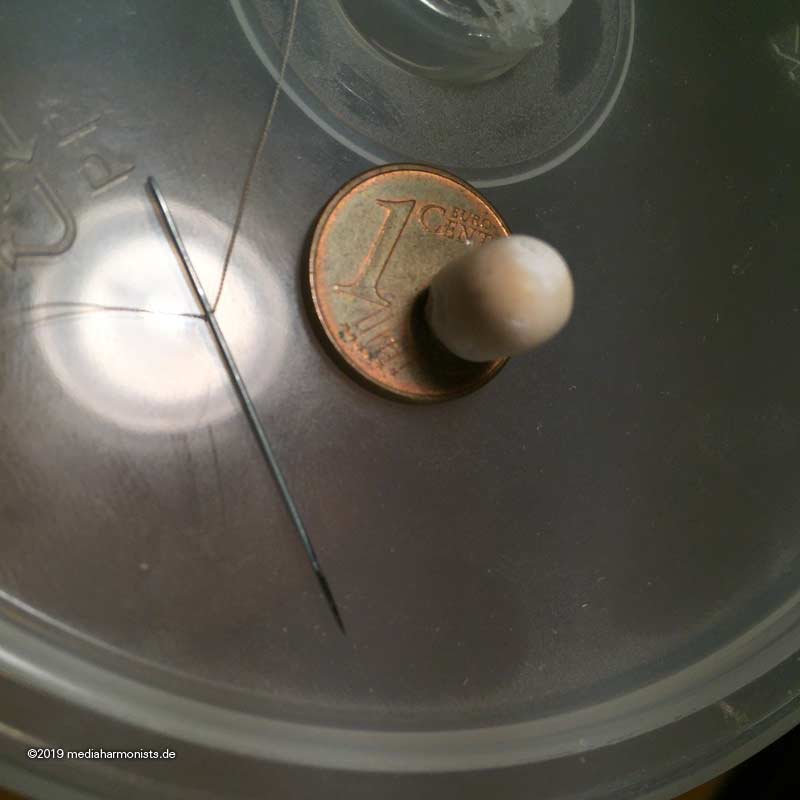
Take a sprue, drill a hole and ...
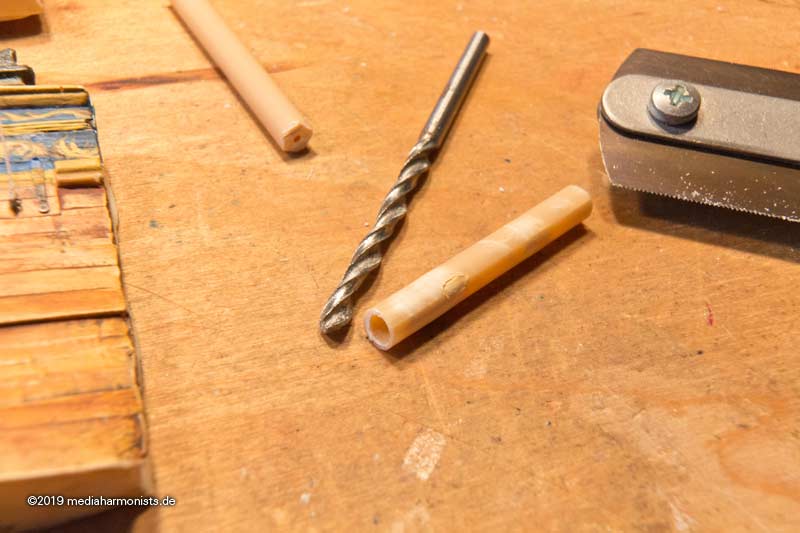
... heat it up and pull
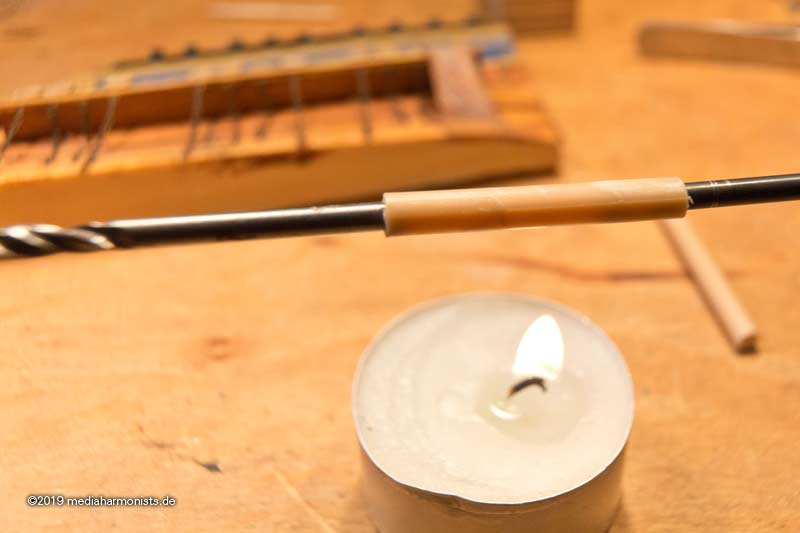
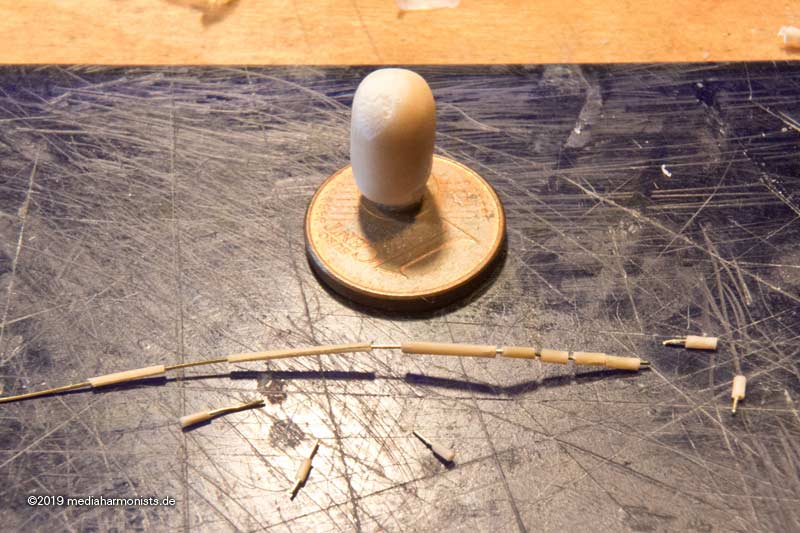
After some tries I had suitable tubes of 0,7 mmm outside and 0,3 mm inside. Alined them on 0,3 mm wire to be able to cut without smashing them by rolling under a knife.
Drilled some 0,75 mm in the right angle into the ship ...

... and glue the tubes in with a wire still as handling help.
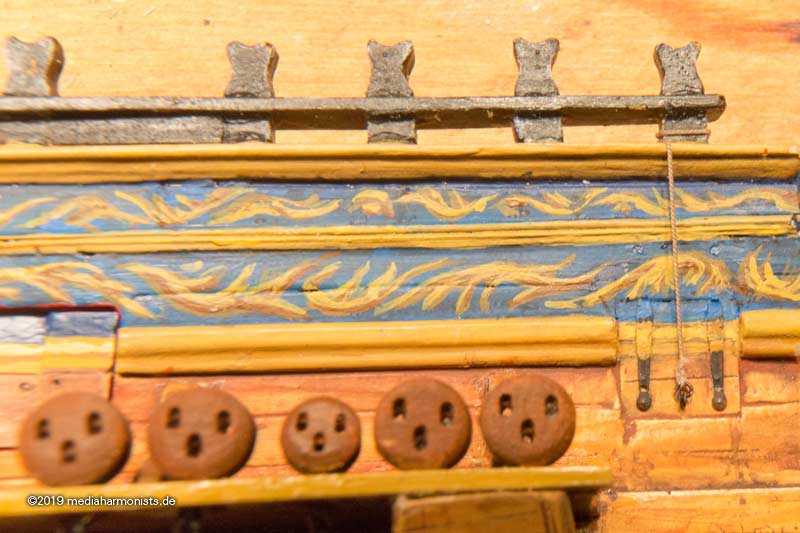
Checked the angle and checked the opening with a needle, then still applied some paint nice name "rotten leather" .
.
Then fixing the halliards, to unravel the thread did not work as they were too thin ...
... so held the thread tight onto a round edge and usied a sharpened needle in the right angle. Works rather easy ...
... prepared the ringbolt ...
... threaded the bold and lead the free part of the thread through the eye of the needle, pulled ...
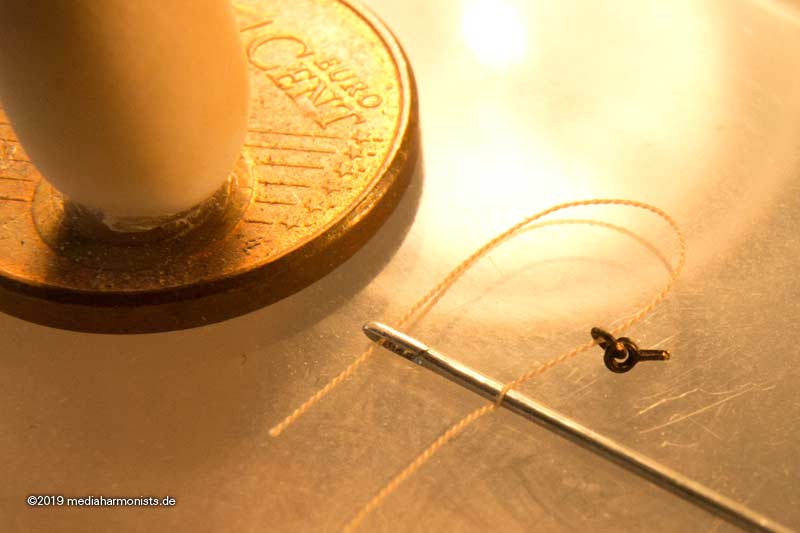
... and a second go for the splice, some glue and - DONE !!!
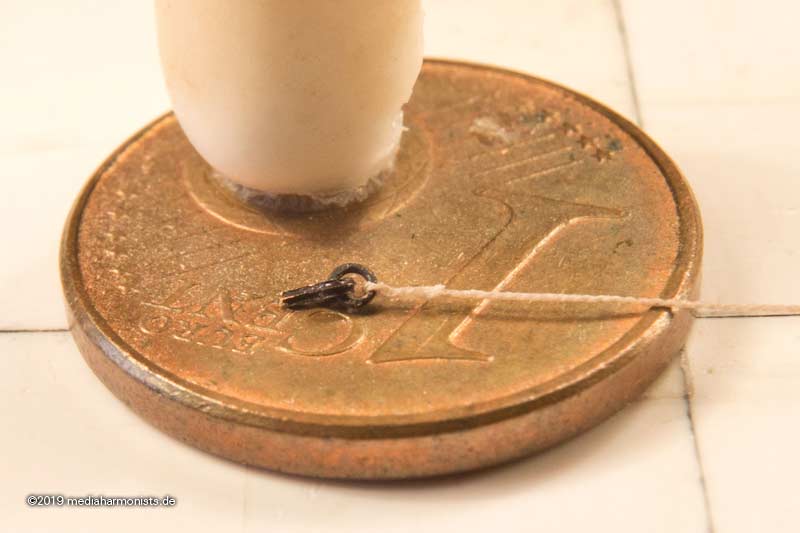
The port lids are waiting already
XXXDAn
Take a sprue, drill a hole and ...
... heat it up and pull
After some tries I had suitable tubes of 0,7 mmm outside and 0,3 mm inside. Alined them on 0,3 mm wire to be able to cut without smashing them by rolling under a knife.
Drilled some 0,75 mm in the right angle into the ship ...
... and glue the tubes in with a wire still as handling help.
Checked the angle and checked the opening with a needle, then still applied some paint nice name "rotten leather"
Then fixing the halliards, to unravel the thread did not work as they were too thin ...
... so held the thread tight onto a round edge and usied a sharpened needle in the right angle. Works rather easy ...
... prepared the ringbolt ...
... threaded the bold and lead the free part of the thread through the eye of the needle, pulled ...
... and a second go for the splice, some glue and - DONE !!!
The port lids are waiting already
XXXDAn
To Victory and beyond ...
viewtopic.php?f=59&t=99050&start=60
See also our german forum for the age of Sail and History:
http://www.segelschiffsmodellbau.com
viewtopic.php?f=59&t=99050&start=60
See also our german forum for the age of Sail and History:
http://www.segelschiffsmodellbau.com
-
europapete
- Posts: 156
- Joined: Thu Jan 05, 2017 8:39 pm
Re: To HMS Victory and beyond
Looking fantastic Dafi. Am saving up for all your sets, and saving this for reference for when I build my Heller kit. Damn good work, the best. Regards, Pete in RI
-
dafi
- Posts: 996
- Joined: Mon Mar 12, 2012 11:13 am
- Location: Ludwigsburg/Germany
- Contact:
Re: To HMS Victory and beyond
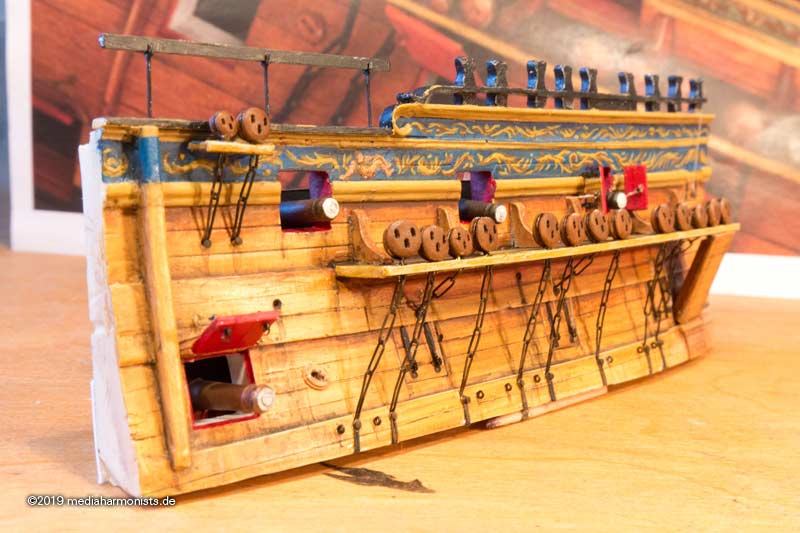
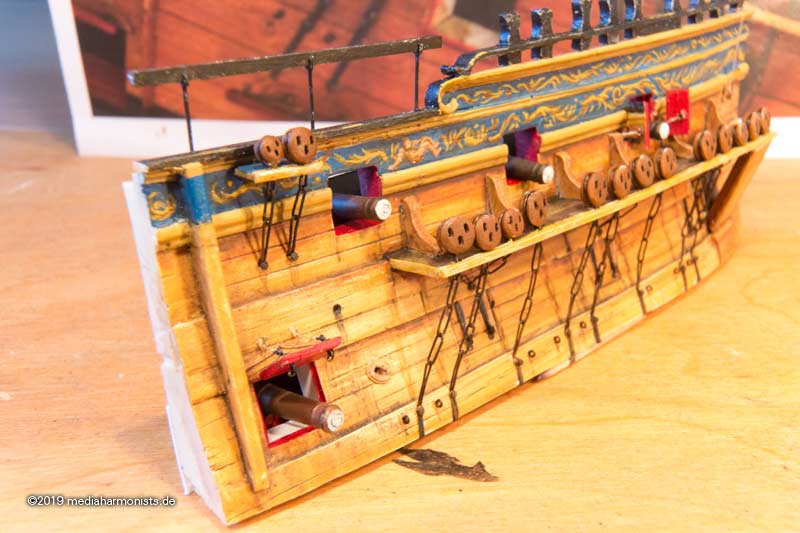
Made the missing lids ...
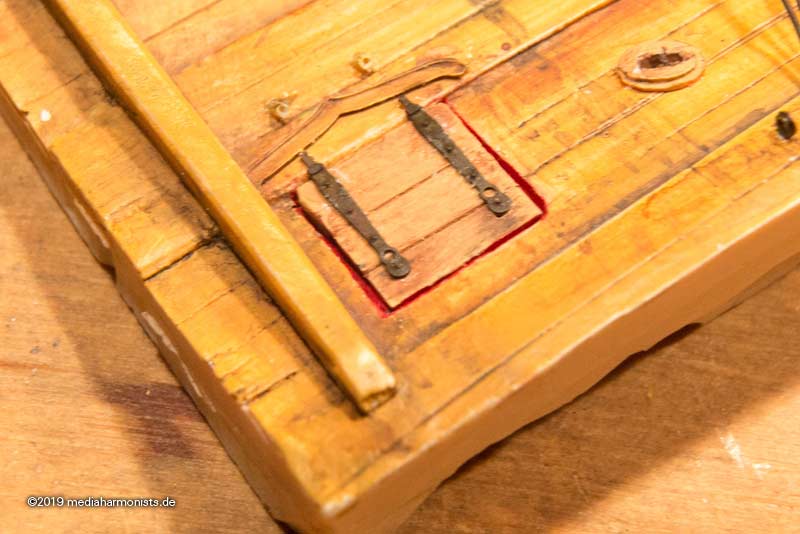
... drilled the holes for the hinge ...
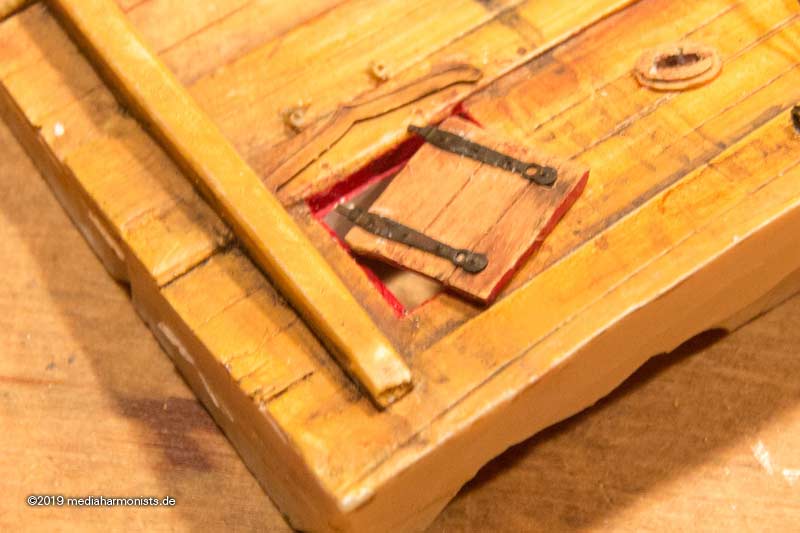
... fixed with the necessary distance ...
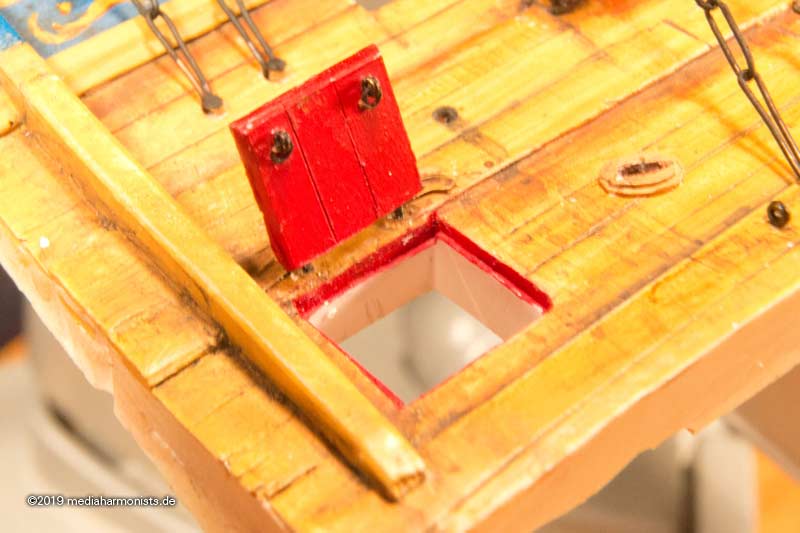
... and put in the lanyards.
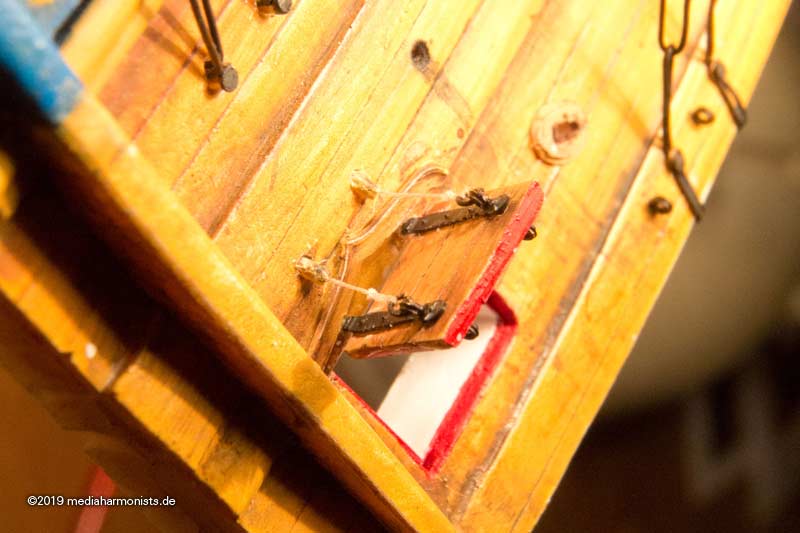
The half port lids need extra distance as fort the moulding.
So the hinges are quite far out.
Also put in the lanyards.
coming close to the finishing line
XXXDAn
... drilled the holes for the hinge ...
... fixed with the necessary distance ...
... and put in the lanyards.
The half port lids need extra distance as fort the moulding.
So the hinges are quite far out.
Also put in the lanyards.
coming close to the finishing line
XXXDAn
To Victory and beyond ...
viewtopic.php?f=59&t=99050&start=60
See also our german forum for the age of Sail and History:
http://www.segelschiffsmodellbau.com
viewtopic.php?f=59&t=99050&start=60
See also our german forum for the age of Sail and History:
http://www.segelschiffsmodellbau.com
-
dafi
- Posts: 996
- Joined: Mon Mar 12, 2012 11:13 am
- Location: Ludwigsburg/Germany
- Contact:
Re: To HMS Victory and beyond
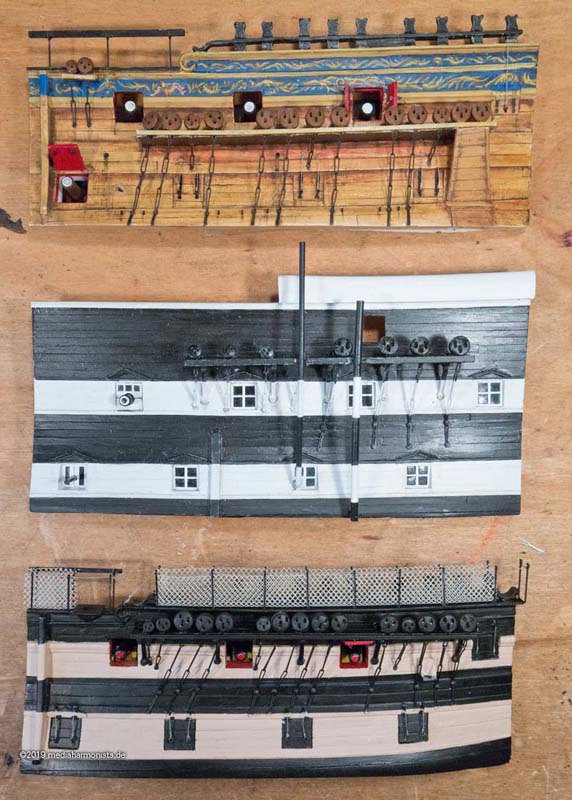
And one more piece finished
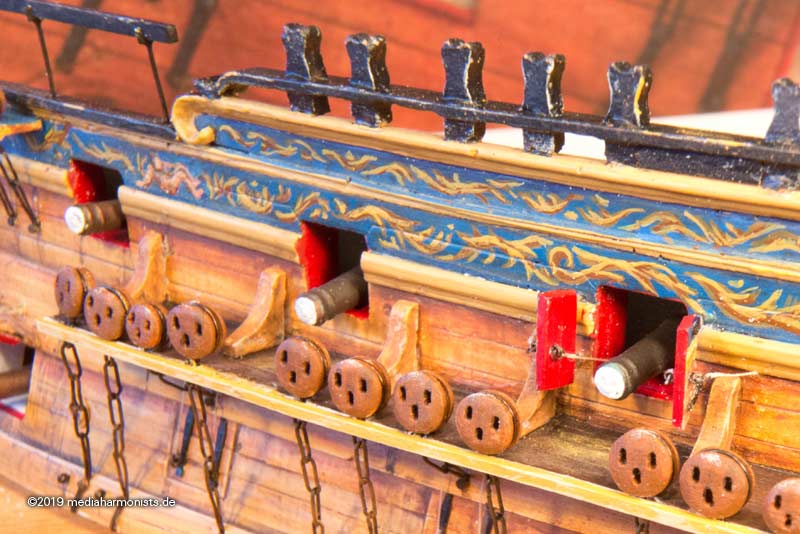
The material of the guns is still in discussion. Did the Vici n 1782 still have brass guns - as Bugler and McKay see as a possibility - or did she have already iron ones. Will keep you updated.
So that was no. 2 out of four being ready now. Approx. 1780 and 1920 are done, 1805 and 2018 still to follow.
Cheers, dafi
To Victory and beyond ...
viewtopic.php?f=59&t=99050&start=60
See also our german forum for the age of Sail and History:
http://www.segelschiffsmodellbau.com
viewtopic.php?f=59&t=99050&start=60
See also our german forum for the age of Sail and History:
http://www.segelschiffsmodellbau.com
-
dafi
- Posts: 996
- Joined: Mon Mar 12, 2012 11:13 am
- Location: Ludwigsburg/Germany
- Contact:
Re: To HMS Victory and beyond
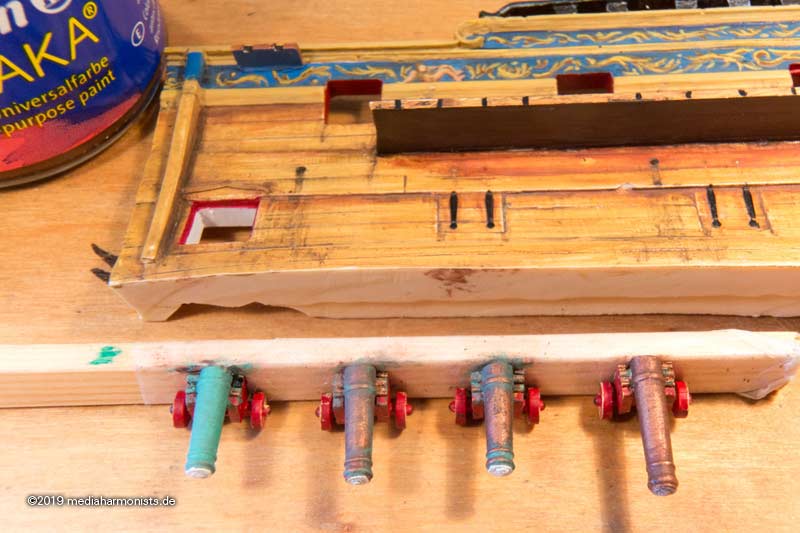
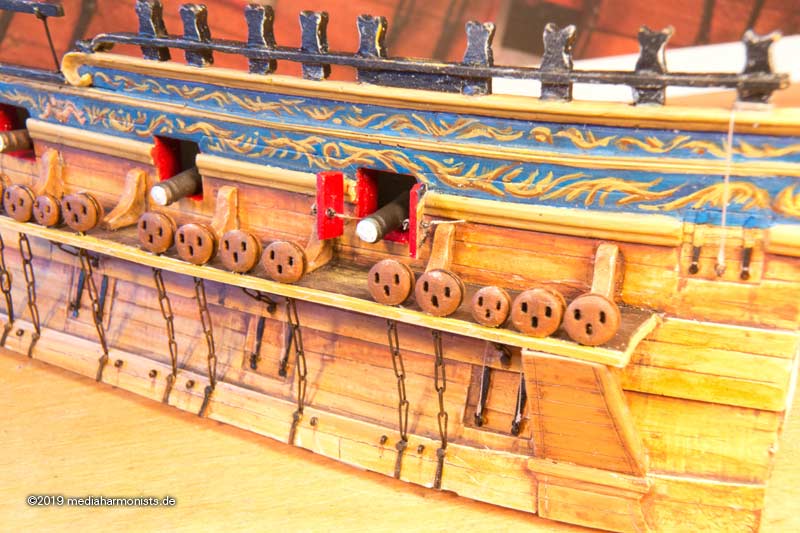
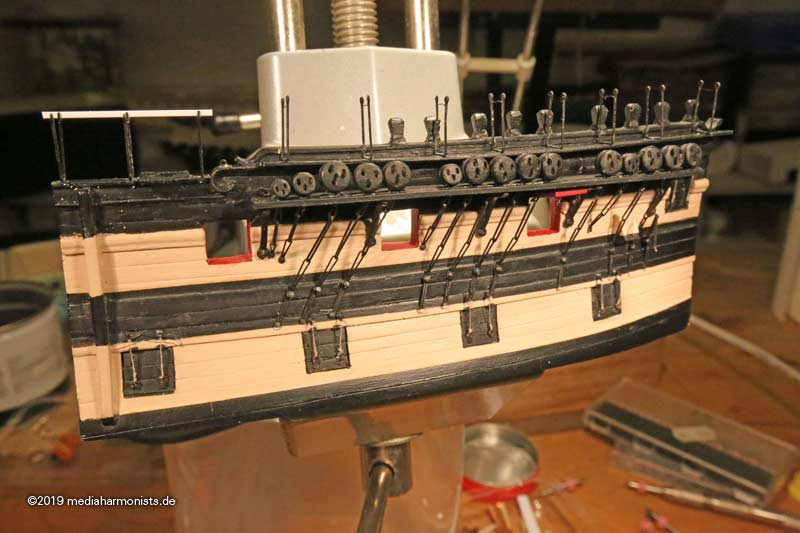
On the road again, meeting Viccies, seeing colors that I�ve never seen ...
Adapted the color of the 2018 version a bit. Funny, like the original, it reacts very much upon the light. Looks different every time ...
Fixed the board that protects the hammock cranes from underneath.
Cheers, XXXDAn
Adapted the color of the 2018 version a bit. Funny, like the original, it reacts very much upon the light. Looks different every time ...
Fixed the board that protects the hammock cranes from underneath.
Cheers, XXXDAn
To Victory and beyond ...
viewtopic.php?f=59&t=99050&start=60
See also our german forum for the age of Sail and History:
http://www.segelschiffsmodellbau.com
viewtopic.php?f=59&t=99050&start=60
See also our german forum for the age of Sail and History:
http://www.segelschiffsmodellbau.com
-
dafi
- Posts: 996
- Joined: Mon Mar 12, 2012 11:13 am
- Location: Ludwigsburg/Germany
- Contact:
Re: To HMS Victory and beyond
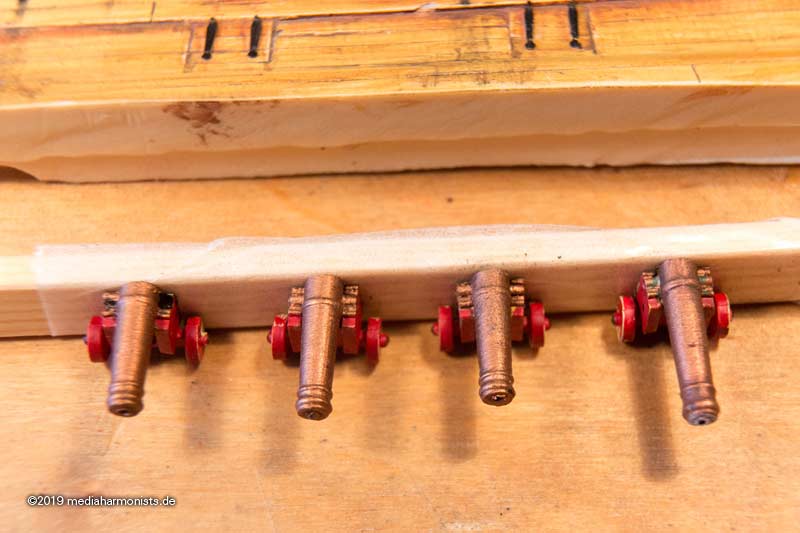
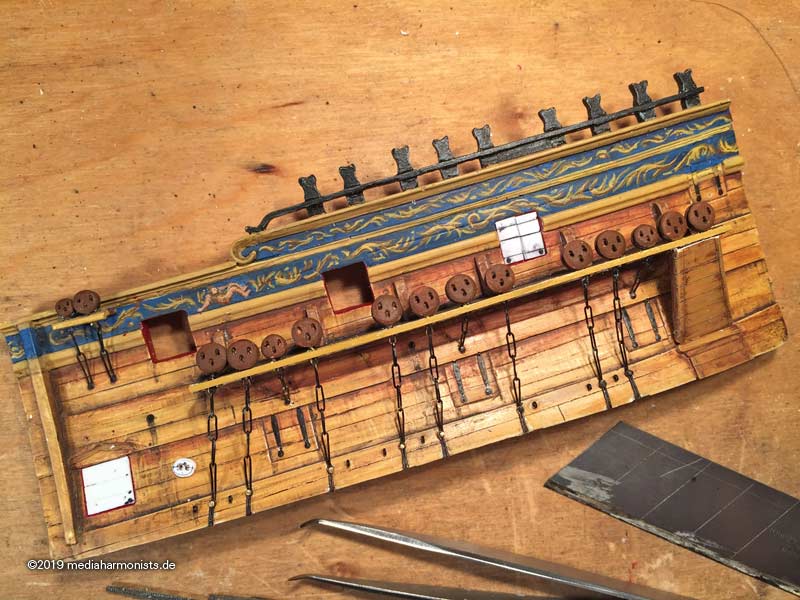
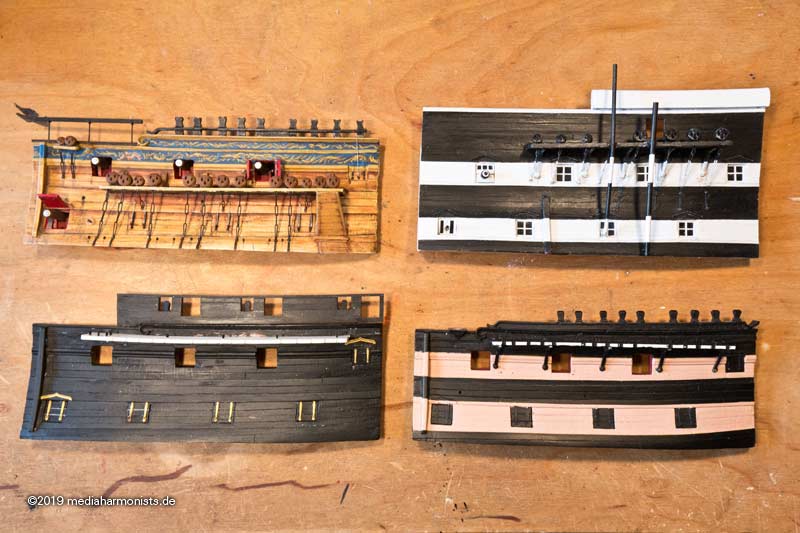
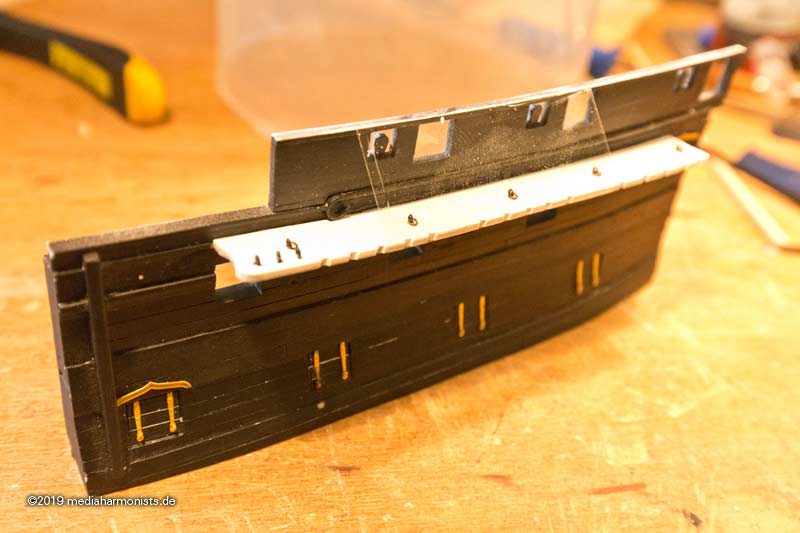
Finally took the time to continue a bit.
Here are the parts again, that I prepared some time ago
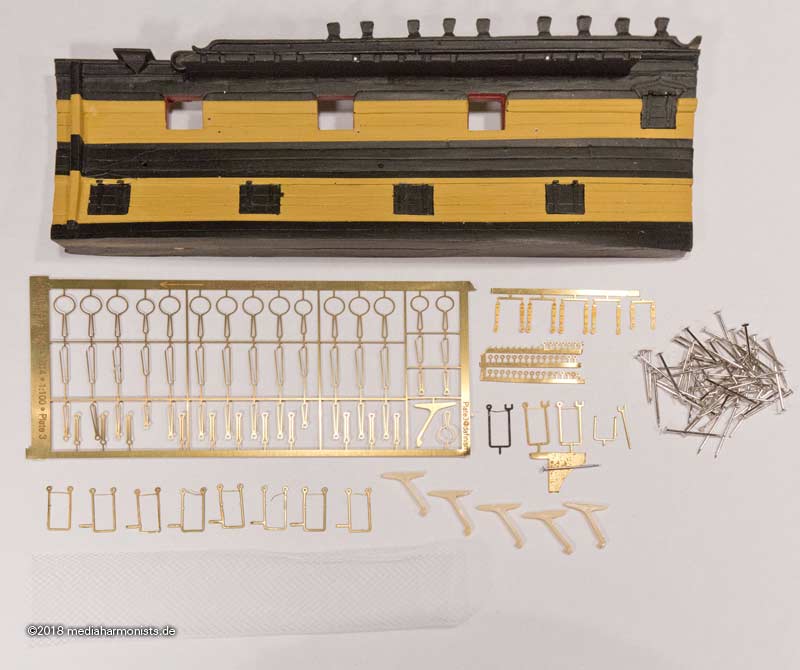
Still work in progress, have to clean up, apply some paint and the batten on the channel board.
XXXDAn[/quote]
Here are the parts again, that I prepared some time ago
Still work in progress, have to clean up, apply some paint and the batten on the channel board.
XXXDAn[/quote]
To Victory and beyond ...
viewtopic.php?f=59&t=99050&start=60
See also our german forum for the age of Sail and History:
http://www.segelschiffsmodellbau.com
viewtopic.php?f=59&t=99050&start=60
See also our german forum for the age of Sail and History:
http://www.segelschiffsmodellbau.com
-
marijn van gils
- Posts: 2686
- Joined: Tue Feb 06, 2007 10:24 am
- Location: Belgium
Re: To HMS Victory and beyond
Very nice! And very realistic! 
-
dafi
- Posts: 996
- Joined: Mon Mar 12, 2012 11:13 am
- Location: Ludwigsburg/Germany
- Contact:
Re: To HMS Victory and beyond
Thank you Marjin
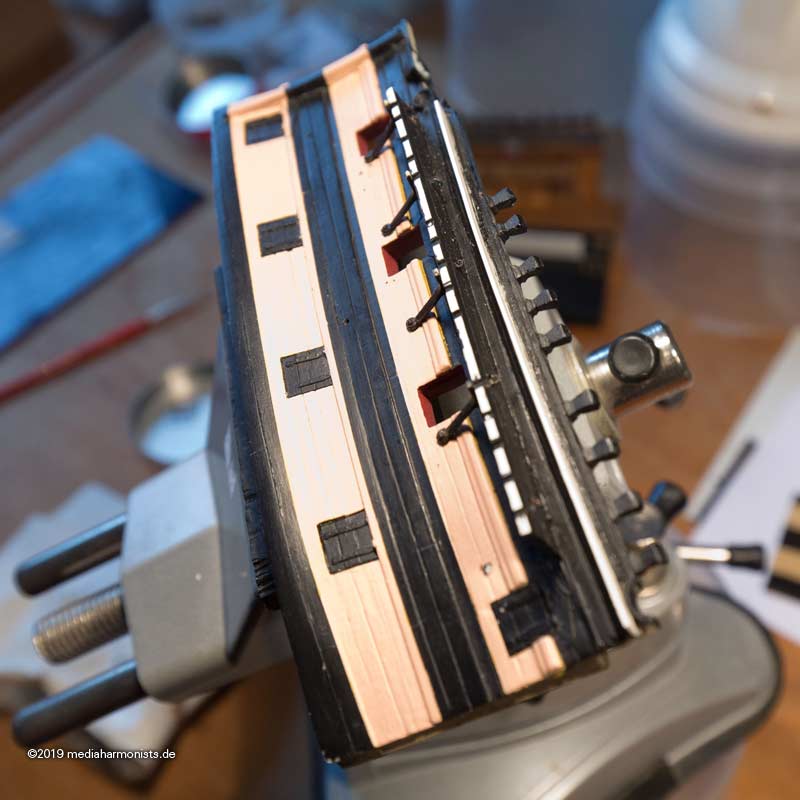
And as always, the rest is "done by the paint" ...
XXXDAn
And as always, the rest is "done by the paint" ...
XXXDAn
To Victory and beyond ...
viewtopic.php?f=59&t=99050&start=60
See also our german forum for the age of Sail and History:
http://www.segelschiffsmodellbau.com
viewtopic.php?f=59&t=99050&start=60
See also our german forum for the age of Sail and History:
http://www.segelschiffsmodellbau.com
-
dafi
- Posts: 996
- Joined: Mon Mar 12, 2012 11:13 am
- Location: Ludwigsburg/Germany
- Contact:
Re: To HMS Victory and beyond
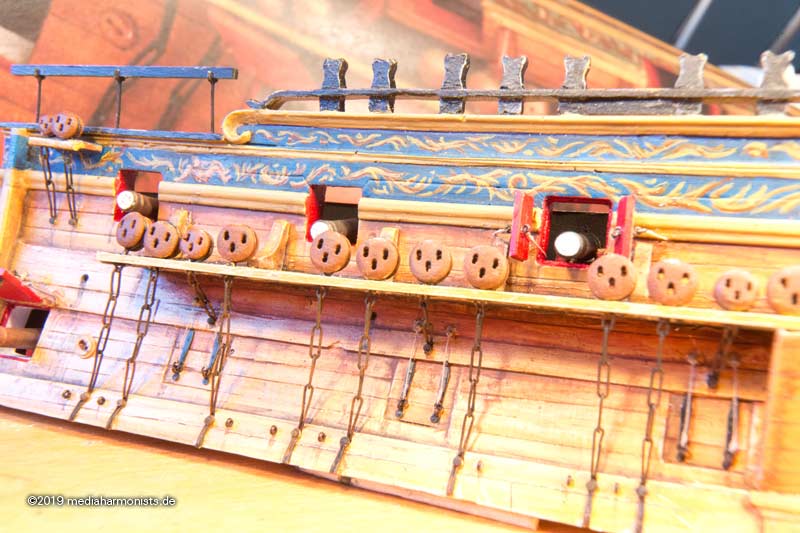
Do not have too much time to busyness commitments. So even small things deserve a small accolade for personal encouragement.
A new gun port lid ...
... and got from a comrade a wire 1,5 mm outer diameter and 0,5 mm inner diameter, so the small protection for the lid lanyards can be done more easily.
And the hammock stanchions are fixed too ...
... and a little later were knocked down - of course :-0
Also the chains suffered a bit, but my experience tells me that that is easily to be done
XXXDAn
To Victory and beyond ...
viewtopic.php?f=59&t=99050&start=60
See also our german forum for the age of Sail and History:
http://www.segelschiffsmodellbau.com
viewtopic.php?f=59&t=99050&start=60
See also our german forum for the age of Sail and History:
http://www.segelschiffsmodellbau.com
-
dafi
- Posts: 996
- Joined: Mon Mar 12, 2012 11:13 am
- Location: Ludwigsburg/Germany
- Contact:
Re: To HMS Victory and beyond
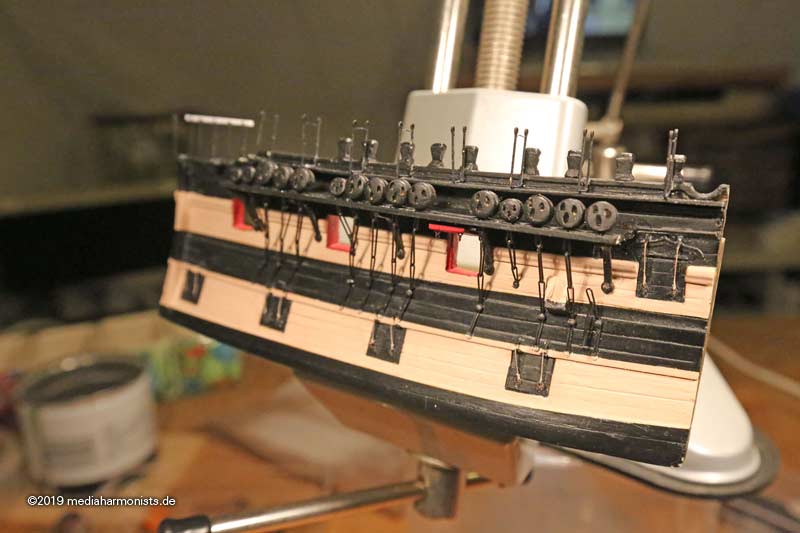
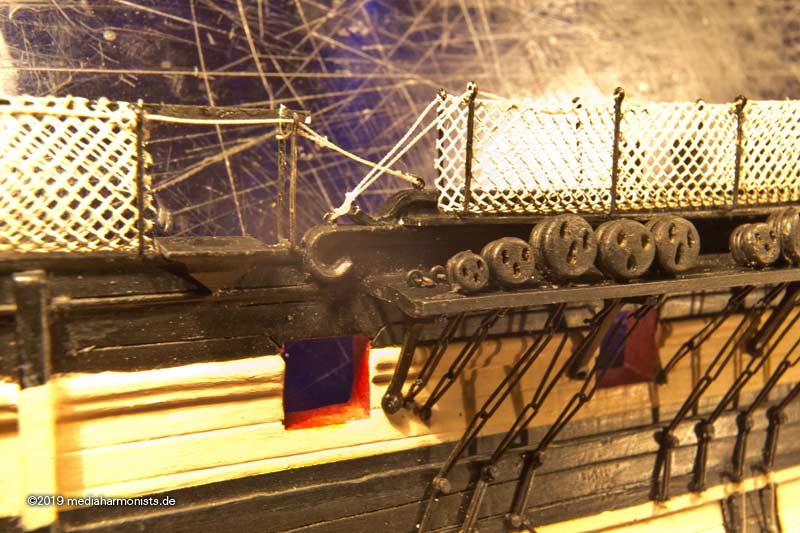
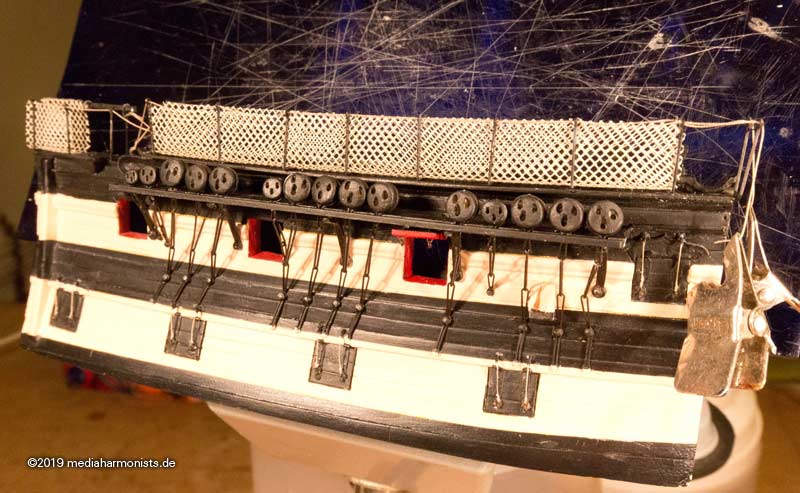
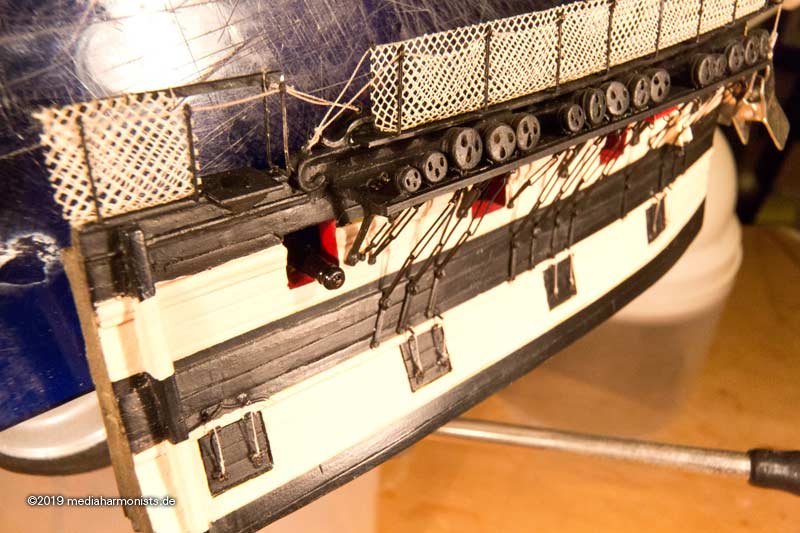
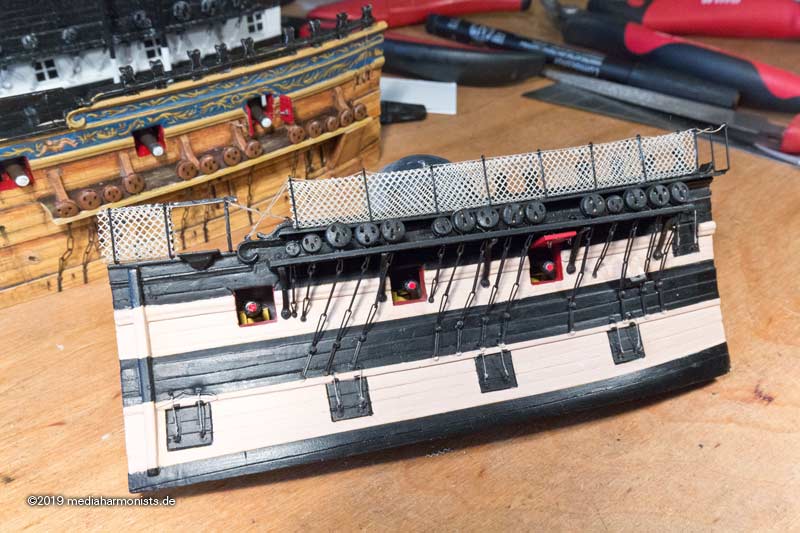
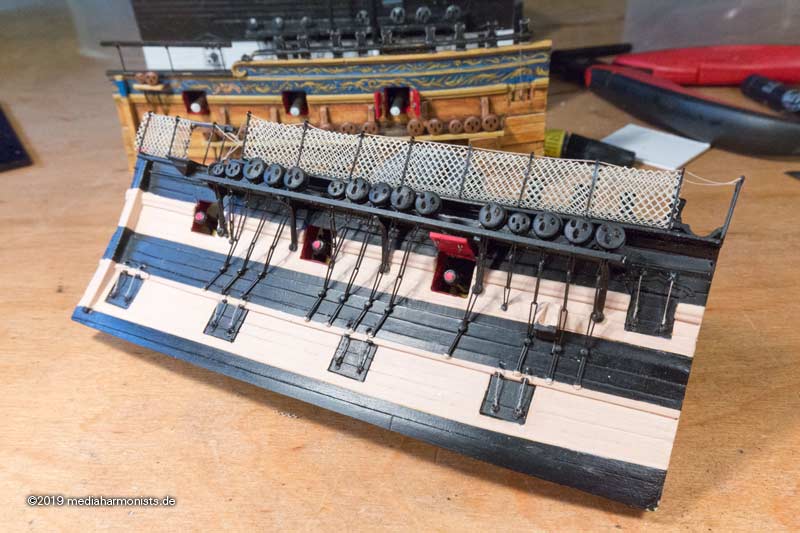
And on we go:
Fixing the hammock nettings on a cardboard and paint them white and buffy colors.

Then first the short side, using paper for the netting not to get stuck on the stanchions and small wooden sticks to press the nettings down properly.
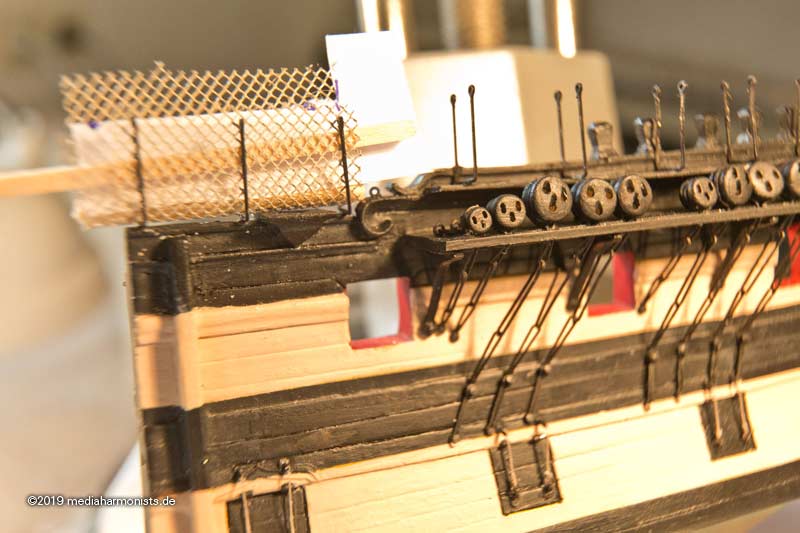
Then the long side. Paper again to facilitate the insertion, then fixing the netting with superglue onto the stanchions.
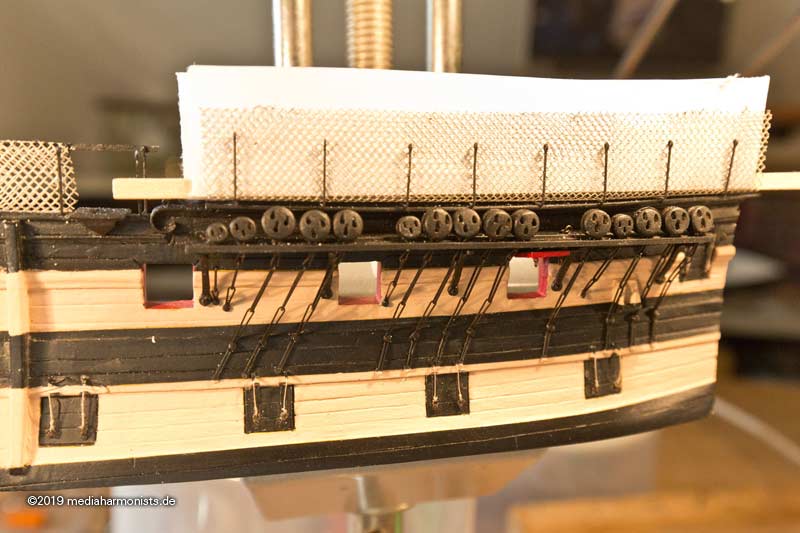
To have a better perceptibility I introduced some darker paper and fitted the nettings to correct size with a very pointed scissors.
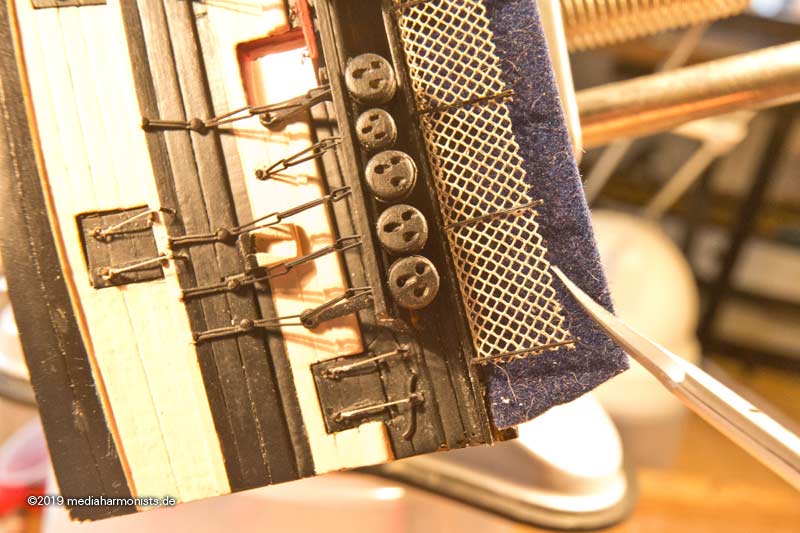
For the adrenaline not to go down too much, I user a lighter�s flame to get rid of some excess superglue :-0
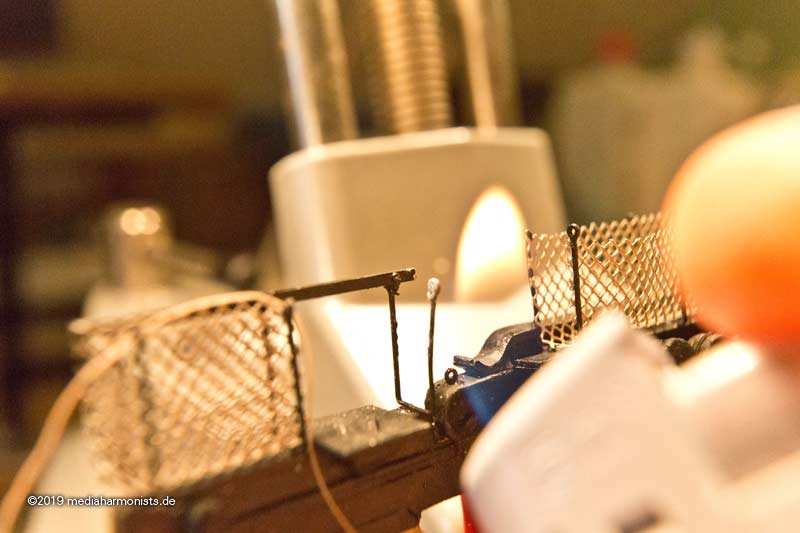
As all parts survived the procedure, the upper holding rope was fixed and the netting glued onto it
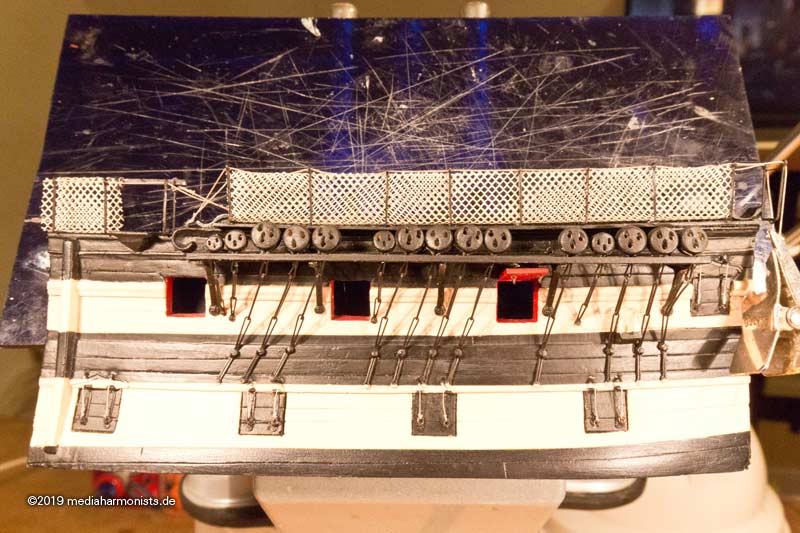
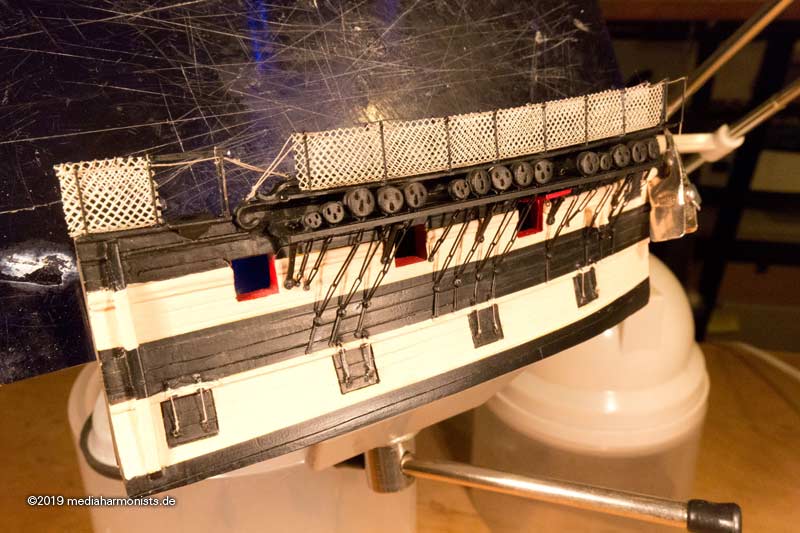
In the meantime - using some drying time - I also fixed some ringbolts of the 1805 version on the channel boards ...
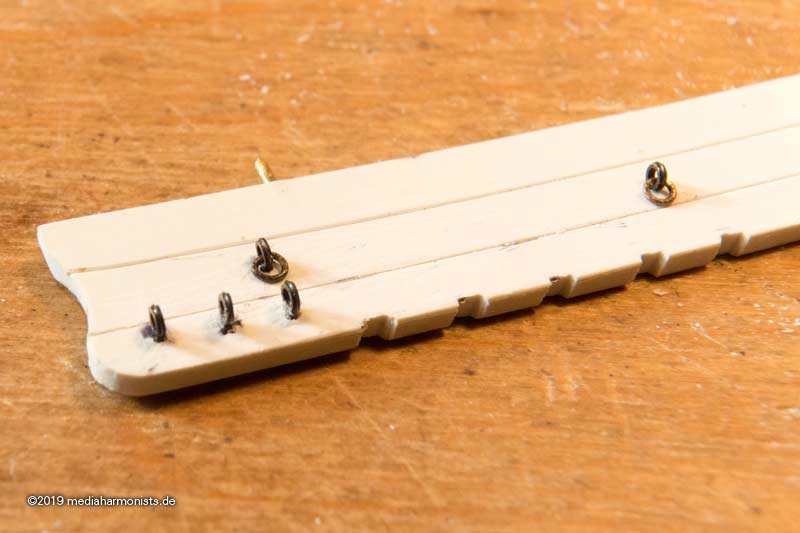
... and fixed the boards onto my slice.
All the best, dafi
Fixing the hammock nettings on a cardboard and paint them white and buffy colors.
Then first the short side, using paper for the netting not to get stuck on the stanchions and small wooden sticks to press the nettings down properly.
Then the long side. Paper again to facilitate the insertion, then fixing the netting with superglue onto the stanchions.
To have a better perceptibility I introduced some darker paper and fitted the nettings to correct size with a very pointed scissors.
For the adrenaline not to go down too much, I user a lighter�s flame to get rid of some excess superglue :-0
As all parts survived the procedure, the upper holding rope was fixed and the netting glued onto it
In the meantime - using some drying time - I also fixed some ringbolts of the 1805 version on the channel boards ...
... and fixed the boards onto my slice.
All the best, dafi
To Victory and beyond ...
viewtopic.php?f=59&t=99050&start=60
See also our german forum for the age of Sail and History:
http://www.segelschiffsmodellbau.com
viewtopic.php?f=59&t=99050&start=60
See also our german forum for the age of Sail and History:
http://www.segelschiffsmodellbau.com
-
Bill Livingston
- Posts: 730
- Joined: Tue Jun 20, 2006 5:06 pm
- Location: Cambridgeshire
Re: To HMS Victory and beyond
Hi Dafi,
As usual, your attention to detail astounds me! Congratulations!
I have attached a couple of photos of the netting from Victory from my trip this summer. Hope they are of interest...
As usual, your attention to detail astounds me! Congratulations!
I have attached a couple of photos of the netting from Victory from my trip this summer. Hope they are of interest...
Bill Livingston
Cambridge
Cambridge
-
dafi
- Posts: 996
- Joined: Mon Mar 12, 2012 11:13 am
- Location: Ludwigsburg/Germany
- Contact:
Re: To HMS Victory and beyond
Thank you Bill!
XXXDAn
XXXDAn
To Victory and beyond ...
viewtopic.php?f=59&t=99050&start=60
See also our german forum for the age of Sail and History:
http://www.segelschiffsmodellbau.com
viewtopic.php?f=59&t=99050&start=60
See also our german forum for the age of Sail and History:
http://www.segelschiffsmodellbau.com
-
europapete
- Posts: 156
- Joined: Thu Jan 05, 2017 8:39 pm
Re: To HMS Victory and beyond
looking fantastic Dan, am about ready to submit an order to you for a complete set. Regards, Pete in RI.
-
dafi
- Posts: 996
- Joined: Mon Mar 12, 2012 11:13 am
- Location: Ludwigsburg/Germany
- Contact:
Re: To HMS Victory and beyond
Thanks Pete
Nothing new from me, but a fun and good read
https://www.thesun.co.uk/news/10455141/ ... eir-heads/
Nothing new from me, but a fun and good read
https://www.thesun.co.uk/news/10455141/ ... eir-heads/
To Victory and beyond ...
viewtopic.php?f=59&t=99050&start=60
See also our german forum for the age of Sail and History:
http://www.segelschiffsmodellbau.com
viewtopic.php?f=59&t=99050&start=60
See also our german forum for the age of Sail and History:
http://www.segelschiffsmodellbau.com
-
dafi
- Posts: 996
- Joined: Mon Mar 12, 2012 11:13 am
- Location: Ludwigsburg/Germany
- Contact:
Re: To HMS Victory and beyond
So the guns are taken on board but much to hurried, the board of ordnance did not have the time to repaint the carriages in the new color.
Have to change that still ...

And now just the Trafalgar slice missing
XXXDAn
Have to change that still ...
And now just the Trafalgar slice missing
XXXDAn
To Victory and beyond ...
viewtopic.php?f=59&t=99050&start=60
See also our german forum for the age of Sail and History:
http://www.segelschiffsmodellbau.com
viewtopic.php?f=59&t=99050&start=60
See also our german forum for the age of Sail and History:
http://www.segelschiffsmodellbau.com